

Drawing a sofa can seem tricky at first. But with the right steps, it’s easier than you think.
In this blog post, you’ll learn how to draw a sofa in simple steps. We’ll break down the process, making it easy for beginners. Whether you’re an aspiring artist or just want to doodle, this guide will help you. No need for advanced skills or special tools.
Just grab a pencil and paper, and follow along. By the end, you’ll have a sofa sketch to be proud of. Let’s get started on this creative journey!
Materials Needed
Drawing a sofa can be a fun and rewarding experience. To get started, you need the right materials. This section will cover the essential tools and types of paper needed for this project.
Drawing Tools
Having the right drawing tools can make your work easier and more enjoyable. Below is a list of tools you will need:
- Pencils: Use different grades like HB, 2B, and 4B for various shading.
- Eraser: A kneaded eraser is good for lightening areas, while a regular eraser can help with precise corrections.
- Ruler: Essential for drawing straight lines and ensuring proportions.
- Sharpener: Keep your pencils sharp for detailed work.
- Blending Stump: Useful for softening and blending pencil marks.
Paper Types
The type of paper you use can greatly affect the quality of your drawing. Here are some options:
| Type of Paper | Description |
|---|---|
| Sketch Paper | Thin and lightweight, ideal for practice sketches. |
| Drawing Paper | Heavier and more durable, perfect for final pieces. |
| Bristol Board | Extra thick and smooth, great for detailed work and inking. |
Selecting the right materials is the first step in creating a beautiful sofa drawing. With the right tools and paper, you are well on your way to success.
Basic Shapes
Drawing essentials
These are the everyday tools we recommend for any drawing tutorial on this site, picked for reliability and beginner-friendly pricing.


As an Amazon Associate, drawingseasy.com earns from qualifying purchases. Prices and availability are subject to change.
Drawing a sofa starts with understanding the basic shapes that make up the furniture. Breaking down the sofa into simple geometric shapes makes the process less daunting. By focusing on these fundamental forms, you can ensure accuracy and proportion in your drawing.
Sketching Rectangles
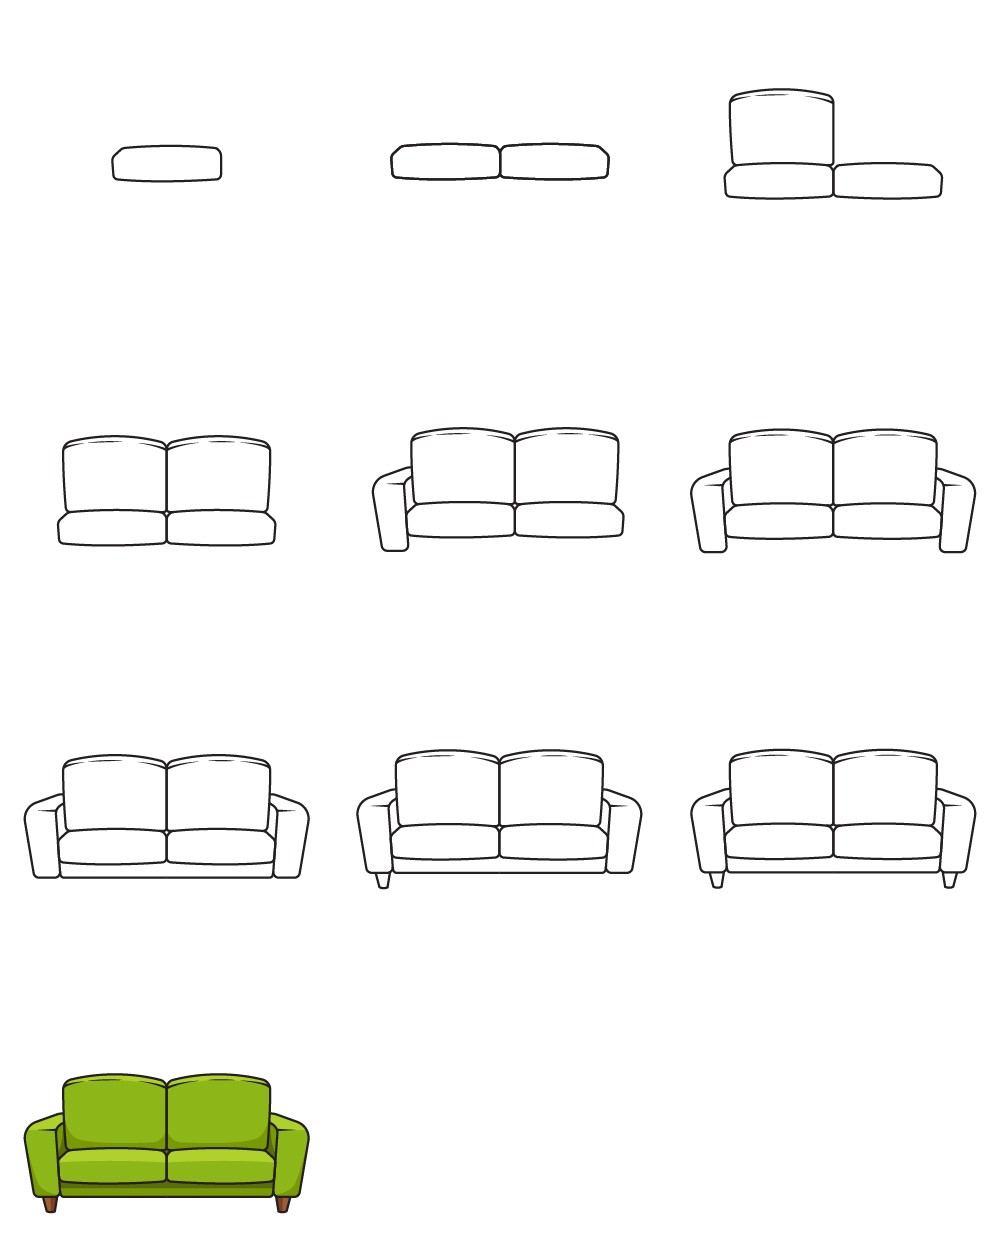
The first step in drawing a sofa is to sketch rectangles. These rectangles will form the base and backrest of the sofa. Start by drawing a large horizontal rectangle. This will represent the seat of the sofa. Make sure the rectangle is wide enough to look like a comfortable seat.
Next, draw a vertical rectangle extending from one side of the horizontal rectangle. This will be the backrest of the sofa. Ensure that the height is proportional to the seat. By using these simple shapes, you can easily outline the primary structure of the sofa.
Adding Cylinders
Once you have the rectangles in place, it’s time to add cylinders for the sofa’s arms and legs. Start by drawing a cylinder on each end of the seat rectangle. These will serve as the armrests. Make sure they are of equal size and aligned with the seat.
For the legs of the sofa, draw small cylinders at each corner of the seat rectangle. These should be shorter than the armrest cylinders. By incorporating these cylindrical shapes, you will add depth and dimension to your sofa drawing.
Frame Structure
Understanding the frame structure is key to drawing a sofa. The frame is the backbone of the sofa, providing support and defining its shape. In this section, we will cover how to outline the base and draw the backrest of a sofa.
Outlining The Base
The base is the foundation of your sofa drawing. Start by drawing a horizontal rectangle. This rectangle will represent the seating area. Make sure it is long enough to look comfortable.
Next, add the legs. Draw four small vertical lines at each corner of the rectangle. These lines should be evenly spaced to support the base properly. The legs can be simple lines or more detailed shapes, depending on your design.
To add depth, draw a parallel rectangle behind the first one. This creates a 3D effect. Connect the corners of both rectangles with diagonal lines. This step gives your drawing a more realistic look.
Ensure the base is proportional to the rest of the sofa. A well-proportioned base makes the sofa look balanced and appealing.
Drawing The Backrest
Now, focus on the backrest. Start by drawing a vertical rectangle above the base. This rectangle should be centered and slightly taller than the base.
Connect the top corners of the backrest to the base with vertical lines. This step defines the backrest’s position and shape.
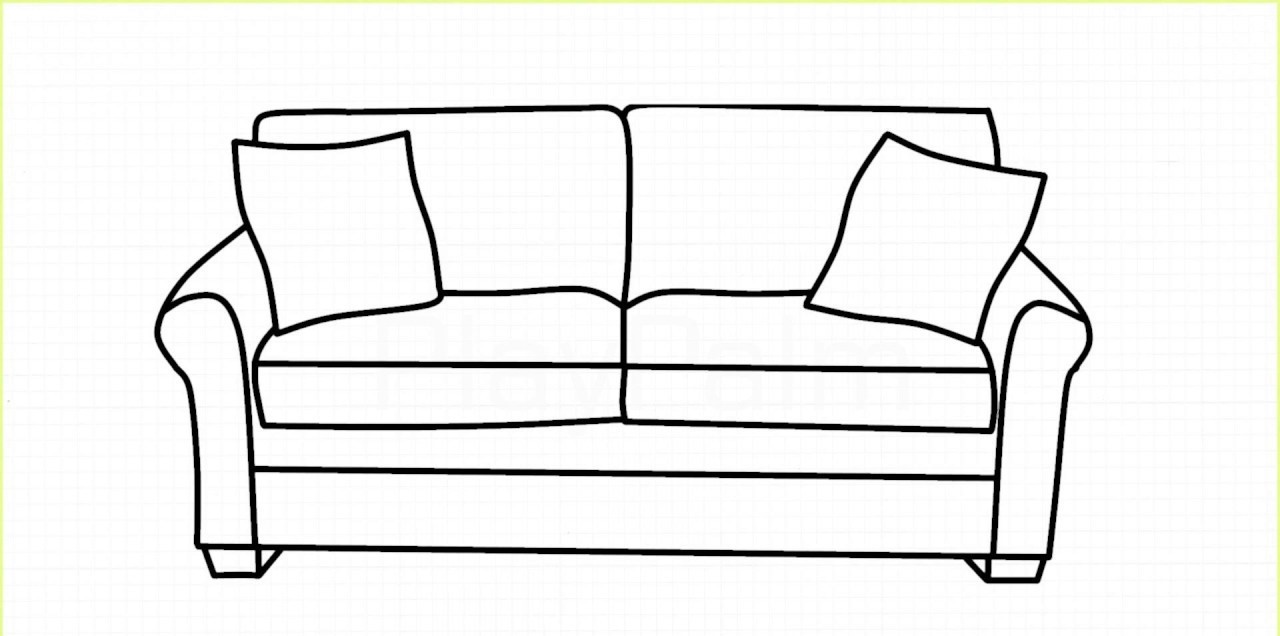
To add comfort details, draw cushions. These can be simple rectangles or more complex shapes. Ensure the cushions fit well within the backrest.
If you want armrests, draw them on the sides of the base. They can be simple lines or more detailed shapes. Make sure they are proportional to the rest of the sofa.
Remember, the backrest should look supportive and comfortable. Adjust the height and angle to achieve this effect.
Adding Details
Adding details to your sofa drawing brings it to life. These small touches make a big difference in the overall look. Let’s focus on some key elements.
Cushions And Padding
Start with the cushions. Draw soft, rounded shapes for a comfy feel. Add small lines to show creases and folds. These lines create depth and texture. Don’t forget the padding. Make the edges slightly uneven for a natural look. This gives the sofa a more realistic appearance.
Armrests And Legs
Next, focus on the armrests. Draw curved or straight lines based on the style. Add simple details like stitching or buttons. These small details enhance the design. Move on to the legs. Draw them thick for a sturdy sofa or thin for a sleek design. Add shadows beneath the legs. This step grounds the sofa and adds dimension.
Shading Techniques
Shading techniques are crucial for giving your sofa drawing a realistic look. Proper shading can make your sketch pop off the page. It adds depth and dimension to your artwork. Let’s dive into some essential shading techniques for drawing a sofa.
Light Source
First, determine where your light source is coming from. This is vital. It affects how shadows fall on your sofa. Is the light coming from above? Or maybe from the side? Mark the light direction on your paper. This will guide your shading process.
Creating Depth
Shading is key to creating depth. Start with the darkest areas. These are usually the parts farthest from the light source. Use a soft pencil for this. Gradually shade lighter as you move towards the light. Blend the shading with a paper stump or your finger. This makes the transition smooth.
Don’t forget the cushions and armrests. They also need shading. Darken the parts where cushions meet the sofa. This gives a three-dimensional feel. Consistent shading makes your drawing look more realistic. 
Final Touches
Drawing a sofa can be a fun and rewarding experience. After sketching the basic shape, it’s time for the final touches. These steps will bring your drawing to life.
Refining Edges
Start by refining the edges of your sofa. Smooth out any rough lines. Make the edges clean and clear. This step is crucial for a polished look. Pay attention to the curves and angles. Make them look natural.
Use a sharp pencil for this part. A fine point will help you get precise lines. Ensure all lines connect well. This makes your sofa look solid and realistic.
Erasing Guidelines
Next, erase any guidelines you drew earlier. These lines helped you with the basic shape. Now, they are no longer needed. Use a good eraser that doesn’t smudge. Carefully remove each guideline.
Take your time with this step. You don’t want to erase any important lines. Once done, your sofa should look clean and neat. This step helps in making the sofa stand out.
Common Mistakes
Drawing a sofa can seem simple, but artists often face common mistakes. These errors can affect the overall look of the drawing. Understanding these mistakes can help improve your drawing skills and produce a more realistic sofa.
Proportion Issues
One of the most common mistakes is getting the proportions wrong. A sofa should have balanced dimensions. Here are some tips to avoid proportion issues:
- Measure carefully: Use a ruler to keep the measurements accurate.
- Compare parts: Compare the size of the arms to the backrest.
- Keep it symmetrical: Ensure both sides of the sofa are even.
Incorrect proportions can make the sofa look unrealistic. Take your time and check your measurements often.
Perspective Problems
Another common mistake is perspective problems. Drawing in the right perspective makes the sofa look 3D. Here are some ways to avoid perspective issues:
- Use guidelines: Draw light lines to guide your perspective.
- Focus on vanishing points: Use vanishing points to give depth.
- Practice: Practice drawing cubes and other shapes in perspective.
Perspective problems can make the sofa look flat. Understanding perspective techniques is crucial for realistic drawings.
By recognizing and avoiding these common mistakes, your sofa drawings will look more professional and lifelike.
Frequently Asked Questions
What Materials Do I Need To Draw A Sofa?
You’ll need paper, pencil, eraser, and colored pencils or markers.
How Do I Start Drawing A Sofa?
Begin with basic shapes. Draw a rectangle for the seat and add shapes for the backrest and arms.
How Can I Add Details To My Sofa Drawing?
Add cushions, texture lines, and shading. This makes the sofa look more realistic.
Can Beginners Draw A Sofa Easily?
Yes, by breaking it into simple steps, anyone can draw a sofa. Practice helps!
Drawing a sofa can be fun and easy. Follow the steps carefully. Practice often to improve your skills. Start with simple shapes and add details gradually. Use light lines first, then darken the final sketch. Enjoy the process and don’t rush.
Keep experimenting with different styles and perspectives. Soon, you’ll be drawing sofas with confidence. Happy sketching!


