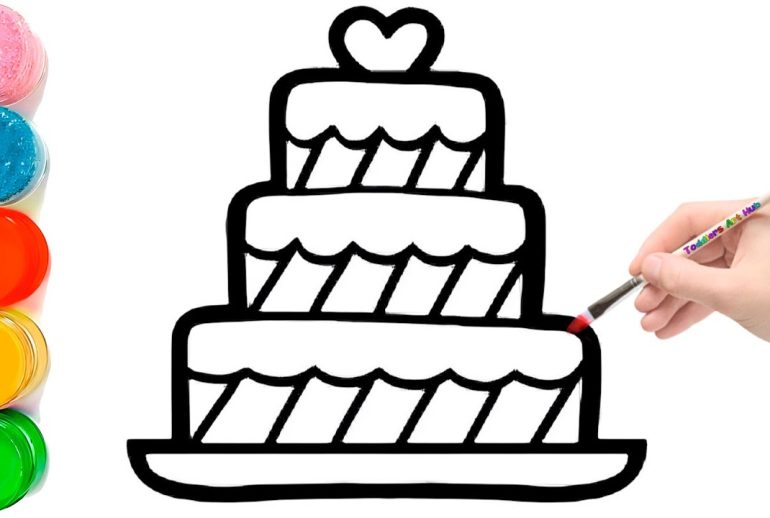
Drawing a cake might seem challenging, but it’s easier than you think. With simple steps, anyone can create a beautiful cake drawing.
Art is a wonderful way to express yourself. Drawing, in particular, is relaxing and fun. Cakes are not just delicious; they make great subjects for art. They have simple shapes and can be decorated in many ways. Whether you’re a beginner or have some experience, this guide will help you draw a cake step by step.
By the end, you’ll have a delightful cake drawing to be proud of. Grab your pencil and let’s get started on this sweet artistic journey!
Materials Needed
Drawing a cake can be a fun and rewarding experience. Whether you are a beginner or an experienced artist, having the right materials is crucial. Below, we will outline the essential and optional tools you might need to create a beautiful cake drawing.
Basic Tools
To get started, you will need some basic tools. These are essential for creating a cake drawing.
| Tool | Purpose |
|---|---|
| Pencils | For sketching the initial outlines |
| Eraser | To correct mistakes and refine lines |
| Paper | Provides a surface for your drawing |
| Ruler | Helps in drawing straight lines and measurements |
Optional Tools
These optional tools can enhance your cake drawing. They are not necessary but can add details and depth.
- Colored Pencils: Add color to your cake drawing
- Markers: For bold outlines and accents
- Blending Stumps: Smooth out pencil shading
- Fine Liners: Create detailed and precise lines
Having these tools at hand will help you create a stunning cake drawing. Whether you choose to use just the basics or add some optional tools, you will be well-equipped to bring your cake to life on paper.
Choosing A Cake Design
Choosing a cake design is the first step in creating a beautiful drawing. The design you choose sets the tone for the entire piece. It can be simple or complex. Let’s explore different options to help you decide.
Simple Designs
If you are new to drawing cakes, start with simple designs. These are easy to create and perfect for beginners. Simple designs often include basic shapes and lines. Here are a few ideas:
- A single-layer cake with a few candles
- A two-layer cake with a smooth frosting
- A cupcake with a swirl of icing
Simple designs help you practice basic drawing techniques. Focus on getting the shapes and proportions right. Use light pencil strokes to outline your cake. Then, add details like sprinkles or cherries. This approach builds confidence and skills.
Complex Designs
Once you are comfortable with simple designs, try more complex designs. These designs include more details and layers. They challenge your creativity and technical skills. Here are some ideas for complex cake designs:
- A multi-tiered wedding cake with intricate patterns
- A birthday cake with detailed decorations and characters
- A themed cake, like a castle or a flower garden
Complex designs require careful planning. Start with a rough sketch of your idea. Break down the design into smaller parts. Draw each part step by step. Use shading and textures to add depth and realism. Complex designs take more time but are rewarding.
To summarize, choosing a cake design depends on your skill level and creativity. Simple designs are great for practice. Complex designs offer a challenge. Both types can be fun and satisfying to draw.
Sketching The Outline
Drawing a cake can be a fun and rewarding experience. Start with a simple outline. This step sets the stage for your delicious creation. Begin with basic shapes and add details later. Here’s how to get started with sketching the outline.
Basic Shapes
First, draw a rectangle for the cake’s base. This will be the bottom layer. Next, add a smaller rectangle on top for the second layer. Want a round cake? Use circles instead. The idea is to create a simple structure. These shapes will guide you as you add more details.
Adding Details
Start by refining the edges of your shapes. Make the lines smooth. Add curves to the edges if you want a softer look. Draw small circles or dots on the top layer. These can be cherries or other decorations. Draw lines down the sides to show layers. Add a few more lines to indicate frosting. Keep it simple at first. You can add more details later.

Drawing The Cake Layers
Drawing a cake involves several steps, and one of the most important is getting the layers right. The layers give the cake its height and structure. They also make it look delicious and inviting. This section will guide you through drawing the cake layers, focusing on the proportions and placement.
Layer Proportions
Start by deciding how tall you want your cake to be. A typical cake has two or three layers. Each layer should be even and symmetrical. If one layer is thicker, it might look odd. Use simple shapes like rectangles or ovals. This will help you keep the layers consistent.
For a round cake, draw circles. Make sure each circle is the same size. For a square cake, draw squares of equal dimensions. This step is crucial for creating a balanced cake.
Layer Placement
Once you’ve drawn the layers, place them on top of each other. The bottom layer should be the largest. This gives the cake a stable base. Stack the layers carefully, making sure they align perfectly. This will create a clean and neat appearance.
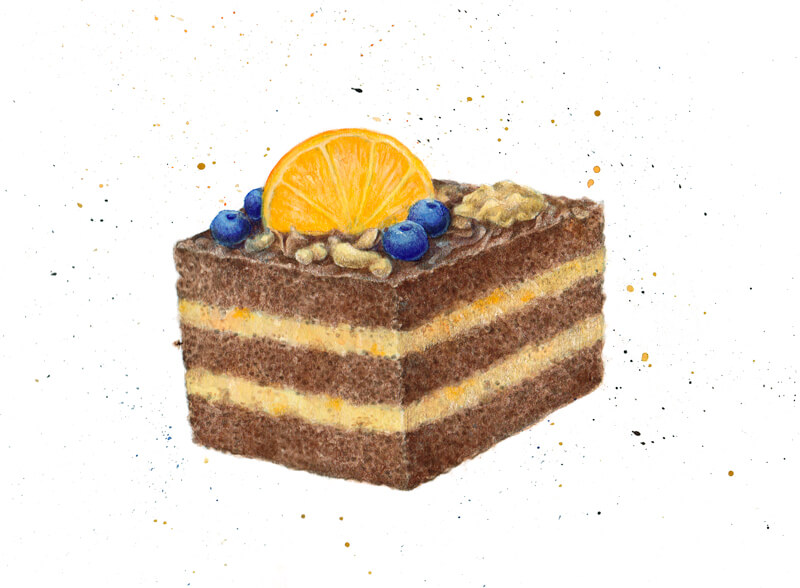
If you want to add details like frosting or decorations, do it after stacking the layers. This will ensure everything looks proportional and well-placed. Remember, each layer should sit directly above the other. This alignment is key for a realistic and appealing cake drawing.
Adding Decorative Elements
Adding decorative elements can transform a simple cake drawing into a stunning piece of art. These details give your cake character and charm. Let’s explore how to enhance your cake with frosting details and various toppings and decorations.
Frosting Details
Frosting is essential for a beautiful cake. Start by outlining the frosting layer. Use smooth, curved lines to show the frosting’s texture. Add swirls and waves to make it look more realistic. Draw small lines to indicate where the frosting is thicker or thinner. This adds depth and dimension to your drawing.
Toppings And Decorations
Now, it’s time to add toppings and decorations. Begin with simple shapes like circles or ovals for cherries or berries. For more intricate designs, try drawing flowers or leaves. These can sit on top of the cake or around the sides. Add sprinkles by sketching tiny dots or short lines. These elements make your cake look festive and fun.
Consider adding candles for a birthday cake. Draw thin, vertical lines for the candles. Add small flames at the top using teardrop shapes. To make the cake even more special, draw ribbons or bows. Simple lines and loops can create a decorative ribbon effect. These small details make a big difference.
Shading And Texturing
Shading and texturing bring your cake drawing to life. By understanding light, depth, and texture, you can create a realistic and mouth-watering cake. Let’s dive into the basics of shading and texturing.
Light Source
Identify your light source before you start shading. Knowing where the light comes from helps you place shadows correctly. Imagine the light hitting your cake from a specific angle.
- Draw a small sun or light bulb to mark the source.
- Keep the light source consistent throughout the drawing.
Use lighter shades on the parts of the cake facing the light. Darker shades go on the opposite side. This adds realism to your drawing.
Creating Depth
Depth makes your cake look three-dimensional. To create depth, use different shades of the same color. Light shades for highlights, medium shades for mid-tones, and dark shades for shadows.
- Start with mid-tones as the base.
- Add shadows on the sides away from the light.
- Highlight the areas where the light hits directly.
Blend the shades smoothly. Use a blending tool or your finger to soften harsh lines. This technique makes the cake look more realistic.
| Shade | Area |
|---|---|
| Light | Top of the cake, facing the light |
| Medium | Middle sections, not directly hit by light |
| Dark | Sides and bottom, away from the light |
Practice shading on different cake layers. Each layer should have its own highlights and shadows. This creates a more detailed and appealing drawing.
Final Touches
Now that you have the basic structure of your cake, it’s time to add those final touches that will make it look complete and appealing. These steps will bring your cake drawing to life and add depth and realism.
Refining Lines
Start by refining the lines of your cake. Make sure the edges are smooth and clear. Use a finer pen or pencil for this step.
- Go over the outline of the cake layers.
- Ensure the lines are even and clean.
- Emphasize the curves and edges of the frosting.
Pay attention to the details in the decorations. Sharpen the edges of any patterns or shapes you have drawn.
This step is crucial for making your cake drawing look polished and professional.
Coloring Tips
Coloring adds life to your drawing. Choose your colors wisely. Think about the type of cake you are drawing.
- Use soft colors for a simple cake.
- Opt for bright colors for a fun, festive cake.
| Type of Cake | Suggested Colors |
|---|---|
| Chocolate Cake | Brown, Dark Brown, White |
| Fruit Cake | Red, Green, Yellow |
| Vanilla Cake | White, Cream, Light Pink |
Blend your colors for a more natural look. Use shading to add depth.
Add highlights to areas where light would naturally hit the cake. This makes the cake look more three-dimensional.
Don’t be afraid to experiment with different color combinations. Make your cake drawing unique and visually appealing.
Frequently Asked Questions
What Materials Do I Need To Draw A Cake?
You will need paper, pencil, eraser, and colored pencils or markers.
How Can I Start Drawing A Cake?
Begin by drawing a simple oval shape for the top of the cake.
How Do I Add Details To My Cake Drawing?
Add layers, frosting, and decorations like sprinkles or candles to make it look realistic.
How Can I Make My Cake Drawing Look 3d?
Use shading and highlights to give your cake drawing depth and a three-dimensional look.
Conclusion
Creating a cake drawing is fun and easy. You can start with simple shapes. Add details step by step. Practice makes it perfect. Use different colors to make it look real. Share your art with friends and family. Enjoy the process and keep drawing.
Happy sketching!

