

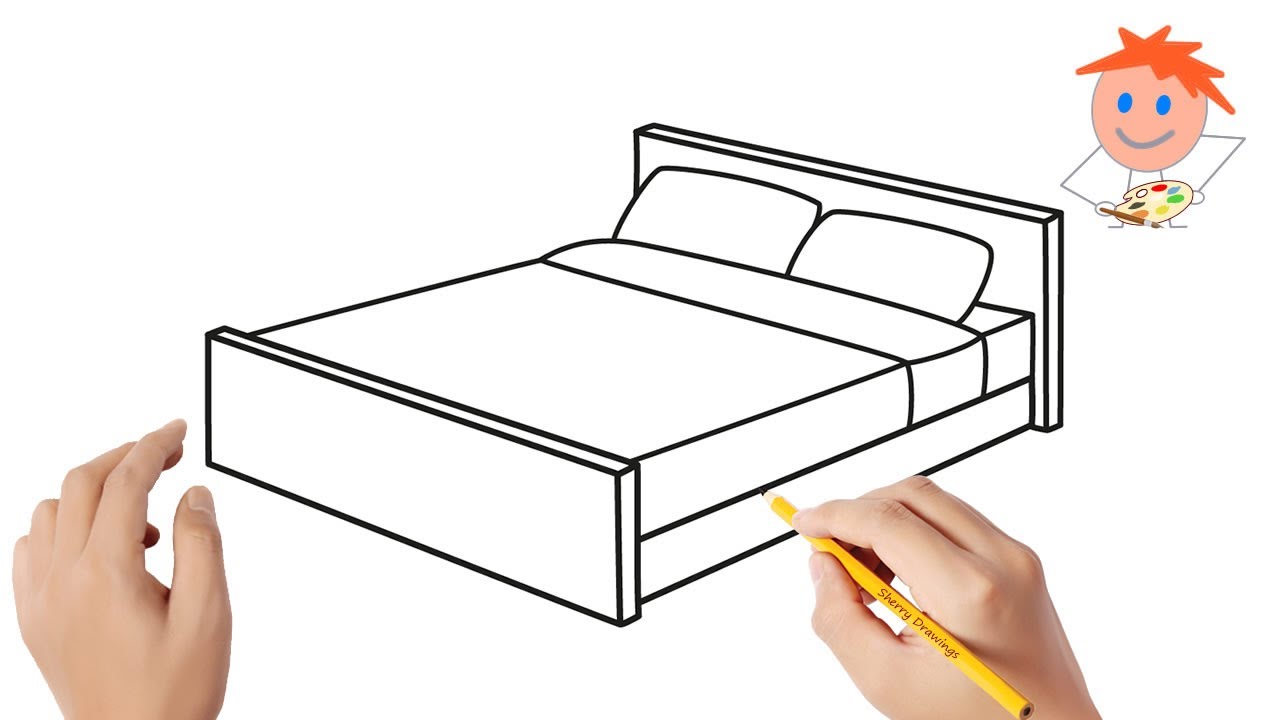
Drawing a bed might seem tricky. But it’s easier than you think.
With some simple steps, you can create a realistic bed sketch. A bed is a common yet fascinating subject for drawing. Whether you’re an artist or a beginner, learning to draw a bed can sharpen your skills. It helps you understand perspective and shapes.
This guide will walk you through the process. You’ll learn to outline the bed frame, add details like pillows and sheets, and bring your drawing to life. Grab your pencil and paper. Let’s start drawing a bed that looks cozy and inviting!
Materials Needed
Before you start drawing a bed, you need the right materials. The right tools make the process smoother and more enjoyable. Here are the essentials you’ll need.
Pencils And Erasers
Using the right pencils is crucial. A set of pencils with various hardness levels is ideal. You can use HB pencils for light sketches and 2B pencils for darker lines. For fine details, a 4B pencil works best.
An eraser is just as important. A good eraser helps you correct mistakes easily. A kneaded eraser is flexible and great for lightening areas without removing all the graphite. A vinyl eraser is perfect for clean, precise erasing.
Paper Types
The type of paper you use can affect your drawing. For practice, standard sketch paper works well. It is affordable and available in most stores. For more detailed and final drawings, consider using heavyweight paper. This paper can handle more erasing and shading.
If you plan to use ink or markers, use smooth bristol paper. It prevents bleeding and provides a clean surface for detailed work.
Optional Tools
There are additional tools that can enhance your drawing experience. These tools are not essential but can be helpful.
- Ruler: A ruler helps you draw straight lines for the bed frame.
- Compass: A compass assists in drawing precise circles, useful for round pillows.
- Blending Stumps: These tools help smooth out shading, creating a more realistic look.
- Sharpener: Always keep your pencils sharp for finer details.
Having the right materials can make the difference in your drawing experience. With these tools, you’re ready to start drawing a bed.
Basic Bed Shape
Drawing a bed is a fun and easy activity. It helps you improve your artistic skills. Let’s start with the basic bed shape. It forms the foundation of your drawing. Begin by drawing a simple rectangle. Then add a headboard to complete the bed frame.
Drawing The Rectangle
Start by drawing a large rectangle. This will be the main part of your bed. Make sure the rectangle is long and wide. It should look like a bed frame. Use a ruler for straight lines. This will keep your drawing neat. The rectangle should be horizontal. This gives the bed a realistic look.
Adding The Headboard
Next, draw the headboard. Begin by sketching a smaller rectangle. Place it at the top of the large rectangle. The headboard should be vertical. This will make it look like it is standing up. You can make the headboard any style you like. It could be simple or detailed. Just ensure it is centered.
Once the headboard is in place, your bed starts to take shape. It now looks more realistic. You can now add more details to enhance your drawing. But these basic shapes are the foundation. Practice these steps to improve your drawing skills.
Adding Bed Legs
Adding bed legs is an essential step in drawing a bed. Bed legs provide support and add to the bed’s overall look. This section will guide you through positioning and drawing the legs.
Positioning The Legs
Start by deciding where to place the legs. Typically, beds have four legs. Place one leg at each corner of the bed. Ensure the legs are evenly spaced. This will make the bed look balanced and realistic.
Drawing The Legs
Now, draw the legs. Begin with simple lines. Each leg should start from the bed’s bottom corners. Draw straight lines downwards. Keep the lines equal in length.
Next, add some details. Draw parallel lines to give the legs depth. Make the legs look three-dimensional. This adds realism to your drawing.
Finally, refine the legs. Add shadows and highlights. This makes them stand out. Your bed drawing will look complete with well-drawn legs.
Drawing The Mattress
Drawing the mattress is a crucial step in creating a realistic bed illustration. The mattress is the centerpiece of the bed. It’s where comfort meets design. In this section, we will break down the process into easy steps. Let’s start by creating the mattress outline and then adding the necessary details.
Creating The Mattress Outline
First, draw a large rectangle. This represents the top view of the mattress. Make sure the corners are slightly rounded. This gives a softer, more realistic look. Next, draw two vertical lines from each corner. These lines should be the same length. They represent the height of the mattress. Connect the ends of these lines with another rectangle. This completes the basic outline.
Adding Mattress Details
Now, let’s add some details to make the mattress look realistic. Draw horizontal lines across the top rectangle. These lines represent the seams. They help create the look of a quilted mattress. You can also add small, evenly spaced circles. These are the buttons or tufts often seen on mattresses.
Lastly, add some shading to give depth. Lightly shade the sides and bottom. This makes the mattress look three-dimensional. Remember to keep it simple and clean. Too much detail can be overwhelming. Follow these steps to draw a perfect mattress for your bed illustration.
Pillows And Bedding
Adding realistic pillows and bedding can bring your bed drawing to life. This section will guide you through drawing pillows, sheets, and blankets. These elements make your bed look comfortable and inviting.
Drawing The Pillows
Pillows are soft and come in many shapes and sizes. Start by drawing two rectangles on the top of the bed. They should be slightly overlapping. To make them look fluffy, add curves to the corners. Use light, flowing lines. Draw small, soft wrinkles on the surface. These details help the pillows look realistic.
Adding Sheets And Blankets
Sheets and blankets should look natural. Draw a large rectangle covering the bed. Allow it to drape over the sides a bit. Add gentle curves and folds to the blanket. This gives it a soft and cozy appearance. Draw a few lines on the blanket to show the texture. These lines should be light and wavy.
Next, add the top sheet. Draw a smaller rectangle on top of the blanket. Fold it back slightly at the head of the bed. This creates a layered look. To add more detail, draw small lines and wrinkles on the sheet. These show that it is soft and flexible.
Use shading to give depth to the pillows, sheets, and blankets. Lightly shade one side of each to show where the light hits. This makes your drawing look three-dimensional.
Here is a simple table to help you remember:
| Element | Shape | Details |
|---|---|---|
| Pillows | Rectangles with curved corners | Wrinkles, light lines |
| Blanket | Large rectangle, draped | Curves, folds, texture lines |
| Sheet | Smaller rectangle, folded back | Wrinkles, light lines |
By following these steps, your bed drawing will look realistic and inviting. It will be a cozy place that anyone would want to rest in.
Final Touches
The final touches bring your bed drawing to life. They add depth, realism, and personality. These details make a simple sketch look professional and complete. Let’s explore two key aspects: Shading and Textures and Correcting Mistakes.
Shading And Textures
Adding shading and textures can transform your drawing. Shading gives the bed dimension and realism. Textures make different materials look distinct.
- Use light strokes for shadows.
- Darken areas under pillows and mattress edges.
- Show light direction by shading opposite to it.
Textures help in distinguishing materials. For example, use small, curved lines for a quilted mattress. Use smooth, long strokes for wooden bed frames. These details make your drawing more interesting and lifelike.
Correcting Mistakes
Mistakes happen. Correcting them is easy and essential for a clean drawing. Here are steps to correct your errors:
- Identify the mistake. Assess if it needs fixing.
- Use an eraser carefully. Lightly erase the error.
- Redraw the corrected lines.
- Blend the erased area to match the rest of the drawing.
Sometimes, mistakes can add to the charm. Consider keeping small errors if they don’t disrupt the overall look. Remember, practice makes perfect. Each mistake is a learning step.
Common Mistakes
Missing key details, such as bed legs, is a common mistake when drawing a bed. Incorrect proportions can also make the bed look unrealistic.
Drawing a bed can be tricky. Many people make common mistakes. These errors can affect the look of the final drawing. Understanding these mistakes can help you avoid them. This will make your bed drawing look more realistic.
Avoiding Proportion Issues
Proportion is important in drawing. Beds have specific shapes and sizes. Many people draw beds that are too long or too short. This makes the drawing look odd. Measure the length and width. Keep them balanced. Think about the mattress, frame, and pillows. They all need to be in proportion. Draw light guidelines first. This helps to keep everything in the right place. Check your work as you go. This will help you catch mistakes early.
Correcting Perspective
Perspective shows depth in your drawing. It can be hard to get right. Many people draw beds from a flat angle. This makes the bed look unrealistic. Use perspective lines to show the bed’s depth. Draw the bed in 3D. Imagine how the bed looks from different angles. Practice drawing from different viewpoints. This will improve your perspective skills. Draw the corners of the bed first. Connect them with lines. This helps to create a 3D effect. Keep practicing. Drawing perspective takes time. But it will make your bed drawings look much better. “`

Frequently Asked Questions
What Materials Do I Need To Draw A Bed?
You need paper, a pencil, an eraser, and coloring tools.
How Do I Start Drawing A Bed?
Begin by sketching a rectangle for the mattress.
How Can I Add Details To My Bed Drawing?
Draw the headboard, pillows, and blanket with simple shapes.
How Can I Make My Bed Drawing Look More Realistic?
Add shadows and textures to give depth and dimension.
Drawing a bed can be fun and simple. Follow the steps carefully. Practice makes perfect, so keep trying. Use these tips to improve your skills. Soon, you will draw beds easily. Enjoy your drawing journey and stay creative. Don’t forget to share your artwork.
Happy drawing!


