

Drawing a dark house can seem difficult. But it doesn’t have to be.
In this blog post, we will show you easy ways to draw a dark house. Whether you’re a beginner or just looking for a fun art project, these tips will help you create spooky, shadowy homes with ease. Drawing dark houses can be a great way to practice shading and learn about light and dark contrasts.
It can also be an exciting theme for Halloween or any eerie scene. Ready to get your pencils and paper? Let’s dive into the world of dark house drawings and discover how simple it can be to create these mysterious and captivating images.
Materials Needed
Creating drawings of a dark house can be an exciting and rewarding activity. The right materials will enhance your artwork and make the process easier. Below, we list the essential materials you need to get started.
Drawing Tools
Having the right drawing tools is crucial for creating detailed and realistic drawings. Start with basic tools like pencils of various hardness. A set with HB, 2B, and 4B pencils is ideal. These pencils provide different shades and textures. You will also need a good eraser. A kneaded eraser works best for lifting graphite without smudging. Consider getting blending stumps. They help in creating smooth transitions and adding depth.
Paper Types
The type of paper you use can affect the quality of your drawing. Choose paper that is thick enough to handle multiple layers. A sketchbook with acid-free paper is a good option. It prevents yellowing over time. For more detailed work, try using bristol board. It has a smooth surface that is perfect for fine lines and shading. Textured paper can add an interesting element to your drawings. Experiment with different types to find what works best for you.
Basic Sketch
Drawing tools for buildings and architectural sketches
Architectural sketches need a precise mechanical pencil and a fineliner you can ink straight over a graphite under-drawing.


As an Amazon Associate, drawingseasy.com earns from qualifying purchases. Prices and availability are subject to change.
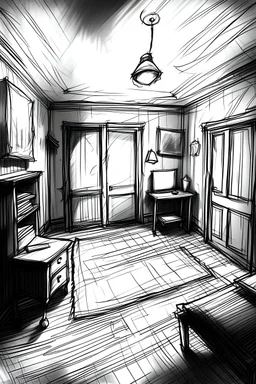
Creating a basic sketch of a dark house can be an exciting project. Start with simple lines and shapes to form the structure. This approach helps you build the foundation of your drawing. Here’s a step-by-step guide to get started.
Outline The House
Begin by drawing a large rectangle. This will be the main body of the house. Next, draw a triangle on top of the rectangle. This triangle will represent the roof. Make sure the edges of the triangle extend slightly beyond the sides of the rectangle.
Now, add a door at the center of the bottom of the rectangle. Draw a smaller rectangle for this. Place two small squares or rectangles on either side of the door for windows. Keep the lines light and easy to erase.
Add Basic Shapes
Enhance the house with more shapes. Add rectangles for a chimney on the roof. Draw small squares inside the windows to create panes. Sketch a few lines on the roof to suggest shingles.
For a spooky effect, consider adding some jagged lines around the windows and doors. This will give the house a worn and eerie look. You can also draw some simple tree shapes around the house to set the scene.
Keep practicing these shapes until you are comfortable. These basic steps lay the groundwork for a detailed dark house drawing.
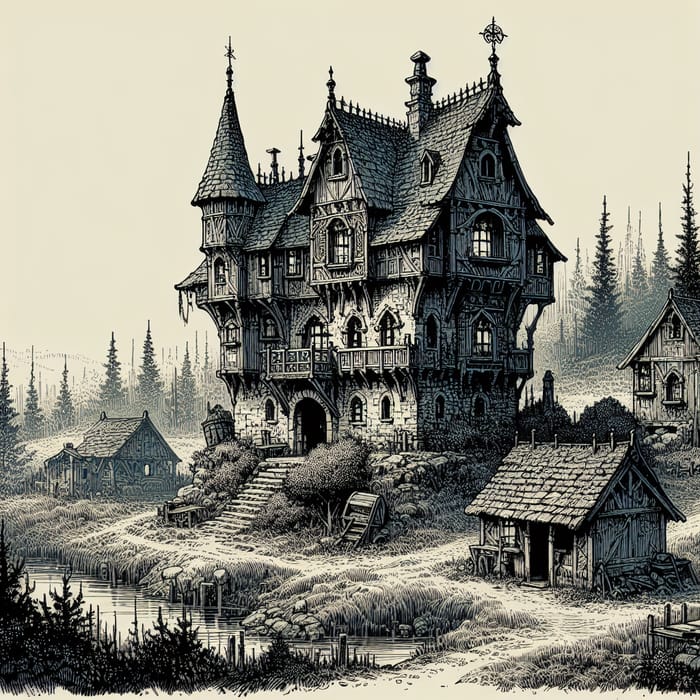
Detailing The Exterior
Detailing the exterior of a dark house drawing can enhance its spooky charm. By focusing on the windows, doors, and roof, you bring your drawing to life. Let’s dive into these details to create a captivating dark house.
Draw Windows And Doors
Begin with the windows. Draw simple rectangles or squares. Add small lines inside to create windowpanes. For a spooky effect, make some windows broken or crooked.
Now, draw the door. Place it in the center for balance. Make the door tall and narrow. Add a round doorknob for a touch of realism. You can also draw cracks or wood textures on the door to enhance the dark theme.
Add Roof Details
Next, focus on the roof. Draw a steep, pointy roof for a classic spooky house look. Add shingles by drawing small, overlapping lines. This adds texture and depth.
Don’t forget the chimney. Draw a tall, narrow chimney on one side of the roof. Add bricks by drawing small, horizontal lines. This creates a realistic effect.
Lastly, add some roof edges. Draw small, jagged lines to show wear and tear. This makes the house look old and abandoned.
Creating Shadows
Creating shadows can add depth and realism to your drawing of a dark house. Shadows give the illusion of three-dimensionality. They make your drawing more engaging and lifelike. Let’s dive into the steps for creating shadows in your artwork.
Identify Light Source
The first step is to identify the light source. Think about where the light is coming from. It could be the sun, a street lamp, or even a candle. Knowing this helps you decide where shadows will fall.
For example, if the light is from the left, shadows will be on the right side. Sketch a small arrow to mark the direction of the light. This will guide you as you add shadows to the house.
Shade The Walls
Next, shade the walls of the house. Start with the walls that are farthest from the light source. Use a light pencil to create soft, even shading. Gradually build up the darkness by adding more layers of shading.
Make sure the shadows blend smoothly into the lighter areas. This will give the walls a more realistic look. Remember, the closer to the light source, the lighter the wall. The farther away, the darker it gets.
Don’t forget to shade under the roof and around the windows. These areas often have deeper shadows. Adding these details makes your dark house drawing stand out.
Adding Texture
Adding texture to your dark house drawing can make it look more realistic. It can bring your artwork to life. Textures add depth and interest. They can be simple to create with a few easy techniques.
Brick And Wood Patterns
To draw brick patterns, start with horizontal lines. These lines should be evenly spaced. Then, add short vertical lines in a staggered pattern. This will create the look of bricks. To make it more realistic, add some small cracks and chips.
Wood patterns are also easy to draw. Begin with long, vertical lines. These lines represent the wooden planks. Next, add some short, curved lines to show the grain of the wood. Vary the length and direction of these lines. This will make the wood look more natural.
Roof Shingles
Roof shingles can add a lot of texture to your house drawing. Start by drawing a series of horizontal lines. These lines should be close together. They represent the rows of shingles. Next, add a series of small, overlapping semi-circles along each line. This will create the look of individual shingles. For a more detailed effect, add some small, curved lines on each shingle. This will show wear and tear.
These simple steps can make your dark house drawing stand out. Adding textures like brick, wood, and roof shingles can bring your artwork to life. It makes it look more realistic and interesting.
Final Touches
Final touches are crucial in bringing your dark house drawing to life. These steps will help you refine and enhance your artwork. Make it stand out. Follow these simple tips to add depth and dimension.
Refine Lines
Start by refining your lines. Use a sharp pencil or pen. Neaten the edges of your drawing.
Ensure the lines are clean and crisp. This makes your drawing look polished. Remove any unnecessary marks.
Check for consistency in line thickness. Use thicker lines for the main structure. Thinner lines for details.
Pay attention to the roof, windows, and doors. These areas need clear, precise lines.
Enhance Shadows
Shadows add depth to your drawing. Use a soft pencil or shading tool. Lightly shade areas for a smooth transition.
Focus on shadow placement. Think about where the light source is. Shade the opposite side.
Blend the shadows carefully. Avoid harsh lines. This makes the house look more realistic.
Highlight key areas. Add darker shadows under the eaves, windows, and door frames. This creates a three-dimensional effect.
With these final touches, your dark house drawing will look complete. Each step enhances the overall appearance. Your artwork will have a professional finish.
Tips For Beginners
Drawing a dark house can seem challenging, especially for beginners. But with the right tips and techniques, it becomes manageable and fun. Let’s explore some helpful tips to make your drawings better.
Common Mistakes
Many beginners make similar mistakes when drawing a dark house. Here are some common ones:
- Overusing black: Using too much black can make your drawing look flat.
- Ignoring shadows: Shadows add depth and realism to your drawing.
- Inconsistent lighting: Ensure light sources are consistent for a natural look.
- Skipping details: Small details like windows and textures bring your drawing to life.
Practice Techniques
Improving your drawing skills takes practice. Here are some techniques to help you get started:
- Sketch lightly: Start with light pencil strokes to outline your house.
- Use reference images: Look at photos of houses in the dark for inspiration.
- Practice shading: Experiment with different shading techniques to create depth.
- Focus on texture: Draw textures like bricks and wood to add realism.
- Work on perspective: Practice drawing houses from different angles.
Here’s a simple table to summarize these tips:
| Technique | Benefit |
|---|---|
| Sketch lightly | Helps in easy corrections |
| Use reference images | Provides inspiration and accuracy |
| Practice shading | Adds depth and dimension |
| Focus on texture | Enhances realism |
| Work on perspective | Improves overall composition |
Keep practicing and refining your techniques. Soon, you’ll be drawing dark houses with confidence!
Frequently Asked Questions
How Do You Draw A Dark House Easily?
Start with basic shapes. Add details like windows and doors. Shade to create darkness.
What Materials Do I Need To Draw A Dark House?
Use a pencil, eraser, and paper. Shading tools like charcoal or graphite help with darkness.
Can Beginners Draw A Dark House?
Yes, beginners can draw a dark house. Follow simple steps and practice shading techniques.
What Are Some Tips For Shading A Dark House?
Use soft pencils for dark areas. Blend with your finger or a blending tool. Practice different shading techniques.
Creating drawings of a dark house can be simple and fun. Practice regularly to improve your skills. Use basic shapes and shadows to add depth. Experiment with different tools and techniques. Enjoy the process and let your creativity shine. Soon, you’ll create impressive dark house drawings with ease.
Keep drawing and exploring new ideas. Happy drawing!


