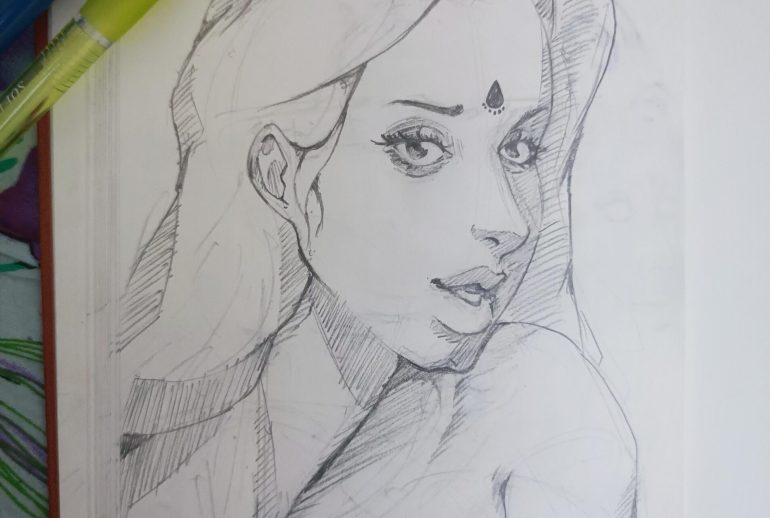
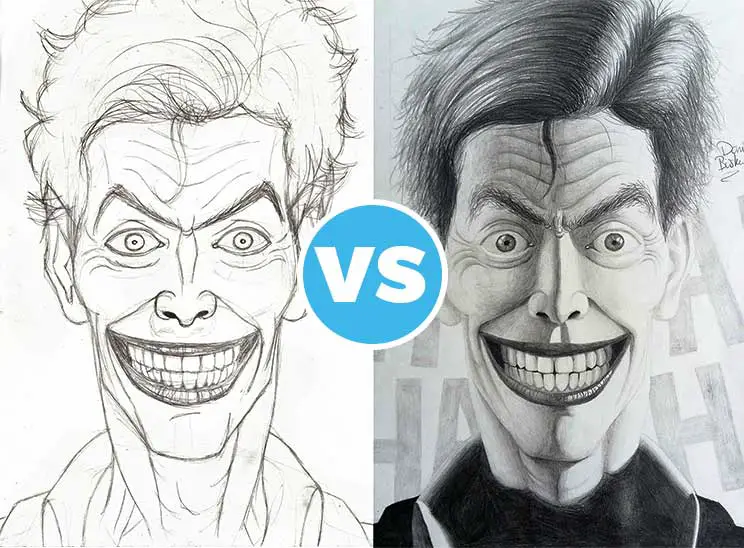
Sketches often lose their charm after inking. This can frustrate artists.
Inking should enhance your work, not make it worse. Let’s explore why this happens and how you can improve your inking technique. Inking is a vital step in creating polished artwork. It defines shapes and adds depth. Yet, many artists find their sketches look less appealing once inked.
This issue can stem from various factors such as technique, tools, or the paper used. Understanding these elements is crucial for creating stunning inked art. By identifying common mistakes and learning effective strategies, you can transform your sketches into beautiful, inked masterpieces. Dive in to discover tips and tricks that will elevate your artwork and boost your confidence in your artistic journey.
Common Inking Challenges
Inking can transform a sketch into a vibrant piece of art. Yet, many artists face challenges during this process. The transition from pencil to ink often brings unexpected hurdles. Let’s explore some common inking challenges that artists encounter.
Loss Of Sketch Detail
Pencil sketches often have fine details. These details give sketches their unique charm. Inking can sometimes overshadow these nuances. Artists may struggle to retain the original essence of their sketch. Thick ink lines can overwhelm delicate pencil strokes. This results in a loss of depth and detail. To preserve detail, use fine-tipped pens. Consider varying line thickness for different elements. Careful planning before inking also helps.
Ink Smudging Issues
Ink smudging is a common frustration for many artists. Wet ink can easily smear, especially when using certain types of paper. Smudges can ruin hours of hard work. To avoid this, ensure the ink dries completely. Work from left to right if right-handed and vice versa. This helps prevent accidental smudging with your hand. Quality paper with a smooth surface can also minimize smudges. Consider using smudge-resistant ink for better results.
Understanding Line Quality
Understanding line quality can be the key to transforming your sketches from rough drafts into polished masterpieces. If your inked sketches seem to lose the charm of your pencil work, it’s time to focus on the quality of your lines. Line quality isn’t just about precision; it’s about consistency and expression.
Importance Of Consistent Lines
Consistency in your lines can make or break your artwork. A sketch might look lively and dynamic, but without consistent lines, your inked version can appear stiff or chaotic. Think of your lines as the backbone of your art; they need to support the entire structure.
Have you ever noticed how a simple doodle can look professional with clean, consistent lines? This is because they convey confidence and intention. Aim for lines that maintain a uniform thickness and smooth flow.
Avoiding Uneven Pressure
Uneven pressure can lead to lines that vary in thickness, distracting the viewer from your intended design. When inking, it’s crucial to maintain a steady hand and consistent pressure. This ensures that your lines are smooth and well-defined.
Try experimenting with different pen grips. A relaxed grip can help you avoid pressing too hard or too lightly. You might find it helpful to practice on scrap paper before committing to your final artwork.
Think about this: how many times have you felt frustrated with wobbly lines? It’s a common issue, but one that can be remedied with practice and patience. Remember, the pen is in your hand; you control the pressure.
As you work towards improving your line quality, consider the impact each stroke has on your overall design. Are your lines enhancing your sketch or detracting from it? This mindfulness can transform your approach and results.
Choosing The Right Tools
Choosing the right tools makes a big difference in your sketches. When sketches look worse after inking, tool selection may be the reason. The ink you use can change the look and feel of your art. Using the right pens, brushes, and paper impacts your final piece. Each element plays a role in achieving the desired outcome.
Types Of Pens And Brushes
Pens vary in tip size and ink flow. Fine-tip pens offer precision for detailed work. Brush pens provide smooth lines and varied thickness. Each type serves different art styles and needs. Testing different pens helps find what suits your sketching technique. Consider how each pen affects the line quality.
Brushes add unique effects with ink. Round brushes create dynamic strokes. Flat brushes offer broad, even strokes. The brush material affects how ink spreads on paper. A synthetic brush behaves differently than a natural hair brush. Experimenting with brushes can reveal new ways to enhance your art.
Paper Selection Impact
Paper type influences how ink interacts with your sketch. Smooth paper ensures clean lines and consistent ink flow. Textured paper provides character but may disrupt ink movement. Thickness affects ink absorption and can prevent bleeding. Choosing the right paper for your style is vital. Try different papers to see how they change your art’s appearance.
Specialty papers might enhance the inking process. They are designed for specific ink types or techniques. The right paper can make inking easier and improve the final look. Always consider paper quality when preparing to ink your sketches.

Mastering Inking Techniques
Inking can transform a sketch into a polished piece of art. Yet, many artists find their sketches lose charm after inking. Mastering inking techniques is crucial for creating captivating art. Proper technique enhances the beauty of your sketches and maintains their essence.
Cross-hatching Techniques
Cross-hatching adds depth and texture to your artwork. It involves drawing intersecting lines to create shading. Vary the spacing and angle of lines for different effects. Tightly spaced lines create darker shades. Wider gaps produce lighter tones. Practice different patterns to find your style. Experiment with angles and densities for rich textures.
Creating Smooth Transitions
Transitions between light and dark areas can make or break your inked art. Smooth transitions require careful blending of lines and shading. Use lighter lines near highlights. Gradually increase darkness towards shadows. Feathering the edges helps in blending. Small strokes create a gradient effect. This avoids harsh lines and maintains fluidity.
Inking requires patience and precision. Each stroke should enhance the sketch. Avoid rushing the process. Take time to understand light and shadow dynamics. With practice, your inked sketches will improve.
Improving Precision And Control
Sketches may lose their charm after inking due to lack of precision. Uneven pressure often distorts original lines. Practice control with smooth strokes to maintain original sketch beauty.
When transitioning from sketching to inking, many artists notice their drawings lose some of their original charm. You might wonder why your sketches look worse after inking. A significant factor is often the lack of precision and control. Improving these aspects can greatly enhance your inking results. With the right techniques and practice, you can maintain the vibrancy of your sketches through the inking process. ###
Hand Position And Grip
How you hold your pen can drastically affect your inking precision. Adjusting your hand position and grip can lead to smoother lines. Many artists find success with a relaxed grip that allows more fluid movements. Try holding your pen further from the nib to increase flexibility in your strokes. This technique can reduce the likelihood of shaky lines. Experiment with different grips to find what feels most comfortable for you. ###
Practice Exercises
Improving control takes practice. Consider dedicating time to specific exercises that enhance your inking skills. Line exercises are simple yet effective. Draw straight lines, curves, and circles repeatedly until your hand feels steadier. Another exercise involves tracing over your sketches lightly before committing to dark lines. This helps build muscle memory and confidence. Do you notice a difference in your control after consistent practice? Integrating precision and control into your routine might seem challenging at first. However, these small adjustments can transform your inking process. Embrace these exercises and hand techniques to preserve the beauty of your original sketches.

Enhancing Sketch Structure
Sketching often feels organic and free, allowing creativity to flow. But after inking, many artists find their work looks stiff or less appealing. Enhancing sketch structure is essential for maintaining the original charm. By focusing on composition and strengthening the sketch, you can improve the final result. Let’s explore how these elements help.
Planning Composition
Careful planning sets the foundation for your art. Before inking, think about the layout. Where do your eyes naturally go? Consider balance and harmony. This helps maintain the sketch’s essence. Use light pencil marks to map out key areas. This ensures clarity when inking.
Avoid overcrowding. Too many elements can distract the viewer. Simplify where possible. This allows your main idea to shine. Sketch lightly, and adjust composition as needed. Planning saves time and enhances your art.
Strengthening Underlying Sketch
A strong sketch supports a polished ink drawing. Focus on the basic shapes first. These form the skeleton of your sketch. Ensure proportions are correct. This prevents awkward results after inking. Use guidelines for symmetry and balance.
Refine details once the basic structure is solid. This approach reduces mistakes during inking. Aim for clean, confident lines. Practice builds skill and assurance. The more you sketch, the better your inking becomes.
Managing Ink Mistakes
Many artists feel their sketches lose charm after inking. Managing ink mistakes can be challenging. It’s easy to smudge or make lines too bold. These errors can distract from the original sketch. Understanding how to manage ink mistakes can improve your artwork.
Correcting Errors
Spotting errors early is crucial. Use a white gel pen to fix small mistakes. This pen can cover unwanted lines effectively. For larger mistakes, consider using correction fluid. It helps in covering big areas neatly. Another option is digital editing. Scan your artwork and correct it on a computer. This method ensures precision in corrections.
Preventing Future Mistakes
Planning before inking saves time. Use light pencil guidelines to map out your inking path. Choose the right pen for your style. Test on scrap paper to see how it behaves. Consider starting with thinner pens. They offer more control over line thickness. Practice hand movements to reduce smudging. Keeping your hand steady can prevent accidental strokes.
Boosting Confidence In Inking
Inking can make sketches look worse than expected. This feeling is common among artists. With practice, inking becomes less daunting. Building confidence is key. Let’s explore how to boost confidence in inking.
Overcoming Anxiety
Anxiety can affect your inking process. Shaky hands and indecision are common. Deep breaths can help calm the nerves. Start with simple lines and shapes. Practice on scrap paper before inking your main piece. This reduces fear of mistakes. Remember, each line doesn’t need to be perfect. Embrace imperfections as part of the art. Confidence grows with each attempt.
Building Skill Over Time
Skills improve with practice. Set aside time to ink every day. Small, consistent efforts lead to progress. Study your favorite artists. Observe their techniques and styles. Try to replicate them in your work. This builds familiarity with tools and strokes. Over time, your inking will improve. Patience and persistence are key. Celebrate small victories. Each success boosts confidence in your ability.
Frequently Asked Questions
Why Does My Lineart Look Worse Than My Sketch?
Your lineart may lack the sketch’s dynamic feel. Focus on varying line thickness and maintaining fluidity. Practice and refine your technique to capture the sketch’s spontaneity. Use references to guide line quality and experiment with digital tools for precision.
How Do You Fix Ink Mistakes In Drawings?
Use a white gel pen to cover ink mistakes. Let it dry, then redraw over it. Use correction fluid for larger areas. For small errors, try scraping ink with a blade carefully. Practice on scrap paper to avoid damage. This maintains your artwork’s integrity and quality.
How Do I Stop My Sketches From Smudging?
Use fixative spray on your sketches to prevent smudging. Work on clean surfaces and keep hands clean. Use a piece of paper under your drawing hand. Store sketches in a portfolio or protective sleeves to maintain their condition.
How Can I Improve My Sketch Quality?
Enhance sketch quality by practicing regularly and observing real-life objects. Use quality materials and experiment with techniques. Study art tutorials and seek feedback from artists. Maintain a consistent style and focus on light and shadows. Develop patience and attention to detail for refined sketches.
Conclusion
Improving sketches after inking takes practice and patience. Start by understanding your tools. Experiment with different pens and papers. Learn to control your hand pressure. This can help avoid unwanted lines. Try tracing lightly over your pencil lines. It provides better guidance.
Pay attention to line weight. Varying thickness adds depth to your art. Analyze your sketches closely. Notice what changes after inking. Practice regularly to build confidence. Every artist faces challenges. Keep refining your technique. Over time, you’ll see improvement. Enjoy the creative journey.
Happy sketching!

