Japanese Maple trees are beautiful and unique. Drawing them can be simple and fun.
Creating a Japanese Maple tree drawing might seem hard at first. But, with some guidance, you can easily capture its beauty. These trees have distinct leaves and a graceful shape. Learning to draw them can improve your art skills. Plus, it’s a relaxing activity.
In this post, you will find easy steps to draw a Japanese Maple tree. Whether you’re a beginner or just love to draw, this guide will help. So, grab your pencils and let’s start drawing!

Introduction To Japanese Maple Trees
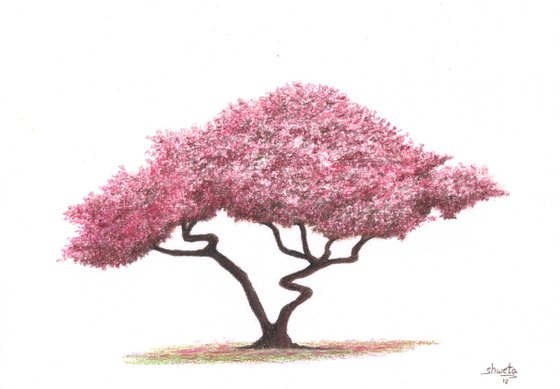
Japanese Maple trees are admired for their delicate beauty and vibrant colors. These trees are popular in gardens and landscapes around the world. They are known for their intricate leaves and stunning fall foliage. Drawing a Japanese Maple tree can be a rewarding experience. It allows you to capture their unique charm on paper.
Unique Characteristics
Japanese Maple trees have distinctive features that set them apart. Their leaves are often deeply lobed and come in various shapes and sizes. The colors range from green to deep red, making each tree unique. In autumn, their leaves turn brilliant shades of red, orange, and yellow. This transformation is a highlight for many tree enthusiasts.
The tree’s bark also adds to its appeal. It can be smooth or slightly textured, with a subtle color that complements the leaves. Japanese Maples often have a graceful, spreading form. This creates a serene and elegant appearance in any setting.
Popular Varieties
There are many varieties of Japanese Maple trees, each with its own charm. One popular type is the ‘Bloodgood’. It has deep red leaves that keep their color throughout the season. Another favorite is the ‘Tamukeyama’, known for its cascading branches and rich, purple-red leaves.
The ‘Green Cascade’ is a beautiful choice for those who prefer green foliage. It has finely dissected leaves and a weeping habit. The ‘Sango Kaku’, or ‘Coral Bark Maple’, is unique with its bright coral-red bark. This variety is especially striking in winter when the leaves have fallen.
Each variety offers something special for artists and gardeners alike. Exploring these trees can inspire your drawings and deepen your appreciation for their beauty.
Essential Drawing Materials
Drawing a Japanese maple tree can be a rewarding experience. To get started, you need the right materials. Having the right tools can make your drawing process smoother and more enjoyable. Let’s explore the essential drawing materials you will need.
Paper And Pencils
First, you need quality drawing paper. Choose a smooth or slightly textured paper. It helps in creating fine details. A good option is 80-100 lb weight paper.
Next, pick the right pencils. Use a range from HB to 6B. The HB pencil is good for light sketches. The 6B pencil is perfect for dark, bold lines. Mechanical pencils are also useful for fine details.
Erasers And Blending Tools
An eraser is essential. A kneaded eraser works best. It allows you to mold it into different shapes. This helps in erasing small areas. A vinyl eraser is good for erasing larger sections.
Blending tools are also important. Use a blending stump or tortillon. These help in creating smooth transitions and shading. You can also use a soft tissue or cotton swab for blending.
| Material | Recommendation |
|---|---|
| Paper | 80-100 lb weight paper |
| Pencils | Range from HB to 6B |
| Eraser | Kneaded and vinyl erasers |
| Blending Tools | Blending stump or tortillon |
Basic Drawing Techniques
Drawing a Japanese Maple Tree can be a fulfilling experience. With a few basic techniques, you can create a beautiful piece of art. Whether you’re a beginner or an experienced artist, these steps will guide you in drawing a stunning Japanese Maple Tree.
Sketching Outlines
Start by sketching the basic outline. Use light, gentle strokes. Begin with the trunk, drawing a slightly curved line to represent its natural shape. Next, add branches extending from the trunk. Remember, the branches should be thinner as they get farther from the trunk.
For the leaves, sketch out small, pointed shapes. Japanese Maple leaves have a unique, star-like appearance. Place the leaves randomly along the branches for a natural look.
Adding Details
Now, focus on adding details to your drawing. Begin by enhancing the trunk and branches. Add texture to the bark with short, curved lines. This will give your tree a more realistic feel.
| Detail | Technique |
|---|---|
| Trunk Texture | Use short, curved lines |
| Branch Thickness | Gradually thin out the lines |
| Leaf Veins | Draw fine lines within each leaf |
For the leaves, add veins to each leaf. Draw fine lines starting from the base of the leaf towards its tips. This will give the leaves a more lifelike appearance.
Lastly, add shading to your drawing. Use light and dark tones to create depth. Shade the areas of the trunk and branches that are not directly hit by light. This will make your Japanese Maple Tree drawing pop out more.
Drawing The Tree Trunk
Drawing the trunk of a Japanese Maple tree can be a fun and rewarding experience. The trunk provides the foundation and character for the entire tree. Paying attention to details like texture and shading can bring your drawing to life. Below, we’ll explore some key techniques to help you draw the tree trunk effectively.
Creating Texture
To create a realistic tree trunk, focus on adding texture. Use short, curved lines to mimic the bark’s rough surface. Vary the direction and length of the lines to add interest. You can also include small knots and cracks to give the trunk more character. These details make the drawing look more natural.
Consider using a reference photo of a Japanese Maple tree. This will help you understand how the bark looks. Notice how the texture changes at different parts of the trunk. Try to replicate these variations in your drawing.
Shading For Depth
Shading is essential to give your tree trunk depth and dimension. Start by identifying the light source. This will guide where you place your shadows and highlights.
Use a soft pencil to apply light shading to one side of the trunk. Gradually build up the darkness to create a gradient effect. This makes the trunk look three-dimensional. You can use a blending tool or your finger to smooth out the shading.
To enhance the depth further, add darker shading in the cracks and knots. These areas naturally receive less light. By doing this, you make the tree trunk appear more lifelike.
Drawing The Branches
Drawing the branches of a Japanese Maple Tree can be a fun task. They add charm and character to your artwork. Let’s break down the steps to make this process easy and enjoyable.
Branch Structure
Start by sketching the main branches. These are the thicker ones that sprout from the trunk. Use light, gentle strokes to outline them. Keep the branches natural and flowing. Japanese Maple branches have a graceful, curving appearance.
Make sure to add smaller branches coming off the main ones. These smaller branches should be thinner. They help give the tree a realistic look. Vary their directions for a more natural feel.
Layering Branches
Once you have the basic structure, start layering. Draw more branches on top of the initial ones. This gives your tree depth. It also adds complexity to your drawing.
Think about how branches overlap in real life. Some branches will be in front, while others are behind. This layering creates a sense of perspective. Use lighter lines for the branches that are further back. This technique will make your drawing look three-dimensional.
Don’t worry about making every branch perfect. Trees in nature aren’t perfect either. The beauty of the Japanese Maple Tree lies in its unique, irregular shapes. Embrace these imperfections in your drawing.
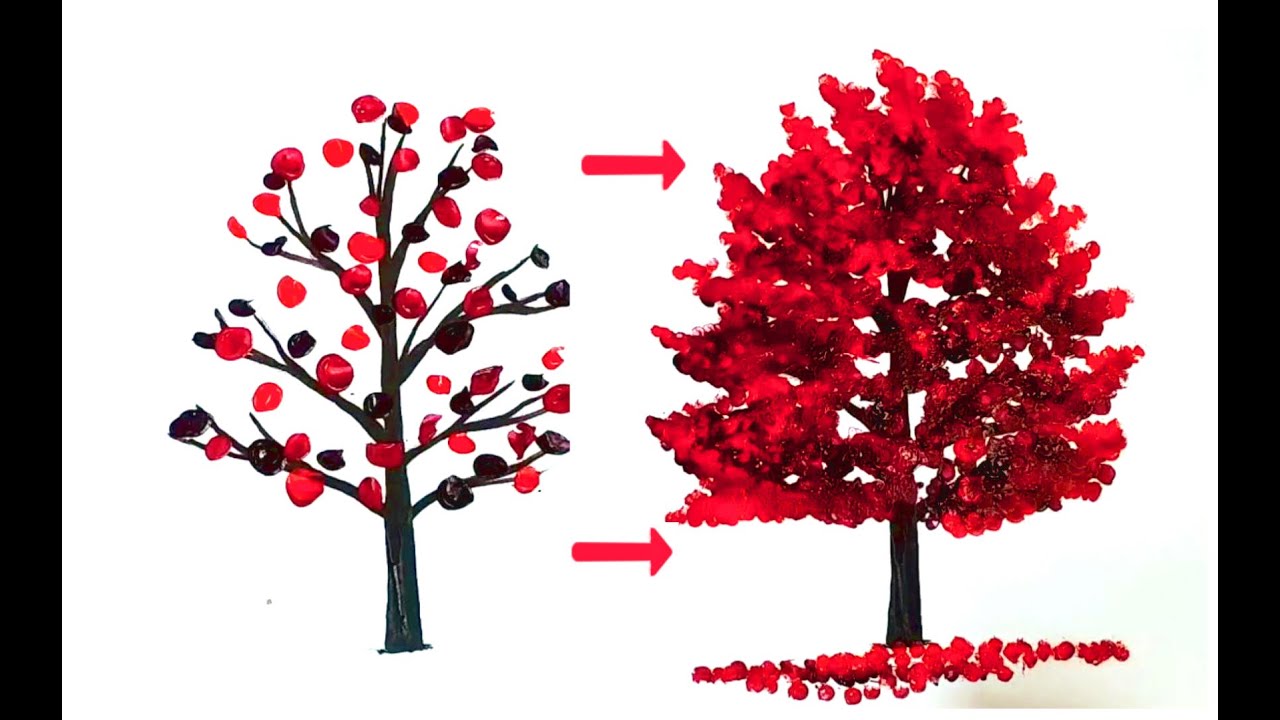
Drawing The Leaves
Drawing the leaves of a Japanese Maple tree can be a fun and rewarding experience. The leaves are unique and beautiful, adding character to your drawing. To make this process easier, let’s break it down into simple steps. First, we will look at the different leaf shapes. Then, we will examine how to arrange the leaves on your drawing.
Leaf Shapes
Japanese Maple leaves have distinct shapes. They usually have five to nine pointed lobes. Each lobe is long and narrow. The edges are serrated, giving the leaf a delicate look. Start by drawing a small circle for the center. From this circle, draw lines for each lobe. Make sure the lines spread out evenly. Once you have the basic shape, add the serrated edges. Keep the lines light and fluid for a natural look.
Leaf Arrangement
Now that you have the leaf shapes, it’s time to arrange them. Japanese Maple leaves grow in clusters. Each leaf is connected to a thin stem. Draw the stems first, branching out from a central point. Attach the leaves to the ends of these stems. Remember to vary the angles. This will make your drawing look more realistic. Some leaves should overlap slightly. This adds depth to your drawing. Take your time and enjoy the process.
Final Touches
Final touches can make your Japanese Maple Tree drawing stand out. These small details bring life and depth to your artwork. Here, we will focus on adding shadows and enhancing highlights. These steps will give your drawing a more realistic and professional look.
Adding Shadows
Shadows add depth to your drawing. Start by identifying the light source. This will help you determine where shadows fall. Use a darker shade of your main color. Apply this shade to the underside of the branches and leaves. Use light, quick strokes for a natural look. Shadows should be soft and blend smoothly. Avoid harsh lines.
Enhancing Highlights
Highlights make your drawing pop. They give the illusion of light hitting the tree. Choose a lighter shade of your main color. Apply this to the top edges of branches and leaves. Use gentle strokes to create a natural shine. Highlights should be subtle yet noticeable. They should not overpower the drawing. Balance is key.
Frequently Asked Questions
How Do You Start Drawing A Japanese Maple Tree?
Begin with the trunk and main branches. Then, add smaller branches and leaves.
What Tools Do I Need For This Drawing?
You need paper, pencils, and erasers. Colored pencils or markers can be used for coloring.
Is It Hard To Draw A Japanese Maple Tree?
No, it’s simple with practice. Start with basic shapes and add details gradually.
Can Beginners Draw Japanese Maple Trees?
Yes, beginners can draw them. Follow easy step-by-step tutorials for guidance.
Drawing a Japanese Maple tree can be enjoyable and relaxing. Start with simple shapes. Then, add branches and leaves. Practice makes it easier. Soon, you’ll create beautiful drawings. Remember, art is about having fun. Don’t stress about perfection. Share your artwork with friends.
They will appreciate your effort. Keep learning and exploring new techniques. Happy drawing!