Who doesn’t love ice cream? It’s fun to eat and even more fun to draw!
In this blog post, we will explore some exciting ice cream drawing ideas. Perfect for both beginners and skilled artists, these ideas will inspire your creativity. Drawing ice cream can be a delightful experience. You can experiment with different shapes, flavors, and toppings.
Think about a cone with sprinkles, a sundae with cherries, or a simple popsicle. Each drawing can tell a story and bring a smile. You don’t need fancy tools; just grab a pencil and paper. Let your imagination run wild. This guide will help you create colorful and fun ice cream drawings, perfect for your next art project. Ready to get started? Let’s dive into the world of ice cream art!
Introduction To Ice Cream Drawing
Drawing ice cream can be a delightful activity. It’s simple, fun, and allows your imagination to run wild. Whether you’re an experienced artist or a beginner, ice cream drawing offers a great way to practice your skills. This guide will provide you with some exciting ice cream drawing ideas.
Why Draw Ice Cream?
Ice cream drawings are easy and enjoyable. They allow you to experiment with colors and patterns. You can create different styles, from realistic to cartoonish. Drawing ice cream can help you improve your art skills. It’s a great way to relax and have fun.
Materials Needed
To start, gather some basic materials. You’ll need paper, pencils, and erasers. Colored pencils or markers can add vibrant touches. You might want a ruler for straight lines. Some artists use digital tools. You can use a tablet or drawing software if you prefer.

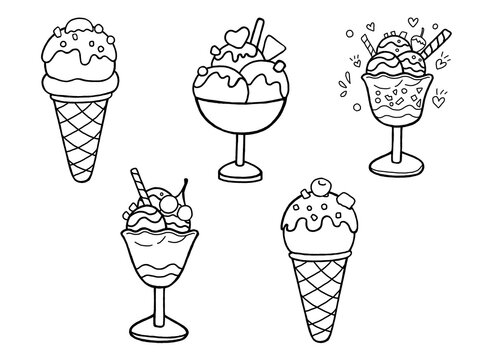
Simple Ice Cream Cones
Explore fun ice cream drawing ideas with simple cones. Draw creative designs, adding colorful toppings and unique shapes. Perfect for all ages.
Drawing simple ice cream cones can be fun. It’s an easy way to practice your drawing skills. Let’s explore how to draw basic cone shapes and add details to make them look delicious.
Basic Cone Shape
Start with a triangle. This will be the cone. Draw a horizontal line across the top. This line will be the base of the ice cream scoop. Make sure the triangle is wide enough for the scoop. Next, draw a semi-circle on top of the line. This is the ice cream scoop. The semi-circle should be slightly larger than the triangle. This will make the scoop look like it’s sitting on the cone.
Adding Details
Now, add texture to the cone. Draw crisscross lines inside the triangle. This will create a waffle pattern. It makes the cone look more realistic. For the ice cream, add some curves at the bottom of the semi-circle. These curves will look like drips. It will make the ice cream appear soft and melting. Finally, add some fun toppings. Draw small circles for sprinkles. Or, add a cherry on top by drawing a small circle with a stem. These details will make your ice cream cone more interesting. Remember to use light and shadow. Shade one side of the cone and scoop. This will give your drawing depth and make it stand out. “`
Creative Sundae Designs
Ice cream sundaes are not just delicious treats. They are also a canvas for creativity. Drawing sundaes can be a fun and imaginative activity. This post will explore various ice cream drawing ideas. Focused on Creative Sundae Designs, we will dive into layering techniques and toppings and textures. Let’s get started!
Layering Techniques
Layering is key to a stunning sundae design. Think about how different flavors and colors stack up. Use layers to create a visual feast.
- Base Layer: Start with a simple scoop of ice cream. This is your foundation.
- Middle Layer: Add another scoop or two, slightly offset. This adds depth.
- Top Layer: Finish with a small scoop or whipped cream. This adds height.
Experiment with different colors. Mix and match flavors like chocolate, vanilla, and strawberry. Use contrasting shades for a more dynamic look.
Toppings And Textures
Toppings make a sundae special. They add fun and flavor. Think about how you can draw different textures.
| Topping | Texture |
|---|---|
| Sprinkles | Small, colorful dots |
| Chocolate Syrup | Smooth, dark lines |
| Cherries | Round, shiny shapes |
Use different strokes for different textures. For sprinkles, use tiny, quick dashes. For syrup, use long, smooth lines. For cherries, use small circles with highlights.
Combine toppings for a unique sundae. Draw nuts, candy pieces, or fruit slices. Each topping adds a new layer of interest.

Colorful Ice Cream Scoops
Drawing colorful ice cream scoops can be a delightful activity. The vibrant hues and creamy textures make it an enjoyable subject. Whether you are a beginner or an experienced artist, adding color to ice cream scoops brings them to life. Let’s explore some ideas to make your ice cream drawings pop with color.
Choosing Colors
Selecting the right colors is important for your drawing. Bright colors like pink, yellow, and blue are great choices. They make the ice cream look fun and tasty. You can also experiment with pastel shades for a softer look. Think about the flavors you want to represent. Strawberry, lemon, and blueberry are just a few ideas. Don’t be afraid to mix and match colors. This can make your drawing more interesting.
Blending Techniques
Blending colors can add depth to your ice cream scoops. Start by applying the base color lightly. Then, add a darker shade to the edges. Use a blending tool or your finger to smooth the colors together. This creates a realistic effect. You can also use colored pencils or markers. Try layering different colors for a rich texture. Practice makes perfect, so keep experimenting with different techniques.
Whimsical Ice Cream Characters
Drawing whimsical ice cream characters can be a delightful experience. These characters bring joy and creativity to your art. Imagine scoops of ice cream with playful faces and fun props. They can be as imaginative and quirky as you like.
Faces And Expressions
The face is the heart of your ice cream character. Start with big, expressive eyes. Add a smile that matches the character’s mood. A wide grin can show happiness. A tiny smirk can hint at mischief. Experiment with different expressions. Each adds a unique personality to your character.
Accessories And Props
Accessories can make your ice cream characters stand out. Add a colorful hat or a pair of sunglasses. Think of props like tiny umbrellas or cherries on top. These details make your characters more engaging. They tell a story and capture the viewer’s imagination. Try adding different accessories to create a fun mix.
Seasonal Ice Cream Themes
Ice cream drawing ideas can change with the seasons. Each season brings its own unique theme and inspiration. Whether it’s the warm glow of summer or the festive spirit of winter, seasonal themes can make your ice cream drawings stand out. Let’s explore some exciting seasonal themes that can give your ice cream drawings a fresh twist.
Summer Vibes
Summer is the perfect time to draw ice cream. The warm weather calls for cool treats. Use bright colors and fun patterns to capture the essence of summer. Think about:
- Beach scenes with ice cream cones
- Ice cream trucks on a sunny day
- Melting ice cream under the sun
These ideas bring a sense of fun and relaxation. You can also include summer fruits like strawberries or pineapples in your drawings. These elements add a refreshing touch to your ice cream art.
Holiday Inspirations
Holidays bring a festive atmosphere. Incorporate holiday themes into your ice cream drawings. Here are some ideas:
- Christmas: Ice cream with candy canes and snowflakes
- Halloween: Ice cream with spooky decorations like ghosts or pumpkins
- Valentine’s Day: Heart-shaped ice cream or ice cream with roses
Using holiday elements can make your drawings more relevant and engaging. It adds a touch of celebration and joy to your art.
Try to use colors and decorations that match the holiday theme. For Christmas, use red, green, and white. For Halloween, use orange and black. This makes your drawings instantly recognizable and festive.
Ice Cream Truck Illustrations
Ice cream trucks bring joy and nostalgia to many. Drawing an ice cream truck can be a fun and rewarding activity. Whether you are an artist or a beginner, these ideas will help you create the perfect ice cream truck illustration.
Designing The Truck
Start with the basic shape of the truck. Use simple geometric shapes like rectangles and circles. The body of the truck can be a large rectangle. Add two circles at the bottom for the wheels. Draw a smaller rectangle on top for the driver’s cabin. Make sure the shapes are proportionate.
Next, add windows and doors. Draw two squares for the windows on the front. Add a rectangle for the door on the side. Don’t forget to draw the serving window. This is where the magic happens. Make it big and inviting.
Adding Fun Details
Add playful elements to your ice cream truck. Draw ice cream cones and popsicles on the sides. These can be simple shapes. Add colorful stripes or polka dots to the truck. This will make it more cheerful.
Consider adding a sign on the top. Write something fun like “Ice Cream” or “Sweet Treats”. You can also add a little character, like a smiling ice cream cone, waving from the window. These details will make your illustration stand out.
Advanced Techniques
Drawing ice cream can be fun and challenging. Advanced techniques can help bring your artwork to life. These methods can make your ice cream drawings look more realistic. Let’s explore some of these techniques.
Shading And Shadows
Shading adds depth to your drawing. It shows light and dark areas. Use a soft pencil for smooth shading. Start with light pressure. Gradually increase pressure for darker areas. Observe where the light hits the ice cream. Add shadows on the opposite side. This makes the ice cream look three-dimensional.
Blend the shading with a blending stump or your finger. This helps create smooth transitions. Pay attention to the cone too. Add shadows to show its texture. Practice shading different parts of the ice cream. This will improve your skills over time.
Creating Realistic Textures
Textures make your ice cream drawing stand out. Observe real ice cream closely. Notice the smooth, creamy texture. Use short, curved lines to show this. Vary the pressure to create different effects. For the cone, use cross-hatching. This creates a waffle pattern.
Add small details like sprinkles or chocolate chips. These elements add interest to your drawing. Use a sharp pencil for fine details. Layer your lines to build texture. Practice different textures on scrap paper first. This will help you understand how to draw them.
Final Touches
Adding the final touches to your ice cream drawing can make a huge difference. These steps can bring your artwork to life. Let’s dive into two important aspects: highlighting and accents and framing and presenting.
Highlighting And Accents
To give your drawing a realistic touch, add highlights. Use a white or light-colored pencil to create light reflections. Focus on areas where the light naturally hits.
Add accents to enhance details. Use darker shades to emphasize shadows. This will create depth and make your ice cream look three-dimensional.
You can also add sprinkles or chocolate chips. Small details can make your drawing stand out.
Framing And Presenting
Once your drawing is complete, consider framing it. A simple frame can make your artwork look professional.
Choose a frame that complements your drawing. Avoid too many colors. Keep it simple to focus on the artwork.
Present your drawing in a well-lit area. Good lighting can enhance the colors and details. Share your artwork with friends or online.
Use a scanner or a good camera for digital sharing. Make sure the image is clear and well-lit.
Frequently Asked Questions
How To Start Drawing Ice Cream?
Begin with simple shapes like circles and triangles. Draw a cone and scoop. Add details gradually.
What Tools Do I Need?
You need basic tools: pencil, eraser, paper, and colored markers or crayons.
Can Beginners Draw Ice Cream?
Absolutely! Start with basic shapes and gradually add details. Practice makes perfect.
How To Add Texture?
Use short, curved lines for scoops. Add crosshatch lines for the cone to show texture.
Drawing ice cream can be fun and relaxing. Try different styles and colors. Let your creativity flow. Practice makes perfect. Share your drawings with friends. They might get inspired too. Drawing is a great way to express yourself. Enjoy the process and have fun.
Keep drawing and exploring new ideas. Happy sketching!