

A blending stump is a vital tool in drawing. It helps create smooth transitions and realistic shading.
To use a blending stump, hold it like a pencil and gently rub it over the areas you want to blend. Drawing with a blending stump can change your artwork. This small tool can make big differences in the way shadows and highlights appear.
Artists use blending stumps to soften lines and mix colors. With practice, you can improve your skills and add depth to your drawings. Learning the right techniques will help you create more lifelike and detailed art. Keep reading to discover the best ways to use a blending stump and enhance your drawing abilities.

Introduction To Blending Stumps
Blending stumps are essential for artists who draw with pencils or charcoal. They help create smooth transitions and add depth to artwork. Learning to use them can boost your drawing skills. This section will introduce you to blending stumps and their benefits.
What Is A Blending Stump?
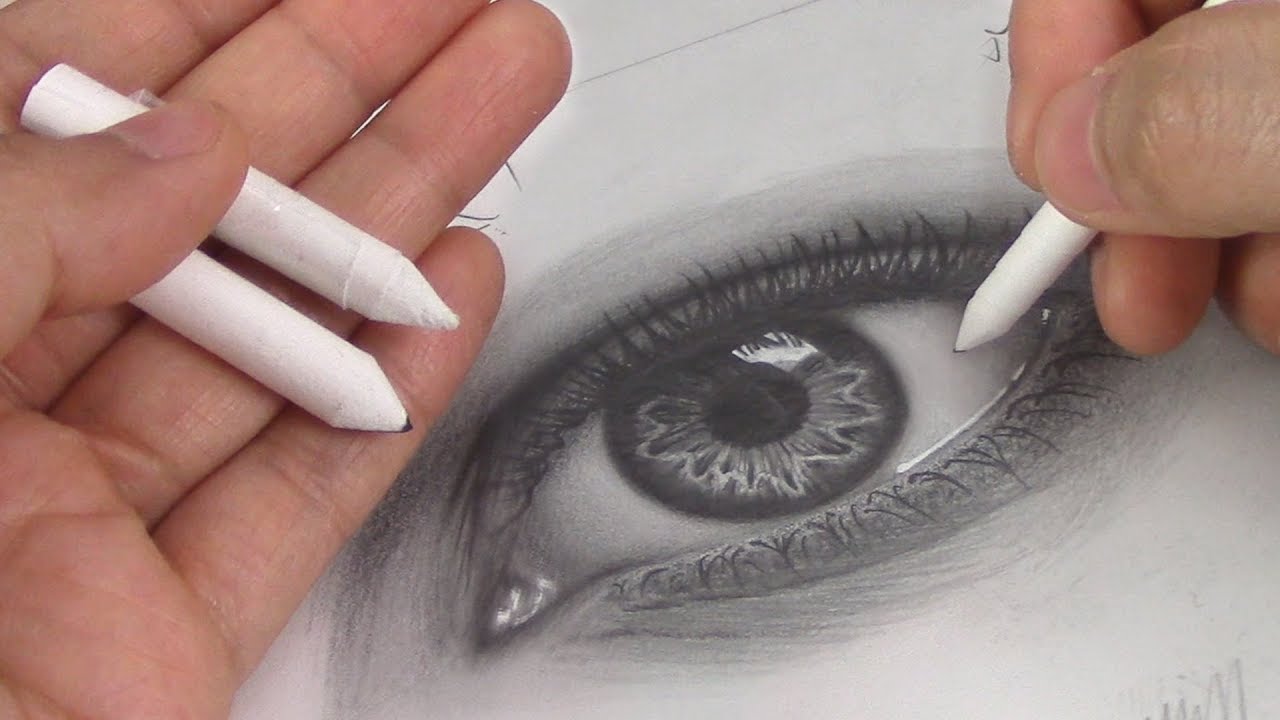
A blending stump is a tool made from tightly rolled paper. It has pointed ends for detailed work. Artists use it to blend pencil and charcoal marks. This tool is reusable and easy to clean. It comes in various sizes to suit different needs.
Benefits Of Using Blending Stumps
Blending stumps offer several advantages. They help achieve smooth shading in drawings. They allow for controlled blending and refined details. Using them reduces smudging from fingers. They also help in creating realistic textures. Overall, blending stumps enhance the quality of your artwork.
Choosing The Right Blending Stump
Recommended supplies for shading, blending, and technique practice
Technique drills need a real graphite range and a blending kit to feel the difference between hatching, smudging, and stumping.


As an Amazon Associate, drawingseasy.com earns from qualifying purchases. Prices and availability are subject to change.
Selecting the right blending stump is crucial for smooth shading. It helps in achieving soft transitions and detailed textures in your drawings. Make sure to choose one that suits your paper and drawing style.
Choosing the right blending stump can make a big difference in your drawing. It helps in smoothly blending pencil strokes. It creates beautiful transitions between shades. But how do you know which blending stump to choose? Let’s break it down into materials, sizes, and quality vs. cost.
Materials And Sizes
Blending stumps come in different materials. The most common ones are paper and felt. Paper stumps are tightly rolled paper. They are excellent for fine details. Felt stumps are softer and provide a smoother blend. Sizes vary too. Small stumps are great for detailed areas. Larger stumps cover more area quickly. Choose the size based on your drawing needs. For fine lines, use a small stump. For larger areas, use a bigger stump.
Quality Vs. Cost
Quality matters in blending stumps. High-quality stumps last longer. They also give better blending results. Cheaper stumps may wear out quickly. They might not blend as smoothly. But you don’t need to spend a lot. Look for mid-range stumps. They offer good quality at a reasonable price. You can find sets with different sizes. This way, you have the right tool for any part of your drawing.
Preparing Your Workspace
Preparing your workspace is the first step to using a blending stump effectively. A clean, organized area helps you focus and produce better drawings. Let’s explore how to get your workspace ready.
Essential Tools And Supplies
Gathering the right tools is crucial. You’ll need a blending stump, pencils, and erasers. Also, have a sharpener and a clean cloth nearby. A sketchpad or drawing paper is essential too. Make sure you have a good light source. Natural light works best, but a lamp will do.
Setting Up For Success
Choose a quiet space where you won’t be disturbed. A sturdy table and a comfortable chair are important. Position your light source to avoid shadows on your paper. Keep your tools within reach. Arrange them neatly to save time searching for items.
Now, you’re ready to start drawing with your blending stump. With an organized workspace, you’ll find it easier to focus and create beautiful art.
Basic Blending Techniques
Blending stumps are great tools for artists. They help create smooth transitions in your drawings. These tools are easy to use. Let’s explore some basic blending techniques.
Shading And Gradients
Shading adds depth to your drawings. Use a blending stump to create smooth gradients. Follow these steps:
- Draw your outline with a pencil.
- Shade the area lightly with the pencil.
- Use the blending stump to smooth the pencil marks.
- Apply more pressure for darker areas.
- Use less pressure for lighter areas.
This technique helps create realistic shadows and depth. It also makes your drawing look more professional.
Softening Edges
Hard edges can make a drawing look flat. Softening edges with a blending stump adds realism. Here’s how:
- Identify the hard edges in your drawing.
- Gently rub the blending stump along the edges.
- Use small, circular motions for best results.
- Blend until the edges look soft and natural.
This technique is great for portraits. It makes the skin look smooth. It’s also useful for landscapes. It helps blend the horizon and sky.
Remember to clean your blending stump. A dirty stump can leave unwanted marks. Use sandpaper to clean it.
Advanced Blending Methods
Advanced blending methods can enhance your drawing skills, adding more depth and texture. Using a blending stump effectively can create stunning effects. Let’s explore some advanced techniques.
Creating Texture
To create texture with a blending stump, start with light, gentle strokes. Build layers gradually. Use a circular motion to mimic natural textures. For a rough texture, apply more pressure in some areas.
- Use side of the stump for broader textures.
- For finer details, use the tip of the stump.
- Experiment with different pressures.
Avoid over-blending. It can smooth out the texture too much. Keep practicing to find the right balance.
Depth And Dimension
Creating depth and dimension is crucial for realistic drawings. Use a blending stump to soften shadows and create gradients.
- Start by shading the darkest areas.
- Use the blending stump to pull the graphite into the lighter areas.
- Blend in a controlled, deliberate manner.
This technique adds a three-dimensional feel to your drawings. Make sure to keep your light source consistent. This will make your work look more realistic.
Using these advanced blending methods will upgrade your drawings. Practice and observe how these techniques transform your art.
Maintaining Your Blending Stump
Blending stumps are essential tools for artists. They help in creating smooth gradients and soft edges. But, to ensure they work well, you need to maintain them properly.
Cleaning Tips
Clean your blending stump after each use. This prevents graphite buildup. You can clean it with sandpaper. Gently rub the stump on the sandpaper to remove the dirt. Rotate the stump as you rub to keep it even. You can also use a kneaded eraser. Press it against the tip and twist. This will pull off the residue.
When To Replace
Over time, your blending stump will wear down. Check the tip. If it’s too blunt, it won’t blend well. Also, if the paper starts peeling, it’s time for a new one. A well-used stump may become too short to hold comfortably. Replace it for better control and precision.
Common Mistakes To Avoid
Using a blending stump can greatly enhance your drawings. Yet, many artists make common mistakes. These mistakes can affect the final outcome of their artwork. Let’s explore these errors and learn how to avoid them.
Over-blending
Over-blending is a frequent error. It can make your drawing look muddy and lose detail. When you blend too much, you erase the texture. This makes the drawing look flat. To avoid this, blend only where needed. Keep some areas sharp and detailed. This contrast adds depth to your artwork.
Improper Pressure
The pressure you apply with the blending stump is crucial. Applying too much pressure can damage the paper. It can also cause the graphite to smudge too much. This leads to dark, unwanted marks. Using too little pressure can result in ineffective blending. You won’t achieve the smooth transitions you desire.
To find the right pressure, practice on a scrap piece of paper. Experiment with light, medium, and heavy pressure. Notice the differences and adjust accordingly. Consistent, controlled pressure results in better blending.
Frequently Asked Questions
What Is A Blending Stump Used For In Drawing?
A blending stump is used to smudge and blend pencil marks. It creates smooth transitions.
How Do You Clean A Blending Stump?
Clean a blending stump by rubbing it on sandpaper. This removes excess graphite or charcoal.
Can You Use A Blending Stump With Colored Pencils?
Yes, blending stumps can blend colored pencils. They help create soft, smooth color transitions.
How Do You Hold A Blending Stump?
Hold a blending stump like a pencil. Apply gentle pressure to blend areas smoothly.
Mastering the use of a blending stump takes practice. Start with light pressure. Gradually, increase pressure for darker shades. Always keep your stump clean. This prevents unwanted marks on your drawing. Experiment with different techniques. Discover what works best for your style.
Remember, blending adds depth and realism. Enhance your drawings with smooth transitions. Happy drawing!


