Drawing a sunset can seem challenging at first. But with the right steps, anyone can do it.
Imagine capturing the beauty of a sunset on paper. It’s a peaceful and rewarding activity. This blog will guide you through simple steps to draw a stunning sunset. No previous art experience is needed. Just grab your materials and follow along.
By the end, you will have your own piece of sunset art. Ready to start? Let’s dive into the colorful world of sunset drawing!
Materials Needed
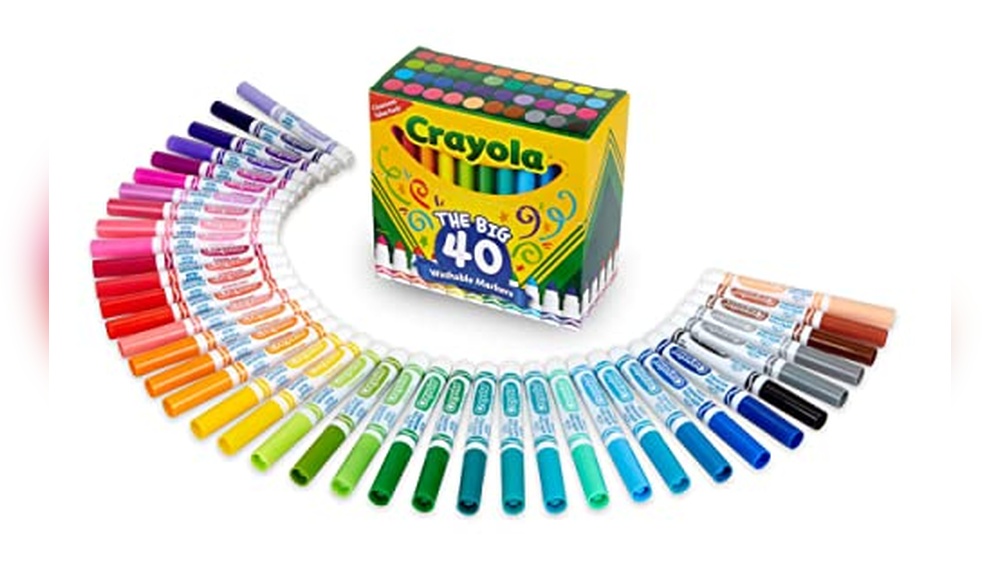
Before you start drawing a beautiful sunset, gather the right materials. The right tools make the process smooth and enjoyable. Here is a list of essential and optional supplies you’ll need to draw a stunning sunset.
Essential Tools
First, you need a good set of colored pencils. Choose bright and warm colors like red, orange, yellow, and pink. Next, get a quality sketch pad or drawing paper. The paper should be smooth and thick to handle layers of color. A pencil sharpener is also crucial. Keep your pencils sharp for fine details.
Don’t forget an eraser. Mistakes happen, and a clean eraser helps keep your drawing neat. A ruler can help draw straight lines for the horizon. Lastly, have a blending tool. You can use a blending stump or even a tissue to smooth out colors.
Optional Supplies
For added effects, consider using watercolors. They can create a soft, blended look. A set of watercolor brushes will be necessary if you choose this option. Another useful tool is a white gel pen. It can add highlights and make your drawing pop.
Pastels are another optional supply. They can give your sunset a rich and vibrant look. Masking tape is also helpful. It can keep your paper in place and create clean edges. Lastly, use a fixative spray to protect your finished drawing. It helps prevent smudging and keeps colors bright.

Choosing Your Colors
Creating a stunning sunset involves selecting the right colors. The hues you choose can make your sunset look realistic and captivating. Below, we will explore the essential elements of picking colors for your sunset drawing.
Color Palette
The color palette is crucial for drawing a sunset. Here are the key colors you need:
- Yellow: Represents the sun and the brightest part of the sky.
- Orange: Blends with yellow to create a warm glow.
- Red: Adds depth and intensity to the sunset.
- Purple: Often found at the edges of the sunset, adds contrast.
- Blue: Represents the remaining daylight and sky.
These colors can be mixed and matched to achieve the desired effect. A balanced palette brings your sunset to life.
Blending Techniques
Blending colors is essential for a smooth transition. Here are some techniques:
- Layering: Apply colors in layers, starting with the lightest. Gradually add darker shades.
- Smudging: Use a blending tool or your finger to mix colors seamlessly.
- Dry Brushing: Use a dry brush to blend edges without adding more color.
- Gradient: Create a gradient by slowly transitioning from one color to another.
These blending techniques will help you achieve a realistic and beautiful sunset.
Below is a simple table to summarize the colors and their uses:
| Color | Use |
|---|---|
| Yellow | Sun and brightest part of the sky |
| Orange | Warm glow |
| Red | Depth and intensity |
| Purple | Contrast at edges |
| Blue | Remaining daylight and sky |
Creating The Horizon Line
Creating the horizon line is a crucial step in drawing a sunset. It sets the stage for the beautiful scene. This line divides the sky from the land or sea. A well-placed horizon line makes your drawing more realistic and balanced. Let’s dive into the details of how to create the perfect horizon line for your sunset.
Positioning The Horizon
Positioning the horizon line is the first step. Decide where you want the horizon. It can be at the top, middle, or bottom of your paper. Each position gives a different perspective.
- Top: Shows more land or sea, less sky.
- Middle: Balanced view of sky and land/sea.
- Bottom: Shows more sky, less land or sea.
Choose based on what you want to highlight. For a sunset, the middle or bottom positions work best. They highlight the sky’s colors. Mark the chosen spot lightly with a pencil.
Drawing Guidelines
Once you have the position, draw the horizon line. Use a ruler for a straight line. This line should be light. It serves as a guide. You can darken it later.
- Place your ruler across the chosen spot.
- Lightly draw a straight line from one side to the other.
- Ensure the line is even and not slanted.
For a natural look, make small bumps or waves if it’s a sea. Add slight curves for hills if it’s land. These details add realism to your drawing. Remember to keep it light. You’ll add more detail and color later.
Sketching The Basic Shapes
Sketching the basic shapes is the first step in drawing a sunset. This step helps set the stage for all the details you will add later. By focusing on the core elements, you can create a strong foundation. Let’s start with the essential shapes.
Outline The Sun
Begin by drawing a circle for the sun. Place it near the horizon to create the sunset effect. Use light pencil strokes so you can adjust the size if needed. The sun is the focal point, so make sure it’s prominent.
Add Clouds And Land
Next, sketch some clouds around the sun. Clouds can be any shape, but keep them simple. Draw a few lines to outline their edges. Vary the sizes to make them look natural.
Finally, add a horizon line below the sun. This represents the land or sea. Draw it straight across the page. You can add some hills or waves for more detail.
Adding Color To The Sky
Drawing a sunset is all about capturing the beauty of the sky. One of the most important steps is adding color to the sky. This creates the mood and sets the scene for your sunset artwork. Let’s explore some techniques to achieve this.
Gradient Techniques
Using gradient techniques can make your sunset look realistic. Gradients help blend colors smoothly, creating a natural transition from one shade to another. Here’s how you can do it:
- Start with the lightest color at the horizon.
- Gradually add darker shades as you move upwards.
- Use a soft brush to blend the colors seamlessly.
For example, begin with yellow at the horizon. Then, blend it into orange, followed by red and purple as you move up. This gradual shift creates a stunning sunset effect.
Layering Colors
Layering colors adds depth to your sunset sky. It makes the colors more vibrant and realistic. Follow these steps to layer your colors effectively:
- Apply a base layer of your lightest color.
- Let it dry completely before adding the next layer.
- Use a medium shade for the second layer.
- Finish with the darkest shade on top.
Using thin layers is key. This allows each layer to shine through, enhancing the overall effect. Make sure to blend the edges where the colors meet for a smooth transition.
| Step | Action |
|---|---|
| 1 | Apply lightest color as base |
| 2 | Let it dry |
| 3 | Add medium shade |
| 4 | Finish with darkest shade |
By mastering these gradient and layering techniques, you can create a captivating sunset sky. Remember to experiment with colors and have fun with your artwork!
Painting The Sun And Clouds
Drawing a sunset can be a relaxing and fun activity. The key parts include painting the sun and clouds. Each part adds to the overall beauty. Let’s break down these steps.
Highlighting The Sun
Start by drawing a circle for the sun. Use bright colors like yellow, orange, and red. Blend these colors to create a warm glow. Make the edges softer by gently blending outwards. This gives a natural look.
Add some rays around the sun. Use a light hand to draw them. This gives the effect of light spreading. The sun should look bright and warm.
Detailing The Clouds
Draw the clouds with soft, fluffy shapes. Use white and light gray. Add hints of pink or orange to reflect the sunset. This adds more depth.
Blend the edges of the clouds softly. This makes them look more realistic. Use a small brush for finer details. Highlight the areas where the sun hits the clouds. This shows light and shadow.
Final Touches
The final touches bring your sunset drawing to life. This stage is crucial for adding depth and realism. You will refine details and add shadows and highlights. These steps will make your sunset look more vibrant and complete.
Refining Details
Start by refining the details of your drawing. Look at the horizon line. Ensure it is smooth and clean. Check the edges of the sun. They should be round and even. Add small touches to the clouds. Make them fluffy and natural. Use a fine-tip pen for this. It helps in adding precision.
Adding Shadows And Highlights
Shadows and highlights give depth. Start with the shadows. Look where the sun would cast a shadow. Add darker shades under the clouds. Use a soft pencil for a natural look. Next, add highlights. These are the bright spots where the sun hits. Use a white pencil or gel pen. Add highlights to the edges of the clouds. Put some on the water or land below. This will make your sunset glow.

Frequently Asked Questions
What Materials Do I Need To Draw A Sunset?
You need paper, pencils, erasers, and coloring tools like crayons or markers.
How Do I Start Drawing A Sunset?
Begin by sketching the horizon line. Then, draw the sun and surrounding clouds.
What Colors Are Best For A Sunset Drawing?
Use warm colors like orange, red, and yellow for the sun and sky.
How Can I Add Depth To My Sunset Drawing?
Blend colors smoothly and add shadows to create a realistic effect.
Conclusion
Creating a sunset drawing is a rewarding experience. Follow simple steps and practice often. Use different colors to bring your sunset to life. Remember, every artist has a unique style. Don’t stress about perfection. With time, your skills will improve.
Enjoy the process and have fun. Happy drawing!


