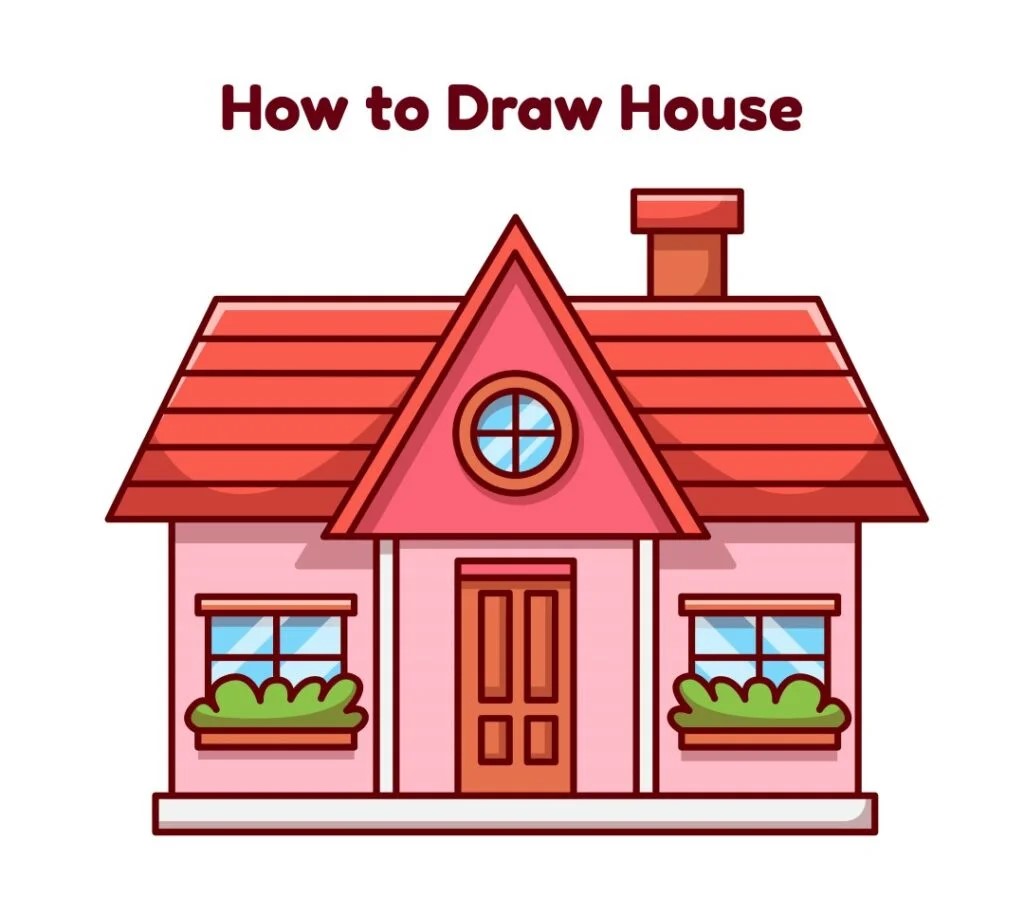
Drawing a house can be fun and rewarding. Many people love creating their own designs.
Learning how to draw a house is a useful skill. It allows you to express creativity and understand basic architectural concepts. Whether you are an aspiring artist, an architecture student, or just looking for a new hobby, drawing a house can be a great way to spend your time.
This guide will provide you with simple steps to create a detailed house sketch. You don’t need to be an expert artist to follow along. With practice and patience, anyone can learn to draw a beautiful house. Grab your pencils and paper, and let’s start this artistic journey together!
Materials Needed
Drawing a house can be a fun and rewarding experience. To start, you’ll need the right materials. This section will cover the essential tools and paper types you need.
Drawing Tools
Having the right drawing tools is crucial for creating a detailed house drawing. Here are some tools you might need:
- Pencils: Use HB pencils for sketching. Use 2B or 4B for shading.
- Eraser: A good quality eraser is necessary for clean corrections.
- Ruler: Helps draw straight lines for the house’s structure.
- Compass: Useful for drawing circles and arcs.
- Sharpener: Keep your pencils sharp for precise lines.
Paper Types
Choosing the right paper type can make a big difference in your drawing. Here are some options:
| Paper Type | Features |
|---|---|
| Sketch Paper | Lightweight and ideal for practice sketches. |
| Bristol Paper | Thicker and smoother, perfect for detailed drawings. |
| Watercolor Paper | Great for adding color with watercolors. |
With these materials, you are ready to start drawing your house. Gather your tools and paper, and let your creativity flow.
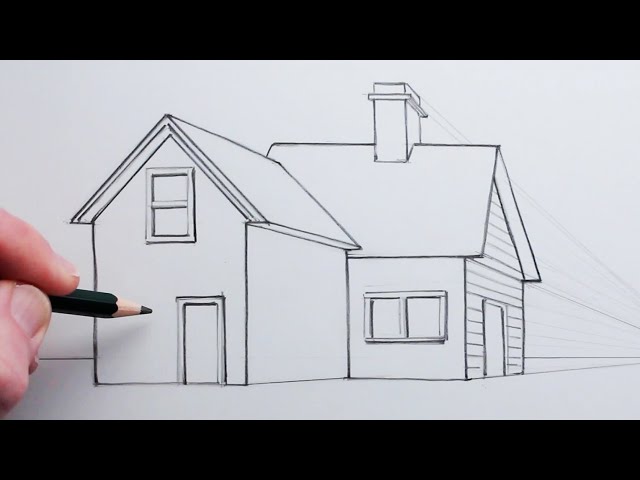
Basic Structure
Drawing a house starts with understanding its basic structure. This includes the foundation and the walls. These elements are crucial for any house drawing. Let’s break it down step by step.
Drawing The Foundation
The foundation is the base of your house. It supports the entire structure. Here’s how you can draw it:
- Start with a horizontal line. This will be the ground level.
- Draw a rectangle above this line. This forms the base of your house.
- Ensure the rectangle is wide enough. It should accommodate all the walls and rooms.
Tip: Use a ruler for straight lines. It makes your drawing neat.
Adding Walls
Once the foundation is in place, you can add the walls. Follow these steps:
- Draw vertical lines from each corner of the rectangle. These are your house’s corners.
- Connect these vertical lines with horizontal lines at the top. This forms the outline of your walls.
- Add internal walls if you have multiple rooms. Use more vertical and horizontal lines.
Tip: Keep walls straight and even. It gives your house a solid look.
Now you have the basic structure. Next, you can add details like windows and doors.
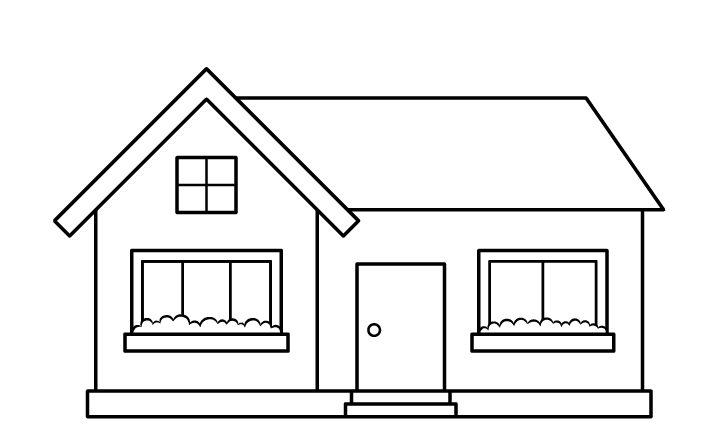
Roof Design
Creating a captivating roof design is essential for any house drawing. The roof adds character and completes the structure. It can be simple or detailed, depending on your artistic vision. Let’s explore different ways to enhance your house drawing through roof design.
Simple Roof Shapes
Start with basic shapes for your roof. A triangle or a rectangle works well. These shapes are easy to draw and provide a solid foundation. A triangular roof gives a classic look. A rectangular roof offers a more modern feel. Sketch these shapes lightly and adjust as needed.
Adding Roof Details
Details can make your roof stand out. Add shingles or tiles to give texture. Draw small lines to represent each tile. This adds depth and realism. Include gutters along the edges. They are simple lines but add realism. You can also draw chimneys or skylights. These details enhance your roof’s uniqueness.
Windows And Doors
Windows and doors are essential features of any house drawing. They give life to the structure and add character. By learning to draw windows and doors, you can make your house look realistic and inviting. Let’s dive into the steps for sketching these elements.
Sketching Windows
Start by drawing a rectangle or square where you want your window. Ensure the shape is neat and proportionate to the house. Divide the shape into sections to create window panes. You can draw vertical and horizontal lines within the window shape. This step adds detail and realism.
Next, sketch the window frame around the pane sections. Use straight lines to outline the frame. Add depth by drawing a second, slightly larger rectangle or square around the first one. This creates a sense of thickness for the window frame.
To enhance the look, add small details like window shutters or curtains. These elements can make your drawing more interesting. Finally, use shading to give the window a three-dimensional appearance. Shade the panes lightly and the frame slightly darker.
Drawing Doors
Begin by drawing a tall rectangle for the door. Ensure the door’s height and width fit well with the house. Add a smaller rectangle at the top or bottom to represent panels. You can draw one or more panels based on your design.
Next, sketch the door frame by drawing a slightly larger rectangle around the door. This adds depth and realism. Add a doorknob or handle by drawing a small circle or oval on one side of the door. Make sure it is at a realistic height from the bottom.
To make the door more detailed, add elements like a peephole or mail slot. These small details can make your door look more authentic. Finally, use shading to give the door a three-dimensional look. Shade the panels lightly and the frame slightly darker.
Exterior Details
Adding exterior details can make your house drawing look more realistic and engaging. These small elements bring your house to life, giving it character and charm. Let’s explore how to add these details effectively.
Adding Textures
Textures add depth to your drawing. They make surfaces look more realistic.
- Brick Walls: Draw small, evenly spaced rectangles. Use light shading for a 3D effect.
- Wood Panels: Draw parallel lines. Add small, curved lines for a wood grain effect.
- Roof Shingles: Draw overlapping rectangles on the roof. Add shading to show layers.
Incorporating Landscaping
Landscaping makes your house drawing feel complete. It adds a natural touch.
Consider these elements:
- Trees: Draw the trunk first. Add curved lines for branches. Use small, jagged lines for leaves.
- Bushes: Use rounded shapes. Add small, wavy lines for texture.
- Flowers: Draw small circles for blooms. Add thin lines for stems and leaves.
These details can be placed around the house. This enhances the overall appearance.
Final Touches
After sketching your house, the next step is to add final touches. These small details bring your drawing to life. In this section, you will learn how to use shading techniques and add color to make your house drawing pop.
Shading Techniques
Shading gives your house depth and dimension. Start by deciding where the light source is. This helps you understand where to add shadows. Use soft strokes for light shadows and harder strokes for dark shadows.
- Hatching: Draw parallel lines close together for light shadows. Increase the space between lines for lighter areas.
- Cross-hatching: Draw intersecting lines. More lines mean darker shades.
- Blending: Use a blending tool or finger to smooth out your shadows. This creates a soft, realistic look.
Remember to keep your strokes in the same direction. This helps maintain a clean and consistent look.
Adding Color
Adding color makes your house look vibrant. Choose colors that fit the style of your house. For a traditional look, go for earthy tones. For a modern look, use bold and bright colors.
| Element | Suggested Colors |
|---|---|
| Roof | Brown, Gray, Black |
| Walls | White, Beige, Light Blue |
| Windows | Black, White |
| Door | Red, Blue, Green |
- Start by coloring the large areas first.
- Use light strokes to fill the area.
- Layer colors to add depth.
- Add details last, like window frames and door handles.
Use colored pencils, markers, or paints. Experiment with different tools to find what works best for you.
Common Mistakes
Drawing a house can seem easy, but beginners often make common mistakes. These errors can make your house look odd or unrealistic. This section will help you understand and avoid these mistakes.
Avoiding Proportion Errors
Proportion is key to drawing a house that looks right. Many beginners draw windows or doors too large or small. This can make the house look strange.
| Feature | Common Proportion Errors |
|---|---|
| Windows | Too large or too small |
| Doors | Not matching the size of windows |
| Roof | Too steep or too flat |
To avoid these errors:
- Measure the size of each feature.
- Keep the windows similar in size.
- Ensure the doors are in proportion with the windows.
- Draw the roof with a balanced slope.
Tips For Symmetry
Symmetry makes your house look balanced. An uneven house can look odd. Here are some tips:
- Start with a centerline. This helps keep both sides even.
- Measure each side equally. This ensures both sides are the same.
- Check your work often. Small errors can add up.
Remember, keeping proportion and symmetry in mind will help you draw a better house. Keep practicing to improve your skills.
Frequently Asked Questions
What Materials Do I Need To Draw A House?
You need a pencil, paper, eraser, ruler, and colored pencils.
How Do I Start Drawing A House?
Begin by sketching a simple rectangle for the house base.
How Can I Add Details To My House Drawing?
Add windows, doors, and a roof. Use a ruler for straight lines.
What Techniques Can Make My House Drawing Look Realistic?
Use shading and perspective. Draw light shadows and angles for depth.
Drawing a house can be fun and creative. Start with basic shapes. Add details like windows, doors, and a roof. Use light lines first, then make them darker. Practice often to improve your skills. Don’t worry about perfection. Enjoy the process and express your style.
Keep trying and you’ll see progress. Happy drawing!