

Drawing a cave can seem like a big task. But with some guidance, anyone can do it.
Learning how to draw a cave involves understanding basic shapes and textures. Whether you want to create a simple cave or a detailed one, the steps are easy to follow. This guide will help you break down the process into simple parts.
No artistic skills are required. By the end, you will have a cool cave drawing. Ready to get started? Let’s dive into the world of cave drawing!
Materials Needed
Drawing a cave can be fun and rewarding. You need the right materials to make the process easy and enjoyable. This section will guide you through the essential tools and paper types.
Drawing Tools
To start, you need basic drawing tools. Here is a list of items you should gather:
- Pencils: Use different grades for shading. HB for outlines, 2B for darker lines, and 4B for deep shadows.
- Erasers: A kneaded eraser is perfect for lightening areas, while a regular eraser removes mistakes.
- Sharpener: Keep your pencils sharp. It helps in adding fine details.
- Ruler: Useful for drawing straight edges and measuring.
- Blending Stumps: These help in creating smooth transitions and soft shadows.
Paper Selection
Choosing the right paper is crucial. Here are some options:
| Paper Type | Description | Best Use |
|---|---|---|
| Sketch Paper | Lightweight, good for practice. | Initial sketches and practice drawings. |
| Drawing Paper | Heavier, smooth texture. | Final drawings, better detail work. |
| Bristol Board | Very smooth, strong. | Professional-quality drawings, detailed work. |
Each paper type has its unique qualities. Sketch paper is great for rough drafts. Drawing paper offers a smooth surface for detailed work. Bristol board is perfect for professional-looking pieces.
Gathering the right materials before you start drawing a cave will make the process smoother and more enjoyable. Happy drawing!
Setting Up Your Workspace
Creating the perfect workspace is crucial for drawing a cave. A well-organized area helps you focus and enhances creativity. Pay attention to lighting and comfort to make the process enjoyable and productive.
Lighting
Proper lighting is essential. It prevents eye strain and ensures you see details clearly. Natural light is ideal. Position your desk near a window, if possible. If natural light isn’t an option, use a bright, white light lamp. Avoid yellow lights as they can cause shadows and distort colors.
| Type of Light | Benefits |
|---|---|
| Natural Light | Best for visibility and reducing eye strain |
| White Light Lamp | Provides consistent, shadow-free illumination |
Comfort
Comfort is key to maintaining focus. Choose a chair that supports your back. Your desk should be at a comfortable height. Keep essential tools within reach. This includes pencils, erasers, and paper. A clutter-free desk helps you stay organized.
Consider these tips for a comfortable workspace:
- Use an adjustable chair with good back support
- Ensure your desk height allows your arms to rest naturally
- Keep a water bottle nearby to stay hydrated
- Take short breaks to avoid fatigue
Setting up your workspace properly makes drawing a cave more enjoyable. Focus on lighting and comfort to improve your experience.
Basic Shapes And Structure
Learning how to draw a cave starts with understanding basic shapes and structure. Using simple shapes helps create a strong foundation. This makes it easier to add more details later.
Outline The Cave
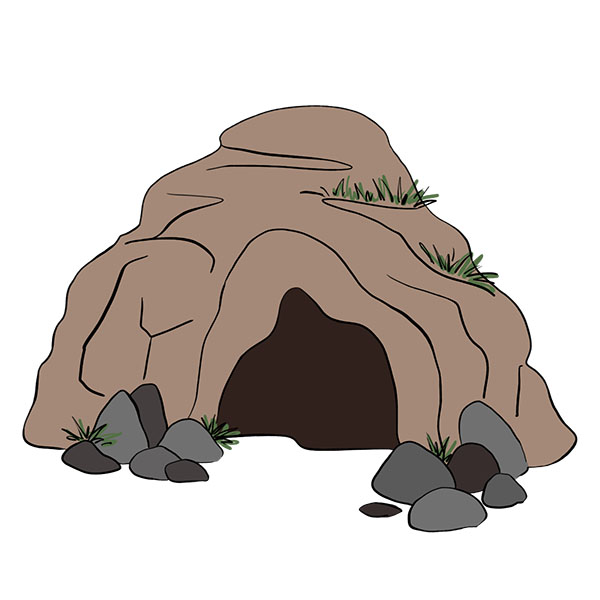
Begin with a simple outline. Draw a large oval or irregular shape. This will form the main body of your cave. Add a curved line at the bottom for the cave entrance. Make sure the entrance is wide enough to show depth later on. Use light pencil strokes for easy adjustments.
Add Depth
Now, add depth to your cave. Draw curved lines inside the cave entrance. These lines create an illusion of a 3D space. Vary the length and direction of these lines. This helps make the cave look more natural. Add shadows to the inner edges of the entrance. This gives the cave a sense of depth and darkness.
Next, add rocks and details around the entrance. Use small circles and irregular shapes to draw them. Place some rocks inside the cave for a realistic look. Erase any extra lines and refine your drawing. Now, your cave has a solid structure and depth. Ready for more details!
Adding Details
Adding details to your cave drawing can bring it to life. The subtle elements make a big difference. These details will add depth and realism. Focus on the textures and natural formations. This section will guide you through adding essential details.
Rocks And Textures
Start by adding rocks to your cave. Vary the size and shape of the rocks. Some can be round, others jagged. This variation makes the cave look natural. Use shading to create depth. Shadows under the rocks give a three-dimensional look. Add cracks and lines to the rocks. These small details make the rocks look more realistic. Use light strokes for a subtle effect.
Stalactites And Stalagmites
Stalactites hang from the cave ceiling. Draw them in different lengths and widths. They form slowly over time. Make them look uneven. This adds authenticity. Use shading to show where light hits them. Stalagmites rise from the cave floor. They are often below stalactites. Draw them in similar styles. Add shading and texture to match. These formations create a sense of age and mystery.
Incorporating Shadows And Light
Incorporating shadows and light can transform your cave drawing from a flat image to a realistic scene. Understanding where the light comes from and how shadows fall is crucial. This section will guide you through key techniques to make your cave drawing come alive.
Light Source
Identifying the light source is the first step in creating realistic shadows and highlights. The light source could be the sun, a torch, or even a glowing rock. Think about where the light hits first.
For example, if the light source is at the cave’s entrance, the areas closest to the entrance will be the brightest. The further you go into the cave, the darker it becomes.
Shading Techniques
Shading techniques help create depth and dimension. Here are some common methods:
- Hatching: Use parallel lines to create shadow.
- Cross-Hatching: Add another layer of lines at an angle to the first set.
- Stippling: Use dots to build up areas of shadow.
- Blending: Smoothly transition between light and dark areas.
To shade effectively, start by applying light pressure with your pencil. Gradually increase pressure for darker areas. Remember, the darkest areas are where the light does not reach.
A table can help compare these techniques:
| Technique | Description |
|---|---|
| Hatching | Parallel lines create shadow |
| Cross-Hatching | Two layers of lines at angles |
| Stippling | Dots build up shadows |
| Blending | Smooth transition between shades |
Final Touches
You’ve sketched your cave and added some shading. Now, it’s time for the final touches. This phase will bring your drawing to life. By refining the edges and enhancing details, your cave will look more realistic.
Refine Edges
Examine the outlines of your cave. Ensure they are smooth and clear. Use a sharper pencil for this step. Darken the edges to make them stand out. Pay attention to the entrance and any rock formations. This will give your cave a defined shape.
Enhance Details
Look closely at the interior and exterior of the cave. Add small rocks and pebbles around the entrance. This adds depth and realism. Use light strokes to create texture on the cave walls. Think about where shadows might fall. Add darker tones in these areas.
Next, add some organic elements. Draw moss or small plants near the cave’s entrance. These details make the cave look more natural. Use a fine-tipped pen for the smallest details. This ensures they are crisp and clear.
Finally, step back and review your drawing. Make any final adjustments. Ensure that the cave looks balanced. Now, your cave drawing is complete, with all the final touches in place.
Common Mistakes To Avoid
Drawing a cave can be challenging. Many artists make common mistakes that affect the final result. Avoiding these mistakes can make your cave drawing look more realistic and engaging. Let’s explore some key areas to focus on.
Overcrowding Details
One common mistake is adding too many details. This can make your drawing look cluttered. Keep your cave design simple. Focus on the main features. Too many tiny details can distract from the overall look.
Use broad strokes. Highlight major elements like the entrance or large rocks. This will make your cave more recognizable. Simplicity often leads to a stronger impression.
Ignoring Perspective
Perspective is crucial in creating depth. Many artists ignore this. A cave without perspective looks flat. Use lines that lead the viewer’s eye into the cave. This creates a sense of depth and space.
Consider how objects change size with distance. Larger objects are closer, smaller ones are farther. This simple trick adds realism to your drawing. Pay attention to the angles and placement of each element.
Remember, practicing these techniques will improve your cave drawings. Avoid these common mistakes to make your artwork stand out.
Frequently Asked Questions
How Do You Start Drawing A Cave?
Begin by sketching the cave’s outline. Use simple shapes. Add detail later.
What Materials Do You Need To Draw A Cave?
You need paper, a pencil, an eraser, and coloring tools. Optional: reference images.
How Can You Add Depth To Your Cave Drawing?
Use shading techniques. Darker areas for depth, lighter for highlights. Create a 3D effect.
What Are Common Mistakes When Drawing Caves?
Avoid flat designs. Missing details like textures or shadows. Overcomplicating the structure. Keep it simple.
Drawing a cave can be a fun and creative activity. With practice, your skills will improve. Start with basic shapes and add details slowly. Use shading to give depth to your drawing. Experiment with different textures. Don’t rush the process.
Enjoy the journey of creating art. Share your cave drawings with friends. Get feedback and keep practicing. Soon, you will feel more confident in your abilities. Remember, every artist starts as a beginner. Keep drawing, and never give up. Happy sketching!


