Drawing a burger is easier than you think. In just a few steps, you can create a delicious-looking sketch.
Imagine capturing the essence of everyone’s favorite fast food in your art. Whether you are a beginner or have some drawing experience, learning to draw a burger can be a fun and rewarding experience. With simple shapes and lines, you can create a tasty burger illustration that looks good enough to eat.
This guide will walk you through each step, ensuring your burger drawing is both realistic and enjoyable to create. Get your pencils ready, and let’s dive into the world of burger art!

Materials Needed
Before starting to draw a burger, gathering the right materials is crucial. Having the right tools and paper can make your drawing process smoother. Let’s dive into what you’ll need to create a fantastic burger illustration.
Required Tools
First, you’ll need pencils. A range from HB to 6B will work best. These pencils allow you to create light sketches and darker, more defined lines. Next, grab an eraser. A kneaded eraser is perfect for lightening lines without damaging the paper.
Colored pencils or markers are also essential. They will add vibrant colors to your drawing. A sharpener ensures your pencils are always ready. Lastly, consider using a ruler. It helps maintain proportions and straight lines for any background elements.
Recommended Paper
The type of paper you use can affect your drawing’s outcome. For pencil sketches, a smooth, thick paper is ideal. It withstands erasing and heavy shading. Look for paper with a weight of at least 80 lb.
If you plan to use markers, choose marker paper. This type of paper prevents colors from bleeding through. It also keeps the colors vibrant and crisp. Mixed media paper works well too. It handles both colored pencils and markers effectively.

Sketching The Bun
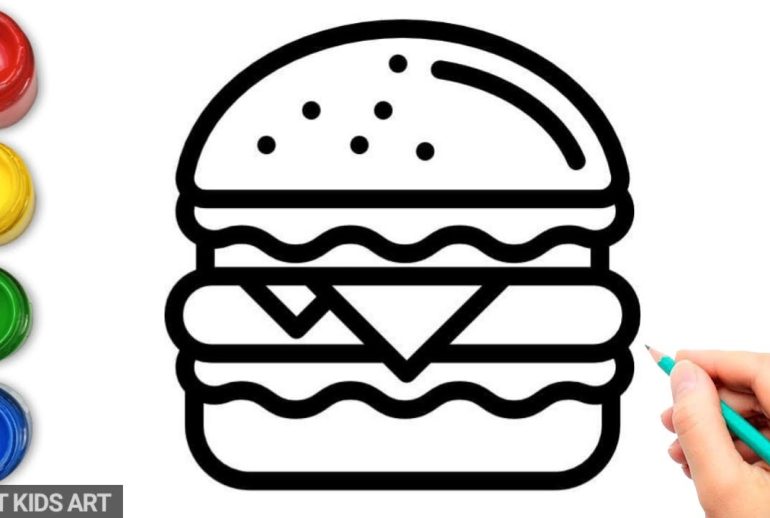
Sketching the bun is a fundamental step in drawing a burger. The bun gives the burger its signature look and feel. In this section, you will learn how to draw both the top and bottom parts of the bun. Let’s break it down into easy steps.
Drawing The Top Bun
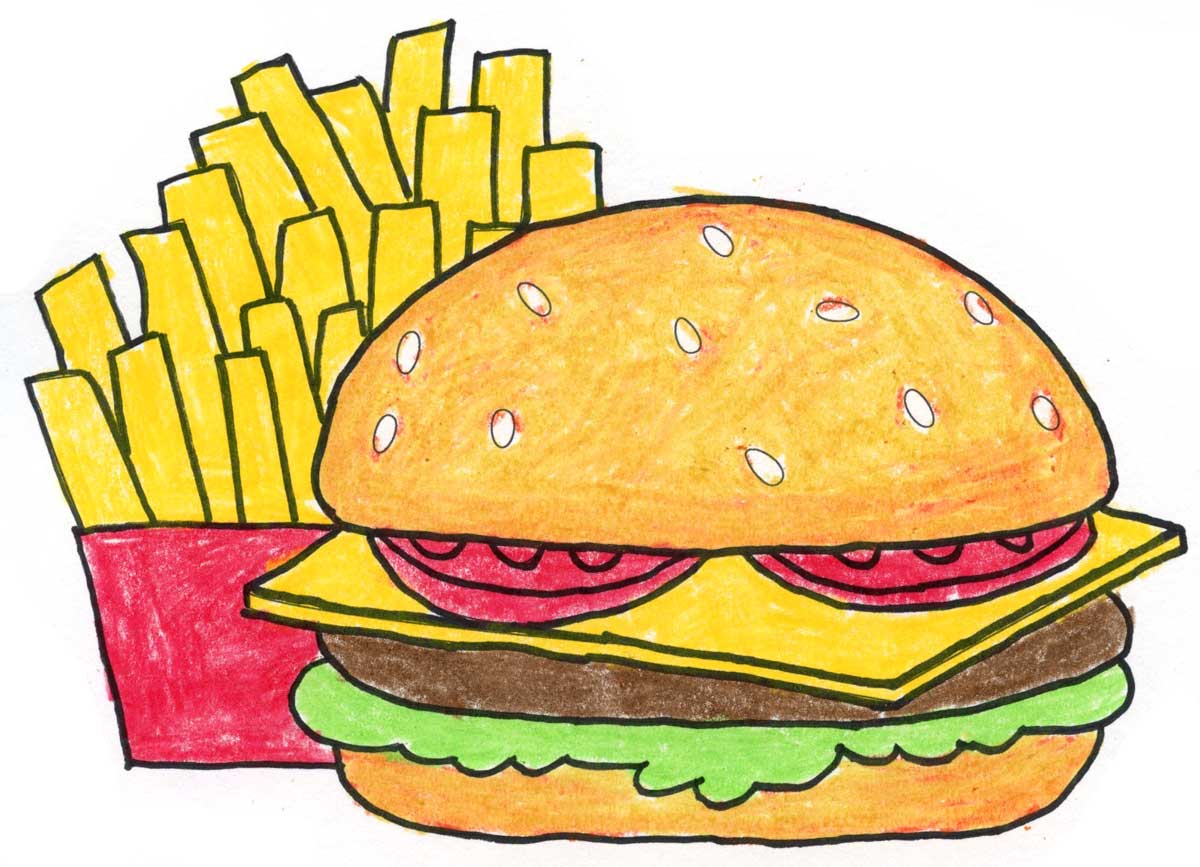
Start with a simple curved line. This line will form the top edge of the bun. Next, draw a slightly curved horizontal line beneath it. Connect the ends of these lines with smooth, curved lines. This shape should resemble a half-circle.
Add texture to the bun by sketching small, curved lines on its surface. These lines represent the fluffy texture of the bread. For extra detail, draw a few sesame seeds on top. Small ovals or circles work well for this.
Shaping The Bottom Bun
Begin with a horizontal line. This line forms the base of the bottom bun. Above this line, draw another curved line. This line should be less curved than the top bun.
Connect the ends of these lines with smooth, curved lines. This creates the bottom bun shape. Add texture with small, curved lines. This makes it look realistic. Your bottom bun is now complete and ready for further details.
Adding The Patty
Adding the patty is a crucial step in drawing a burger. The patty is the heart of the burger. It gives the burger its delicious look. Let’s dive into how to draw this essential part of the burger.
Creating Texture
To make the patty look realistic, add texture. Start with light, short lines. These lines will mimic the rough surface of a real patty. You can draw small curves and dots. These will represent the uneven surface and grill marks.
Use a mix of light and dark lines. This will give depth and a three-dimensional look. Make sure the lines are not too perfect. Real patties are not smooth. They have a lot of irregularities.
Positioning The Patty
Positioning the patty correctly is key. It should sit between the bottom bun and the toppings. Draw the patty as a slightly oval shape. This will make it look like it is being pressed down by the buns.
Ensure the patty is centered. It should not be too big or too small. The patty should match the size of the bun. This balance is important for a realistic look. It should also have a slight overlap with the bun. This makes it look juicy and thick.
| Step | Action |
|---|---|
| 1 | Draw light, short lines for texture |
| 2 | Add small curves and dots |
| 3 | Use a mix of light and dark lines |
| 4 | Position the patty between the buns |
| 5 | Ensure the patty is centered and matches bun size |
Follow these steps, and your burger patty will look delicious and real. Happy drawing!
Drawing Lettuce
Drawing lettuce can add an extra touch of realism to your burger illustration. Capturing the leafy texture and unique layering of lettuce is essential. Let’s break down the process to draw lettuce in a way that is easy and fun.
Leafy Details
Start by sketching the lettuce leaves. Use wavy lines to show the edges. Make sure the lines are not too uniform. This adds a natural look. Draw some leaves longer and some shorter. Vary the shapes for a realistic effect.
Layering The Lettuce
Add layers to your lettuce. Draw overlapping leaves. Start from the bottom and work up. This gives depth and volume. Make the leaves curl and fold over each other. It makes the lettuce look fresh and crispy. Use light and dark shades to show depth.
Adding Cheese
Adding cheese to your burger drawing adds a delicious touch. The cheese layer is a crucial detail to make your burger look mouth-watering. Let’s explore how to add cheese with a melting effect and perfect placement.
Melting Effect
The melting effect makes the cheese look tasty. Start by drawing the cheese slice on top of the patty. Ensure the edges slightly droop over the burger. This gives the impression of melted cheese. To enhance the melting effect, add a few small cheese drips.
Use curved lines for these drips. This will help show the flow of melted cheese. Make sure these lines are smooth. This will create a realistic look. For extra detail, add light shading around the cheese edges.
Cheese Placement
Proper cheese placement is key. The cheese should sit neatly on the patty. Draw a square or rectangular slice slightly larger than the burger patty. Ensure the corners extend beyond the patty’s edges.
To create a layered look, draw the cheese slice slightly tilted. This adds depth to your drawing. You can also draw a second cheese slice if you want a cheesier burger.
Remember to keep the cheese in proportion to the rest of the burger. Too large or too small cheese can make your burger look odd. Consistency is crucial.
For a final touch, add a few small holes in the cheese. This gives it a realistic texture. Use light shading to highlight these holes.
| Step | Action |
|---|---|
| 1 | Draw the cheese slice on top of the patty. |
| 2 | Add slight droops at the edges for a melted effect. |
| 3 | Draw small drips of cheese. |
| 4 | Ensure the cheese sits neatly on the patty. |
| 5 | Draw the cheese slightly tilted for depth. |
| 6 | Add small holes and light shading for texture. |
Sketching Tomato Slices
Sketching tomato slices adds a touch of realism to your burger drawing. These slices give your burger a fresh, delicious look. Follow these steps to draw perfect tomato slices.
Circular Shapes
Start by drawing two overlapping circles. These will be the base of your tomato slices. Keep the circles slightly irregular. Real tomatoes aren’t perfect circles. Use light pencil strokes for easy adjustments.
Adding Seeds
Next, draw small dots inside the circles. These dots represent the tomato seeds. Space them evenly to create a natural look. Don’t overfill the area. Real tomato slices show only a few seeds. Add small curved lines around the seeds. This adds texture to your tomato slices.
Final Touches
Adding the final touches to your burger drawing can make it pop. This is the stage where your artwork truly comes to life. Let’s dive into the final steps to perfect your burger drawing.
Outlining
Outlining your burger drawing gives it definition. Use a fine-tip pen or marker. Trace over your pencil lines carefully. Make sure to outline each part of the burger. This includes the bun, patty, cheese, lettuce, and other toppings. The outline should be smooth and consistent. Avoid making the lines too thick. Thin lines work best for a clean look.
Coloring Techniques
Coloring brings your burger drawing to life. Use colored pencils, markers, or digital tools. Start with the bun. Use light brown for the top and bottom buns. Add darker brown for shading. For the patty, use dark brown. Add texture with small, uneven strokes. Cheese should be a bright yellow. Lettuce needs light and dark green shades. Tomatoes are red with a hint of orange. Layering colors adds depth. Blend where necessary for smooth transitions.
Frequently Asked Questions
What Tools Do I Need To Draw A Burger?
You need a pencil, eraser, paper, and colored pencils or markers.
How Do I Start Drawing A Burger?
Start by drawing two horizontal lines for the bun. Then, add the patty and toppings.
How Do I Make My Burger Drawing Realistic?
Use shading and color to add depth. Pay attention to the textures of each ingredient.
Can Beginners Draw A Burger Easily?
Yes, beginners can draw a burger by following simple step-by-step instructions and practicing.
Conclusion
Drawing a burger is fun and easy. Follow the steps in the guide. Practice often to improve your skills. Use your imagination to add details. Share your artwork with friends. They will enjoy seeing your progress. Keep experimenting with different styles.
Drawing can be a relaxing hobby. Enjoy the process and have fun!

