

Drawing a boat can seem tricky at first. But with a few steps, it’s simple.
Boats are fascinating and drawing one can be a fun challenge. Whether you are a beginner or looking to improve your skills, learning to draw a boat can be both rewarding and enjoyable. This guide will break down the process into easy-to-follow steps.
You don’t need to be an artist to draw a boat. All you need is some patience and practice. So grab your pencil and paper, and let’s get started on this creative journey. Drawing a boat is not just about lines and shapes; it’s about capturing the essence of the sea.
Materials Needed
Before you start drawing a boat, gather the right materials. The right tools make the drawing process easier and more enjoyable. Here, we will cover the essential items you need.
Drawing Paper
Choose good quality drawing paper. A smooth surface works best for clean lines. Avoid thin paper that wrinkles easily. You can use sketch pads or loose sheets.
Pencils And Erasers
You will need pencils of different grades. A soft pencil, like 2B, is good for sketching. A harder pencil, like HB, is better for fine details. Keep a sharpener handy. Also, use a good eraser. A soft eraser helps to remove mistakes without damaging the paper.
Rulers And Compasses
A ruler is essential for straight lines. It helps in drawing the boat’s hull and other parts. A compass is useful for drawing circles, like the boat’s portholes. These tools help maintain accuracy and symmetry in your drawing.
Setting Up Your Workspace
Create a clean, quiet space with good lighting. Arrange your drawing tools within easy reach. This setup helps focus on drawing a boat.
Setting up your workspace is crucial when learning how to draw a boat. A well-organized space can boost creativity and focus. Let’s explore how to create an ideal drawing environment.
Choosing A Quiet Space
Find a quiet spot where you can concentrate. Avoid areas with heavy foot traffic. Noise and distractions can break your focus. A quiet room helps you stay immersed in your drawing.
Proper Lighting
Good lighting is essential. Natural light works best, so set up near a window. If that’s not possible, use a bright lamp. Avoid dim or overly harsh lights. They can strain your eyes and affect your drawing quality.
Organizing Materials
Keep your materials within reach. Arrange your pencils, erasers, and paper neatly. A clutter-free area helps you work efficiently. Use containers or drawers to store supplies. An organized space saves time and reduces stress.
Basic Shapes And Proportions
Drawing a boat starts with understanding basic shapes and proportions. A boat’s structure includes several key components like the hull, deck, and mast. Knowing how to sketch these will make your drawing look realistic.
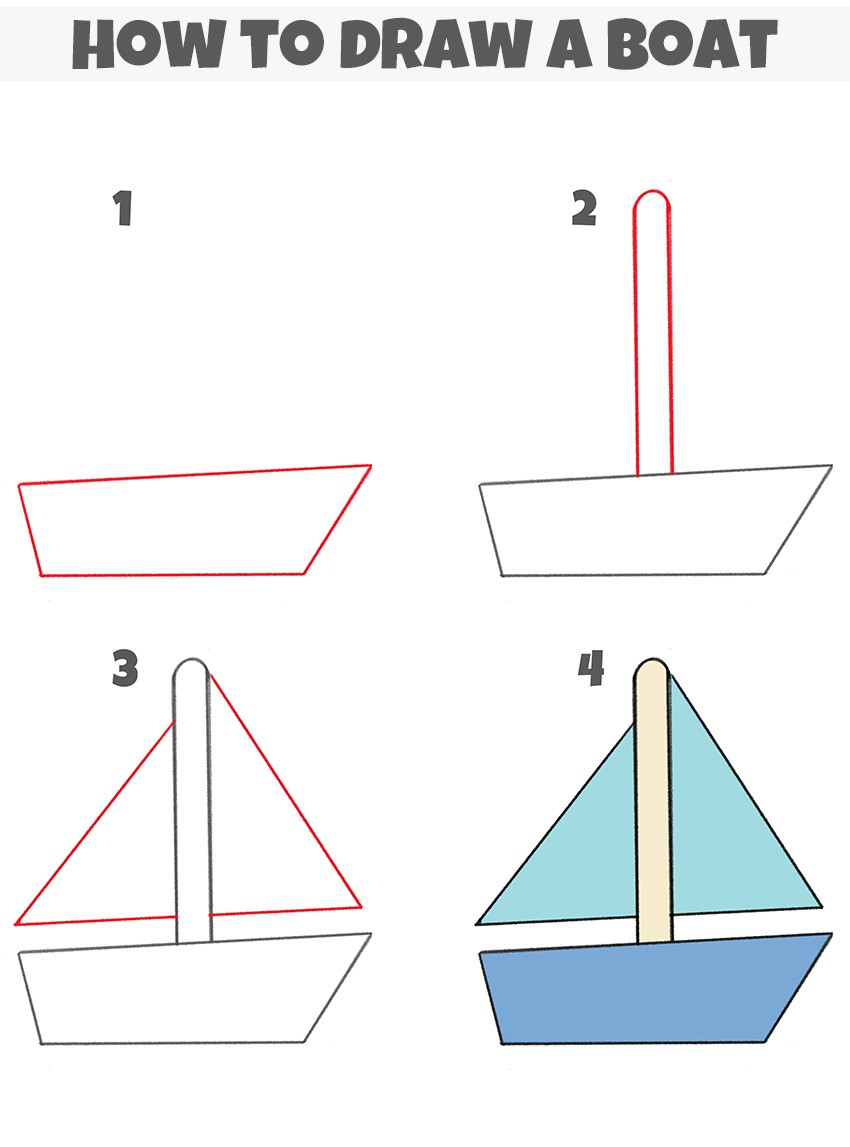
Sketching The Hull
The hull is the main body of the boat. Start by drawing a long, curved line for the bottom. It should be slightly curved to show the boat’s shape. Then, add two shorter lines at the ends to form the bow and stern. Connect these lines with another curved line on top. This will create the basic outline of the hull.
Drawing The Deck
Next, focus on the deck. Draw a horizontal line above the hull. This line should follow the curve of the hull. Make sure it is parallel to the top line of the hull. This will create a balanced look. Add small vertical lines to show the sides of the boat. These lines should connect the deck to the hull.
Adding The Mast
The mast is a tall, vertical pole that holds the sails. Start by drawing a straight line from the deck to above the boat. The mast should be centered on the deck. Add a small rectangle at the base to show where it attaches. Draw another thin, horizontal line near the top of the mast for the boom. The boom helps support the sail.
Detailing The Boat
After sketching the basic shape of your boat, it’s time to add details. Detailing brings life to your drawing and makes it more realistic. This part of the drawing process is fun and creative. Pay attention to each part to make your boat stand out.
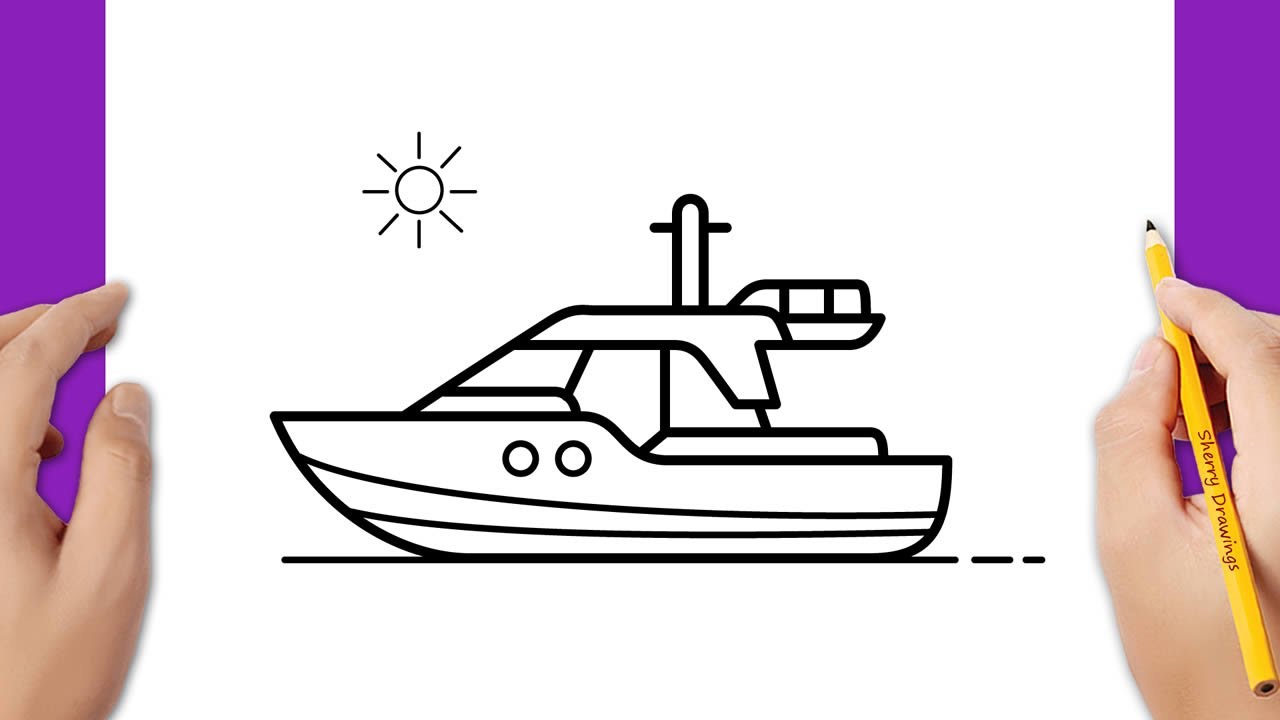
Windows And Doors
First, draw the windows and doors on your boat. These elements give your boat character and purpose. Use simple rectangles and squares for windows. Add small lines to show window panes. For doors, draw larger rectangles. Add a small handle for a realistic touch.
Consider the placement of these elements. Windows are often on the sides. Doors can be at the back or center. This logical placement adds realism to your drawing.
Adding The Sails
Sails are essential for a classic boat look. Draw large triangles for the sails. Attach them to the mast, which is a tall pole in the center of the boat. Ensure the sails look full and curved. This shows they catch the wind.
Use curved lines to show the sail’s fabric. Draw extra lines from the sail to the boat. These lines represent ropes holding the sail. This detail adds depth to your drawing.
Drawing The Rigging
The rigging is the system of ropes and wires on a boat. It holds the sails and mast in place. Draw lines from the top of the mast to the sides of the boat. These lines are the rigging cables.
Add small circles where the lines meet the boat. These circles represent pulleys. Draw a few more lines crisscrossing the mast. This network of lines makes the boat look functional and realistic.
Take your time with the rigging. It can be complex but adds a lot of detail. The more you add, the more realistic your boat looks.
Shading And Texturing
Shading and texturing are essential steps to bring your boat drawing to life. These techniques add realism, making your boat look three-dimensional and more detailed. Let’s explore how to create depth, add shadows, and apply texture techniques to your boat drawing.
Creating Depth
To create depth, use light and dark values. Start by identifying the light source. This will guide where shadows and highlights fall. Shade the parts of the boat that are farthest from the light source with darker tones. The areas closer to the light should be lighter.
Use a gradient effect for a smooth transition between light and dark areas. Apply more pressure with your pencil for darker shades and less for lighter ones. This technique will give your boat a three-dimensional look.
Adding Shadows
Shadows are crucial for realism. They show how the boat interacts with its surroundings. Draw shadows underneath and beside the boat, reflecting the shape of the boat in the water. This makes the boat look like it is actually floating.
Use soft, short strokes to create natural-looking shadows. Blend the edges of the shadows to make them appear more realistic. Consider the direction of the light source while placing shadows. Consistent shadow placement enhances the overall appearance.
Texture Techniques
Textures can add character to your boat drawing. Wood grain, metal rivets, and water ripples are some textures to consider. For wood grain, use a series of parallel lines. Vary the pressure and spacing to create a natural look. You can also add small knots and imperfections.
For metal parts, use smooth shading and add small highlights. This makes them look shiny. Water ripples can be created with wavy lines around the boat. These lines should be light and irregular to mimic the natural movement of water.
| Texture | Technique |
|---|---|
| Wood Grain | Parallel lines, varied pressure |
| Metal | Smooth shading, small highlights |
| Water Ripples | Light, wavy lines |
Experiment with different shading and texturing techniques. This will help you find what works best for your drawing style. Remember, practice makes perfect.
Final Touches
You’ve sketched your boat and added the main details. Now it’s time to refine your drawing. These final touches will bring your boat to life. Focus on refining lines, erasing guidelines, and highlighting details. Each step is important to make your boat look polished and complete.
Refining Lines
First, go over the main lines of your boat. Use a sharp pencil or pen. Make sure the lines are smooth and clear. This will make the shape of your boat stand out. Pay attention to any wavy or uneven lines. Correct these to make your drawing look neat.
Erasing Guidelines
Next, remove any guidelines you used. These lines helped you draw the basic shape of your boat. Now they are not needed. Use a soft eraser to avoid damaging the paper. Be gentle and erase carefully. This will make your drawing look cleaner and more professional.
Highlighting Details
The final step is adding small details. These make your boat look realistic. Add texture to the wood, show the ropes, and add small waves around the boat. Use a light hand to keep these details subtle. You can also add shading to give your boat depth. This will make your drawing more dynamic and interesting.
Common Mistakes To Avoid
Drawing a boat can be a fun activity, but it’s easy to make mistakes. Knowing common errors can help you improve your drawing skills. Here are some pitfalls to avoid.
Incorrect Proportions
One of the most common mistakes is incorrect proportions. The boat’s body, mast, and sails need to be in proportion. If the mast is too tall or the boat too long, it will look odd.
- Use a reference photo to guide your drawing.
- Measure and compare different parts of the boat.
- Sketch lightly first to adjust proportions easily.
Overcrowding Details
Another mistake is overcrowding details. Adding too many small details can make the drawing look messy. Focus on the main features first.
| Do | Don’t |
|---|---|
| Include key details like the hull and sails. | Overwhelm with tiny, unnecessary elements. |
| Keep lines clean and simple. | Use too many intricate patterns. |
Ignoring Perspective
Ignoring perspective is a common error. Perspective gives depth to your drawing and makes it more realistic. Without it, the boat can look flat and lifeless.
- Understand vanishing points and how they work.
- Draw lines that converge at a point on the horizon.
- Practice with simple shapes to get better at perspective.
By avoiding these mistakes, your boat drawings will improve significantly. Keep practicing and you’ll see progress over time.
Frequently Asked Questions
What Materials Do I Need To Draw A Boat?
You need paper, pencil, eraser, and coloring tools like markers or crayons.
How Do I Start Drawing A Boat?
Begin by sketching the boat’s basic shape, usually a curved bottom and a straight top.
What Are The Key Features Of A Boat Drawing?
Include the hull, deck, mast, and sails. Details like windows and flags add realism.
How Can I Add Details To My Boat Drawing?
Use small lines for wood texture, waves for water, and shading for depth and shadows.
Drawing a boat can be fun and relaxing. Follow the steps carefully. Practice often to improve your skills. Don’t rush the process. Enjoy each part of the drawing journey. Use simple shapes to start. Add details as you go along.
Experiment with different styles. Share your artwork with friends. They will appreciate your effort. Keep learning and trying new techniques. Soon, you will create amazing boat drawings. Happy drawing!


