

Drawing a spiral is easier than you think. You can learn it quickly.
Spirals are fascinating shapes that appear in nature and art. They can be seen in shells, plants, and even galaxies. Knowing how to draw a spiral can be a fun and creative skill to have. Whether you are an artist, a student, or just someone who likes to doodle, understanding the basics of drawing a spiral can open up new ways to express yourself.
This guide will show you simple steps to create different types of spirals. Get ready to explore this intriguing shape and add a unique touch to your drawings. Let’s start this creative journey together!
Introduction To Spirals
Spirals are fascinating shapes found in nature and art. They captivate our imagination with their hypnotic curves. Learning to draw spirals can be both fun and rewarding. Let’s start by understanding what spirals are and their different types.
Definition And Types
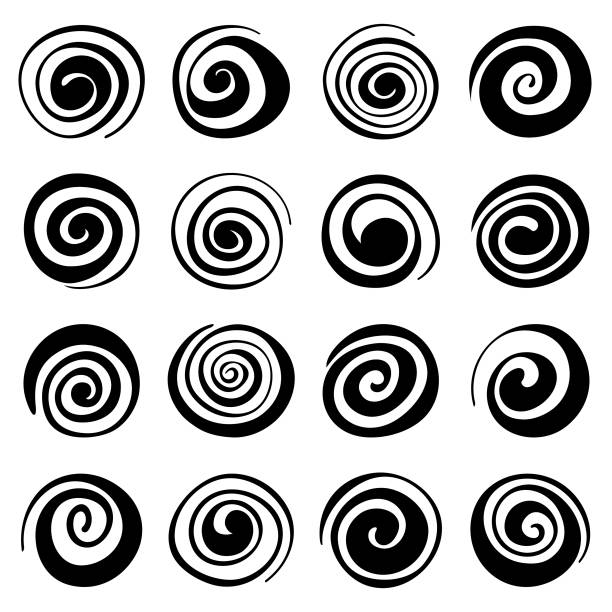
A spiral is a curve that starts from a central point and moves outward. It can be tight or loose. Spirals can be classified into various types. The most common ones are Archimedean, logarithmic, and Fibonacci spirals.
Archimedean spirals have equal distances between each turn. Logarithmic spirals grow wider with each turn. Fibonacci spirals follow the famous Fibonacci sequence. Each type has its unique beauty.
Uses And Examples
Spirals are everywhere. They appear in nature, like in shells and galaxies. Artists use spirals to create dynamic compositions. Architects use them to design stunning structures.
In mathematics, spirals help explain patterns and growth. They also appear in everyday objects, like springs and coils. Understanding spirals can enhance your drawing skills and appreciation of nature.
Materials Needed
Drawing essentials
These are the everyday tools we recommend for any drawing tutorial on this site, picked for reliability and beginner-friendly pricing.


As an Amazon Associate, drawingseasy.com earns from qualifying purchases. Prices and availability are subject to change.
Creating a beautiful spiral drawing begins with having the right materials. This section will guide you on the essential materials you need to start your spiral drawing journey.
Drawing Tools
To draw a spiral, you need a few basic tools. These tools help you achieve precision and clarity in your drawing. Here is a list of the essential drawing tools:
- Pencil: A standard HB pencil is a good choice. It offers a balance between hard and soft graphite.
- Eraser: A kneaded eraser works best. It can be shaped to erase small details.
- Compass: A good compass helps you draw perfect circles. It is crucial for creating a spiral.
- Ruler: A ruler helps you measure and draw straight lines. It ensures accuracy in your drawing.
Paper And Surface
The type of paper and drawing surface you use also impacts your drawing. Here are some recommendations:
- Paper: Choose high-quality drawing paper. Look for paper with a smooth texture. It should be thick enough to handle erasing without tearing.
- Surface: Use a clean, flat surface. A drawing board or a sturdy table works well. It should be large enough to comfortably hold your paper and tools.
Having the right materials makes the drawing process easier. It helps you create a clean and precise spiral.
Basic Techniques
Learning to draw a spiral can be a fun and rewarding experience. By mastering a few basic techniques, you can create beautiful spirals with ease. This section will cover essential aspects like hand position and drawing circles. These techniques will help you get started on your spiral drawing journey.
Hand Position
Proper hand position is key to drawing smooth spirals. Hold your pencil comfortably, with a firm grip. Your fingers should be relaxed to allow smooth movements. Rest your wrist lightly on the paper to guide your hand.
For better control, keep your elbow slightly bent. This allows more flexibility in your movements. Avoid gripping the pencil too tightly. A relaxed hand will help you draw smoother lines.
Drawing Circles
Drawing circles is an important step in creating spirals. Start by drawing a small circle in the center of your paper. Use light, even strokes to keep the circle smooth.
Next, draw a larger circle around the first one. Keep the distance between circles even. This helps maintain the spiral’s shape. Repeat this process, gradually increasing the size of each circle.
Remember to keep your hand steady. Consistent pressure will create even lines. Practice drawing circles often to improve your skills.
Here is a simple table to summarize the steps:
| Step | Action |
|---|---|
| 1 | Draw a small circle. |
| 2 | Draw a larger circle around the first one. |
| 3 | Repeat, increasing the size of each circle. |
By following these basic techniques, you can draw beautiful spirals. Practice regularly to improve your skills and create intricate designs.

Drawing A Simple Spiral
Drawing a simple spiral can be fun and relaxing. Spirals appear in nature and art. Learning to draw a spiral is easy. Let’s start with the basics.
Starting Point
First, find a starting point. Begin with a small dot in the center of your paper. This dot is the center of your spiral. Use a pencil for easy changes.
Next, draw a small circle around the dot. This circle is the first loop of your spiral. Make it as smooth as possible. Practice helps improve your skills.
Expanding The Spiral
Now, expand the spiral. Continue drawing the circle, but slowly move outward. Keep the lines close and even. This creates a smooth spiral shape.
As you draw, think of the spiral as a growing pattern. Each loop gets bigger. Maintain a steady hand for best results. Don’t rush. Enjoy the process.
With practice, your spirals will improve. Use different tools and colors for variety. Have fun and explore your creativity!
Adding Details
Once you have drawn the basic outline of your spiral, it’s time to add details. These details will give your spiral character and depth. They can transform a simple shape into a captivating piece of art. Let’s explore how to enhance your spiral with thickness, curves, shading, and texture.
Thickness And Curves
Varying the thickness of your lines can create a dynamic look. Thicker lines can be used for the outer edges of the spiral. Thinner lines work well for the inner parts. This contrast adds interest and guides the viewer’s eye through the spiral.
Next, focus on the curves. Smooth and gentle curves can give a calming effect. Sharp and tight curves can add excitement and tension. Play around with different types of curves to see what suits your style best.
Shading And Texture
Shading adds depth and dimension to your spiral. Use a light source in your drawing. Decide where the light is coming from. Shade the opposite side of this light source. This will create a sense of three-dimensionality.
Texture can add realism or a unique touch. Use short, quick strokes for a rough texture. Longer, smoother strokes can create a sleek finish. Experiment with different tools like pencils, pens, or even digital brushes. Each tool can offer different textures and effects.
By focusing on these details, you can turn a basic spiral into a piece of art. Whether you prefer a simple or complex design, adding these elements will enhance your drawing. Happy drawing!
Common Mistakes
Drawing a spiral can be fun and relaxing. But beginners often make mistakes. These errors can be frustrating. Understanding common mistakes can help you improve.
Uneven Spirals
One common mistake is creating uneven spirals. Spirals should have consistent spacing. But many end up with sections that are too close or too far apart. This happens when you don’t maintain steady hand movement. To avoid this, practice slow and controlled drawing. Use light pencil marks first. This way, you can correct any uneven parts before finalizing.
Overlapping Lines
Another issue is overlapping lines. This happens when the spiral loops cross each other. It ruins the smooth flow of the spiral. To prevent overlapping, keep track of your lines. Always check the distance between loops. Start with a simple spiral and gradually add more loops. This way, you can maintain a clear space between each line.
| Common Mistake | Description | Solution |
|---|---|---|
| Uneven Spirals | Inconsistent spacing between loops | Practice steady hand movement |
| Overlapping Lines | Loops crossing each other | Check distance between loops |
Remember, practice makes perfect. Keep drawing and you will improve. Happy spiraling!
Advanced Techniques
Advanced techniques can take your spiral drawing to the next level. By incorporating depth and color, your spirals will stand out. These techniques add a new dimension to your art. Let’s explore two key methods: creating depth and using color.
Creating Depth
To create depth, start by varying line thickness. Thicker lines appear closer, thinner lines seem distant. Use this trick to give your spiral a 3D effect. Another way to add depth is shading. Shade parts of your spiral to create shadows. This makes your drawing look more realistic. Blend the shaded areas for a smooth transition.
You can also use perspective. Draw converging lines to make parts of the spiral appear farther away. This technique enhances the illusion of depth. Try combining these methods for a more dynamic effect.
Using Color
Color can transform your spiral. Start with a simple color scheme. Choose two or three colors that complement each other. Gradually change the shades to create a gradient effect. This makes your spiral vibrant and eye-catching.
Experiment with contrasting colors. Use bold colors for the foreground and softer hues for the background. This creates a striking visual difference. You can also use color to highlight specific parts of the spiral. This draws attention to certain areas.
Blending colors is another useful technique. Use colored pencils or digital tools to blend colors smoothly. This adds depth and richness to your spiral. Remember to keep your strokes light and even.
Practice Tips
Drawing spirals can be challenging at first. Practice is key to improvement. Follow these tips to enhance your spiral drawing skills.
Daily Exercises
Consistency is crucial. Aim to draw spirals every day. This helps build muscle memory and improves your technique. Here are some daily exercises:
- Draw small spirals. Start with the center and gradually expand.
- Practice large spirals. Focus on maintaining even spacing.
- Vary the shapes. Try tight and loose spirals.
Use a timer. Spend 10 minutes daily on these exercises. This helps in building a routine and ensures regular practice.
Learning From Examples
Study examples to understand different styles. Observing others can be very helpful. Here’s how to learn from examples:
- Search for spiral drawings online. Save images that you find interesting.
- Analyze the structure. Notice how the lines curve and maintain spacing.
- Attempt to replicate. Try to draw the same spirals in your sketchbook.
Compare your drawings with the examples. Identify areas for improvement. This method helps in understanding the intricacies of spiral drawing.
Remember, progress takes time. Be patient and keep practicing.
Frequently Asked Questions
What Tools Do I Need To Draw A Spiral?
To draw a spiral, you need a pencil, paper, and a compass. Optionally, you can use a ruler for precision.
Can I Draw A Spiral Without A Compass?
Yes, you can draw a spiral freehand. Start with a small circle and gradually expand outward in a smooth motion.
What Types Of Spirals Can I Draw?
You can draw different types of spirals, such as Archimedean, logarithmic, and Fibonacci spirals. Each has unique properties and appearance.
How Do I Make A Perfect Spiral?
To make a perfect spiral, use a compass and draw circles gradually increasing in size. Connect the circles smoothly.
Drawing a spiral can be both fun and relaxing. Follow the steps outlined above to create beautiful spirals. Practice makes perfect, so keep drawing. Experiment with different sizes and styles. Share your spirals with friends and family. They will appreciate your creativity.
Remember to enjoy the process, not just the result. Happy drawing!


