Drawing a gun can seem complex, but with simple steps, anyone can learn. The key is understanding the basics and practicing regularly.
Whether you’re an aspiring artist or just curious, learning to draw a gun can be fun and rewarding. This blog will guide you through each step, making the process easy and clear. We will cover basic shapes, shading techniques, and tips to bring your drawing to life.
Even if you are a beginner, these instructions will help you create a realistic gun drawing. So grab your pencil and paper, and let’s get started on your artistic journey!
Materials Needed
To draw a gun, you need the right materials. These tools will help you create a detailed and accurate drawing. Let’s explore what you need to get started.
Basic Drawing Supplies
First, gather your basic drawing supplies. These include:
- Pencils: Use different grades for various shades and details.
- Eraser: A good eraser helps correct mistakes.
- Paper: Quality drawing paper enhances your artwork.
- Ruler: Straight lines are essential for a gun’s structure.
- Sharpener: Keep your pencils sharp for fine details.
Reference Images
Reference images are crucial for drawing a gun. They provide a clear visual guide. Follow these steps to use reference images effectively:
- Find Clear Images: Look for high-resolution pictures of guns.
- Choose Different Angles: Get images from various perspectives.
- Study Details: Note the gun’s shape, parts, and textures.
With these materials, you are ready to begin drawing. Having the right supplies and reference images makes the process smoother. Happy drawing!

Sketching The Outline
Drawing a gun involves various steps, but detailing is crucial. This stage brings your drawing to life. It adds depth, character, and realism. Let’s break down two important parts: the grip and the trigger.
Creating The Grip
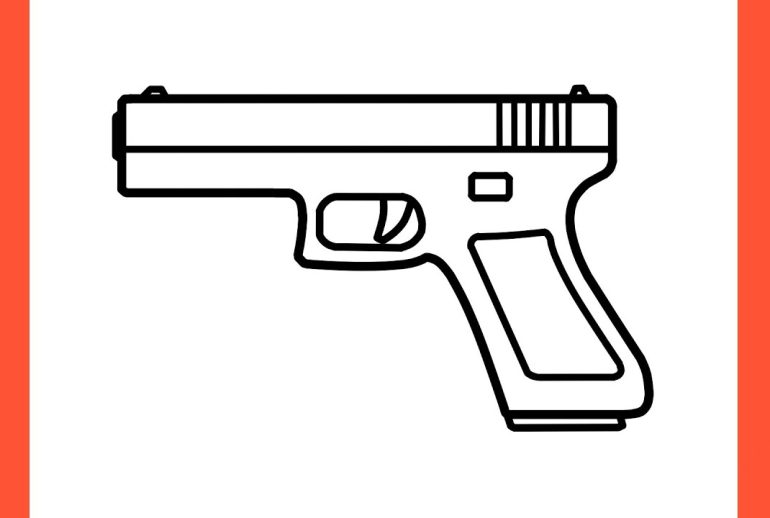
The grip is where the hand holds the gun. It’s an essential part of the drawing. First, draw a rectangular shape at the bottom of the gun’s body. Ensure it’s slightly curved for a realistic look.
Next, add texture to the grip. Use small, diagonal lines. These lines mimic the textured surface of a real gun grip. Additionally, include screws or rivets. This adds more detail and realism.
Pro Tip: Observe real gun grips for inspiration. Notice the patterns and textures. Replicate them in your drawing.
Adding The Trigger
The trigger is another vital part of a gun. Start by drawing a small semi-circle near the bottom of the gun’s body. Ensure the curve faces downwards.
Inside the semi-circle, draw a small oval. This represents the trigger. Make sure it is proportional to the gun’s body. Add a line connecting the trigger to the gun. This line represents the trigger guard.
Details Matter: Add tiny details, like screws around the trigger area. This enhances the drawing’s realism.
Remember: Keep your lines clean and precise. This ensures a neat and professional look.
| Step | Description |
|---|---|
| Draw Grip | Rectangular shape, slightly curved |
| Add Texture | Small, diagonal lines for grip texture |
| Draw Trigger | Semi-circle, downward curve |
| Add Trigger Guard | Line connecting trigger to gun |
Final Tip: Regular practice enhances your skills. Keep drawing and refining your technique.
Detailing The Gun
Shading and texturing are vital to bringing your gun drawing to life. These techniques add depth, making the gun look more realistic. Let’s dive into shading and texturing to enhance your drawing skills.
Applying Light And Shadow
Understanding light and shadow is key to realistic shading.
Steps to apply light and shadow:
- Identify the light source.
- Shade the areas opposite the light source.
- Use a range of pencil pressures for different shadow depths.
Light areas should remain almost untouched. Use light pencil strokes for mid-tones. Darken the shadow areas significantly. This contrast adds realism.
Pro Tip: Use a blending stump or tissue to smooth transitions between light and dark areas.
Creating Metal Texture
Metal texture needs special attention to detail.
Steps to create a realistic metal texture:
- Start with a smooth base layer.
- Add fine, parallel lines to mimic metal grain.
- Use an eraser to add highlights and reflections.
The highlights should be sharp and bright. This gives the metal a shiny look. Use a small, hard eraser for fine details. The reflections should follow the metal’s shape.
Pro Tip: Observe real metal objects to understand how light interacts with their surface.
Shading And Texturing
Once you have sketched the basic outline of your gun, it’s time for the final touches. This step will bring your drawing to life and make it look more realistic. Focus on refining edges and adding highlights to give depth and dimension to your artwork.
Refining Edges
Go over the outlines of your gun with a sharper pencil. Make sure the lines are clean and precise. Pay attention to the curves and angles. Smooth out any rough lines and fix any mistakes.
Check all parts of the gun, including the barrel, handle, and trigger. Ensure the edges are well-defined. This will make your drawing look polished and professional.
Adding Highlights
Now, add highlights to your drawing to enhance its realism. Use a white pencil or an eraser to create light reflections on the gun’s surface. Focus on areas that would naturally catch light.
Think about the light source. Add highlights on the barrel, handle, and metallic parts. This will give your gun a shiny and three-dimensional look.
Remember, small details make a big difference. Take your time and add highlights carefully.
Final Touches
Add shading and texture to your drawing for realism. Focus on details like screws and grips to enhance authenticity.
Drawing a gun can be challenging. Many beginners make common mistakes. These errors can affect the final drawing. Understanding these mistakes can help improve your skills. Here are some common mistakes:
Proportional Errors
Proportions are crucial in drawing. A gun with wrong proportions looks unrealistic. Beginners often draw the barrel too long. Or the handle too short. This makes the gun look odd. Keep an eye on the measurements. Compare parts of the gun to each other. This helps maintain correct proportions. Using a reference image can be helpful.
Overcomplicating Details
Details are important in drawing. But overcomplicating them can ruin your drawing. Beginners often add too many lines. This makes the gun look messy. Focus on the main shapes first. Add details later. Simplify complex parts. Use clean, clear lines. This makes the gun look neat. Avoid unnecessary details. They can distract from the overall drawing. “`
Frequently Asked Questions
What Materials Do I Need To Draw A Gun?
You need paper, pencil, eraser, and coloring tools. Simple supplies.
How Do I Start Drawing A Gun?
Begin with basic shapes. Sketch the barrel and handle first.
Can I Draw A Gun Without Any Art Experience?
Yes, you can. Follow step-by-step tutorials. Practice makes perfect.
Why Is Shading Important In Gun Drawings?
Shading adds depth. Makes your drawing look realistic and three-dimensional.
Conclusion
Drawing a gun can seem tough at first. With practice, it becomes easier. Follow the steps carefully. Use basic shapes to start. Gradually add details. Remember to be patient and enjoy the process. Your skills will improve over time. Keep practicing and stay creative.
Happy drawing!

