Ice cream drawings can be a fun and creative activity. Bold designs make them even more exciting.
Are you looking to add a splash of color and creativity to your art? Ice cream drawing ideas are a perfect way to start. Bold designs can make your drawings pop and capture attention. Whether you are a beginner or an experienced artist, trying out new ideas can help improve your skills.
From vibrant cones to imaginative sundaes, the possibilities are endless. In this blog post, we will explore some exciting and bold ice cream drawing ideas that will inspire you. Get ready to bring your favorite frozen treats to life on paper!
Choosing Your Ice Cream Style
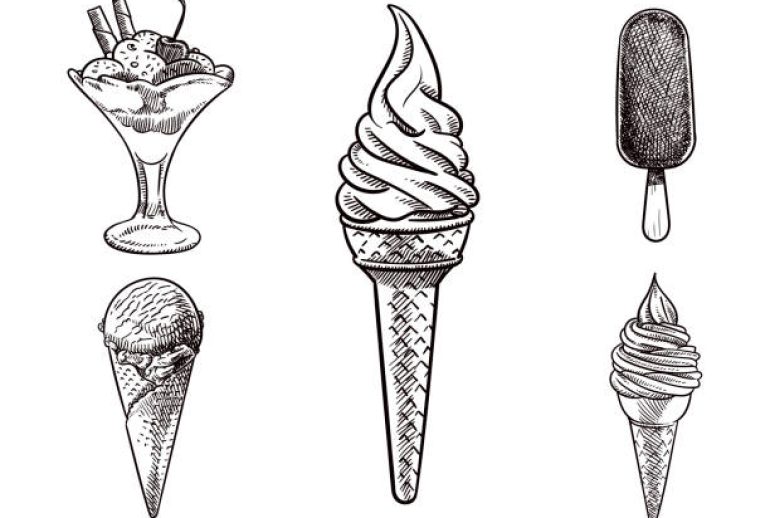
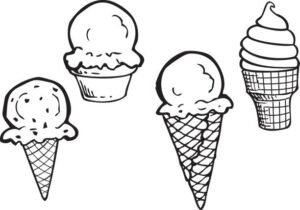
Drawing ice cream can be fun and creative. The style you choose will bring your artwork to life. Whether you prefer a classic cone or a delightful sundae, each style has its charm. Let’s explore some ideas to inspire your ice cream drawings.
Classic Cone
The classic cone is a timeless favorite. It’s simple yet elegant. Start with a triangle for the cone. Add a scoop of ice cream on top. Draw a wavy line for the melting effect. This gives a realistic look. You can add sprinkles or a cherry to make it more interesting.
To make your cone unique, consider these tips:
- Waffle Pattern: Draw small crosshatch lines on the cone.
- Flavor Colors: Use different colors for each scoop.
- Texture: Add small dots and lines for texture.
Here’s a simple table for quick reference:
| Element | Detail |
|---|---|
| Cone | Triangle shape with crosshatch lines |
| Ice Cream | Round scoop with wavy lines |
| Extras | Sprinkles, cherry, or chocolate chips |
Sundae Delight
The sundae delight offers more room for creativity. Start with a bowl. Add multiple scoops of ice cream. Each scoop can have different toppings. Use a large oval shape for the bowl. Draw several circles for the scoops. Add toppings like whipped cream, nuts, and cherries.
Here are some ideas to enhance your sundae drawing:
- Layers: Draw layers of ice cream and toppings.
- Texture: Add small lines and dots for texture.
- Color: Use vibrant colors for a lively look.
A quick reference table for sundae details:
| Element | Detail |
|---|---|
| Bowl | Large oval shape |
| Scoops | Multiple circles |
| Toppings | Whipped cream, nuts, cherries |
Using these tips will make your ice cream drawings stand out. Enjoy the process and let your creativity flow!
Selecting Your Tools
Choosing the right tools is crucial for creating amazing ice cream drawings. The right tools can bring your art to life. Whether you prefer traditional or digital methods, each tool has its own charm and benefits.
Pencils And Markers
Pencils are excellent for sketching your initial ideas. They allow for easy adjustments and shading. Start with a light pencil for the outline. Then, use a darker pencil for details. Markers add bold colors and sharp lines. They are perfect for making your drawings pop. Experiment with different marker types. Fine-tip markers are great for small details. Broad-tip markers cover larger areas quickly.
Digital Drawing Tablets
Digital drawing tablets offer a modern approach to art. They provide a wide range of tools and effects. Tablets allow for easy corrections and endless color options. Many artists find them convenient and efficient. Popular brands include Wacom and Huion. These tablets often come with pressure-sensitive pens. This feature helps create natural-looking lines and textures.
Whether you choose traditional or digital tools, remember to practice. The right tools paired with your creativity will result in stunning ice cream drawings.
Sketching Your Base
Creating a stunning ice cream drawing starts with a strong base. This foundation ensures your drawing has the right shape and proportion. Follow these steps to create a solid base for your ice cream drawing.
Basic Shapes
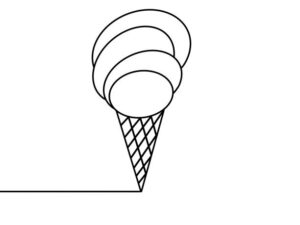
Begin by drawing the basic shapes. Use circles, ovals, and triangles. Start with an oval for the ice cream scoop. It doesn’t have to be perfect. Draw lightly so you can easily erase any mistakes.
| Shape | Part of Ice Cream |
|---|---|
| Oval | Ice Cream Scoop |
| Triangle | Ice Cream Cone |
Next, draw a triangle below the oval. This will be the ice cream cone. Make sure the triangle is proportionate to the oval. If the oval is big, the triangle should be long and wide. If the oval is small, the triangle should be shorter.
Adding Depth
Now, add depth to your drawing. This makes it look more realistic. Start by sketching lines to give the scoop volume. Draw curved lines from the top of the oval. They should go down to the bottom edge. These lines show the roundness of the ice cream.
For the cone, add diagonal lines. These lines should crisscross. This pattern gives the cone a waffle texture. Make the lines light so you can adjust them if needed.
- Sketch basic shapes lightly.
- Add curved lines to the scoop.
- Draw crisscross lines on the cone.
With these simple steps, you have created a solid base. This base will make your ice cream drawing look realistic and detailed. Keep practicing to improve your skills.
Creating Realistic Textures
Creating realistic textures in your ice cream drawings can elevate your art. It adds depth and makes your drawings look almost edible. Focus on details like creamy swirls and melting effects to bring your ice cream to life. Let’s dive into these techniques.
Creamy Swirls
Creamy swirls are key to making your ice cream look real. Start with soft, curved lines. Use light and dark shades to create depth. Highlight the edges to give a shiny look. Blend the colors smoothly to mimic the creamy texture. Pay attention to the direction of your swirls. They should follow the shape of the ice cream.
Melting Effects
Melting effects add a realistic touch to your ice cream drawings. Draw drips with irregular shapes. Use gradient colors to show the melting process. Add a few droplets around the base. Shadows can make the melting parts stand out. Use lighter shades on the top and darker ones near the bottom. These effects make the ice cream look like it’s melting in the sun.
Adding Color And Detail
Adding color and detail brings your ice cream drawing to life. It makes your drawing more vibrant and appealing. Follow these steps to enhance your ice cream artwork.
Choosing A Color Palette
Start by selecting a color palette. Choose colors that reflect the flavors. Think of strawberry, chocolate, and vanilla. Use soft pastels for a more realistic look. Bright colors can give a fun, cartoonish feel. Mix and match colors to see what works best. Experiment with different shades and tones.
Highlighting And Shading
Highlighting and shading add depth to your drawing. Lightly shade areas that would be in shadow. Use a darker color for these parts. Highlight the areas where light hits. This creates a 3D effect. Blend the colors smoothly for a natural look. Practice makes perfect. Keep trying until you get it right.
Incorporating Fun Elements
Adding fun elements to your ice cream drawings can make them more exciting and engaging. These elements can transform a simple drawing into a vibrant piece of art. Let’s explore some ideas to make your ice cream drawings more fun!
Sprinkles And Toppings
Sprinkles and toppings can bring your ice cream drawing to life. Think of colorful sprinkles, chocolate chips, or even gummy bears. These small details can add texture and interest to your artwork.
- Sprinkles: Draw tiny, colorful dots all over the ice cream.
- Chocolate Chips: Add small, irregular shapes to mimic chocolate chips.
- Gummy Bears: Include small, bear-shaped candies for a playful touch.
Creative Backgrounds
A creative background can make your ice cream drawing stand out. Try different settings and elements to add depth and context.
| Background Idea | Description |
|---|---|
| Beach Scene | Draw your ice cream on a sunny beach with waves and sand. |
| Park Picnic | Place your ice cream on a picnic blanket in a green park. |
| Cityscape | Position your ice cream against a bustling city background. |
Use these ideas to make your ice cream drawings more dynamic and fun. Experiment with different combinations to find what works best for you. Happy drawing!
Exploring Different Perspectives
Exploring different perspectives in ice cream drawing can be a fun way to enhance your artistic skills. By looking at ice cream from different angles, you can create more dynamic and interesting drawings. Let’s dive into some unique perspectives you can try out.
Top View
Drawing ice cream from the top view gives you a unique perspective. This angle allows you to focus on the circular shape of the scoop. You can add details like sprinkles, chocolate chips, or a cherry on top.
Here are some tips for drawing from the top view:
- Start with a circle for the scoop.
- Add texture with small, curved lines.
- Draw the cone or cup as an outline beneath the scoop.
This view is simple yet effective, making your drawing stand out.
Side View
The side view of ice cream is the most common angle. It shows the layers of the cone and the scoop. This perspective allows for more detail and depth in your drawing.
Consider these steps to draw from the side view:
- Draw a triangle for the cone.
- Add the scoop on top of the cone with a rounded shape.
- Include texture for the cone with diagonal lines.
- Add details to the scoop, like drips or sprinkles.
This view is perfect for showcasing different flavors and toppings.
Final Touches
Final touches bring your ice cream drawing to life. These steps refine your artwork, adding realism and depth. Focus on clean lines, shadows, and highlights. Follow these tips to perfect your drawing.
Refining Lines
Refine the lines of your ice cream drawing. Use a fine-tipped pen or pencil. Trace over your sketch with steady hands. Clean lines make your drawing look polished. Remove any extra or overlapping lines. This step gives your drawing a neat appearance.
Enhancing With Shadows
Shadows add depth to your ice cream drawing. Decide on a light source direction. Shade the opposite side of the light source. Use a soft pencil for smooth shading. Gradually build up the darkness. Focus on areas under the scoops and cone edges. Shadows create a three-dimensional effect.
Frequently Asked Questions
What Are Some Easy Ice Cream Drawing Ideas?
Start with simple shapes like cones and scoops. Add fun details like sprinkles, cherries, and waffle patterns.
How To Draw Realistic Ice Cream?
Use shading and highlights to create a three-dimensional effect. Pay attention to texture and melting details.
What Tools Are Best For Ice Cream Drawing?
Pencils, colored pencils, and markers work well. Try digital tools for more advanced effects.
Can Kids Draw Ice Cream Easily?
Yes, kids can easily draw ice cream. Use basic shapes and bright colors for a fun experience.
Conclusion
Creating ice cream drawings can be fun and relaxing. These ideas spark creativity. Experiment with colors and shapes. Each drawing tells a unique story. Keep practicing and enjoy the process. Your skills will improve over time. Share your artwork with friends.
Inspire others with your creations. Art brings joy and connects people. Happy drawing!