Drawing clouds can seem tricky. But, with simple steps, anyone can do it.
Clouds are fascinating to draw. They add depth and emotion to your art. Whether you’re a beginner or experienced, capturing the fluffy, airy nature of clouds can elevate your drawings. Understanding cloud shapes and the movement of light and shadow is key.
This guide will help you master these elements. By the end, you’ll feel more confident and skilled in drawing beautiful clouds. Ready to bring the sky to your canvas? Let’s dive in and explore the art of drawing clouds!
Materials Needed
Before diving into drawing clouds, gather the right materials. This ensures your artwork turns out well. Here’s a list of essential and optional supplies to get you started.
Basic Tools
To begin with, you need some basic tools:
- Pencils: Use a range of pencils from HB to 6B for different shading.
- Eraser: A kneaded eraser is great for creating highlights in your clouds.
- Paper: Choose a high-quality drawing paper. It should be smooth or have a slight texture.
- Blending Stumps: These help in blending pencil marks for smooth transitions.
Optional Supplies
For more advanced techniques, consider these optional supplies:
| Supply | Use |
|---|---|
| Charcoal Pencils | Great for deep shadows and bold lines. |
| Colored Pencils | Add color to your clouds for a realistic look. |
| Pastels | Create soft and fluffy cloud textures. |
| Fixative Spray | Protect your drawing from smudges. |
Gather these materials and you are ready to draw beautiful clouds. Remember, the better your materials, the better your artwork will be.

Choosing Your Cloud Type
Choosing the right type of cloud to draw can make a big difference in your artwork. Different cloud types have unique shapes and characteristics. Understanding these will help you create more realistic and engaging drawings. Let’s explore some common cloud types you can draw.
Cumulus Clouds
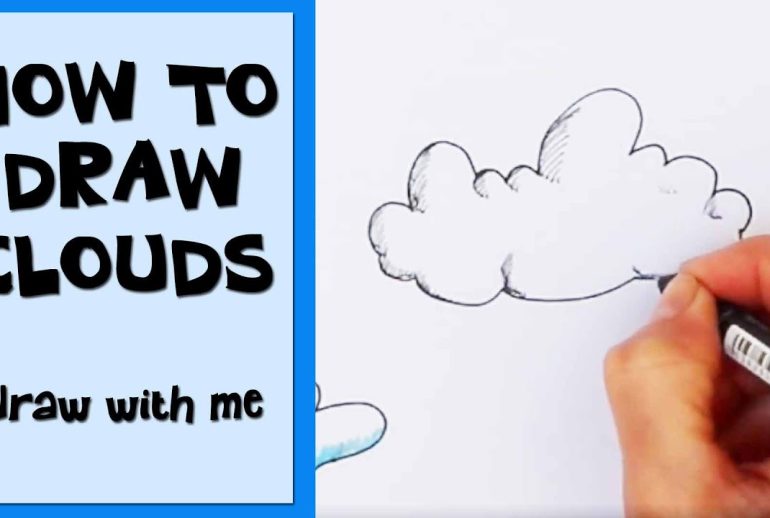
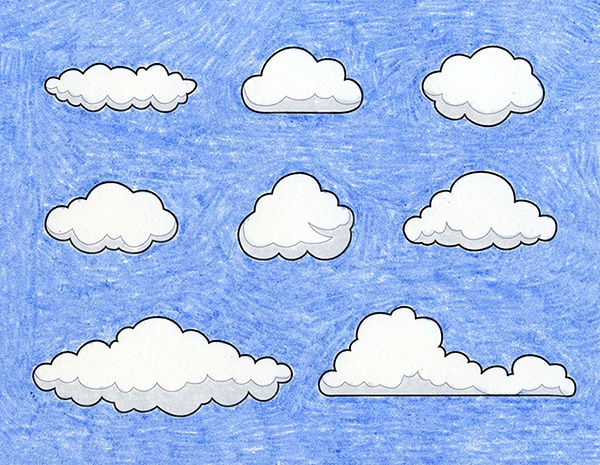
Cumulus clouds are the fluffy, white clouds you often see on sunny days. They look like cotton balls floating in the sky. Start by drawing big, round shapes. Add smaller, round shapes around the edges. Make sure the bottom of the cloud is flat. Shade the bottom to give it depth.
Cirrus Clouds
Cirrus clouds are thin and wispy. They appear high in the sky and look like feathers. Use light, sweeping strokes to draw them. Make the lines long and curved. These clouds should look delicate and airy. Don’t add too many details.
Stratus Clouds
Stratus clouds cover the sky like a blanket. They are low and gray. Start by drawing a long, horizontal line. Then, draw a series of wavy lines underneath. These lines should be close together. Shade them lightly to create a flat, overcast look.
Sketching The Basic Shape
Drawing clouds can be a fun and rewarding experience. The first step is sketching the basic shape. This guide will help you start with a simple outline and then define the structure. Follow these steps for a perfect cloud sketch.
Light Pencil Outline
Begin with a light pencil outline. Use a soft pencil to make faint marks. Draw a series of fluffy shapes, like overlapping circles or ovals. This will form the base of your cloud. Keep it light to allow for changes later.
Defining The Structure
After outlining, it’s time to define the structure. Add more detail to the cloud’s edges. Make some parts look puffier and others more irregular. Vary the shapes to create a natural look. Use short, curved lines for a soft texture.
| Step | Description |
|---|---|
| 1 | Start with a light pencil outline. |
| 2 | Draw overlapping circles or ovals. |
| 3 | Define the cloud’s structure with more detail. |
Remember, clouds are not perfect. Make them look fluffy and natural. Use a light touch and take your time. Happy sketching!
Adding Depth And Dimension
Adding depth and dimension to your cloud drawings can bring them to life. It involves using shading techniques and creating highlights. These techniques help make your clouds look more realistic. Follow these steps to enhance your artwork.
Shading Techniques
Shading adds depth to your clouds. Start with a light hand. Use circular motions to apply light layers of shading. Focus on the bottom of the cloud. This area is usually darker.
Gradually increase pressure to build medium tones. Blend with a soft brush or tissue. This removes harsh lines. You can also use an HB pencil for lighter areas and a 2B pencil for darker areas.
Consider using cross-hatching for more texture. This involves drawing intersecting lines. It creates a denser shadow effect. Remember to keep the strokes soft and consistent.
Creating Highlights
Highlights give clouds a three-dimensional look. They show where light hits. To create highlights, use an eraser. Gently rub the areas where you want the light to reflect.
For more precision, use a kneaded eraser. Shape it into a fine point. Dab it on the cloud’s edges. This technique brings out the natural light spots.
Another method is to use a white pencil or gel pen. Apply it to the highest points of the cloud. This adds a bright, crisp contrast. It can make your clouds look more dynamic.
Here’s a quick reference table:
| Technique | Tool | Purpose |
|---|---|---|
| Shading | HB and 2B Pencils | Adds Depth |
| Blending | Soft Brush/Tissue | Removes Harsh Lines |
| Cross-Hatching | Pencil | Creates Texture |
| Highlights | Kneaded Eraser | Shows Light Spots |
| White Pencil/Gel Pen | Highlights | Adds Contrast |
By combining these techniques, you can make your cloud drawings more realistic. Practice each step, and observe real clouds to improve your skills.
Blending And Softening Edges
Blending and softening edges are key techniques in drawing clouds. These methods make clouds look realistic and airy. Hard lines and defined edges don’t suit clouds. Blending tools help create smooth, soft edges.
Using A Blending Tool
A blending tool is essential for achieving soft cloud edges. Tools like blending stumps or tortillons work well. They help blur hard lines and mix colors seamlessly. Use gentle, circular motions. This technique ensures a natural look. Avoid pressing too hard, which can ruin the effect.
Achieving Smooth Transitions
Smooth transitions between different shades are crucial. Start with light pressure and build up gradually. This helps create depth and dimension in your clouds. Use a soft tissue or cotton ball for larger areas. These tools help blend colors without harsh lines. Practice makes perfect, so keep experimenting.
Incorporating Background Elements
Drawing clouds can be more engaging with a well-crafted background. Adding background elements enhances the overall scene and provides context to your clouds. Let’s explore how to incorporate the sky, horizon, and complementary elements.
Sky And Horizon
The sky sets the stage for your clouds. Use light blue shades for a clear day. For sunset or sunrise, blend pink, orange, and purple hues. The horizon is the line where the sky meets the ground. This line helps create depth and perspective. Place clouds closer to the horizon smaller, giving a sense of distance.
| Sky Type | Colors |
|---|---|
| Clear Day | Light Blue |
| Sunset/Sunrise | Pink, Orange, Purple |
Ensure the colors blend smoothly. This makes the transition between the sky and horizon seamless. Use gradients or soft brushes for this effect.
Complementary Elements
Adding complementary elements can make your cloud drawing more lively. Consider elements like trees, mountains, or birds. These elements add interest and balance to your composition.
- Trees: Place them along the horizon to frame the scene.
- Mountains: Add distant mountains for more depth.
- Birds: Draw small birds to give a sense of scale.
Complementary elements should not overpower the clouds. They should enhance and not distract. Use subtle details and softer colors for these elements.
Final Touches
Final touches can bring your cloud drawing to life. Small adjustments here and there can make a big difference. This section will guide you through refining details and setting the scene.
Refining Details
Refining details can add realism to your clouds. Use a softer pencil or eraser to smooth rough edges. Make sure the transitions between light and dark areas are smooth. Blending tools like cotton swabs can help.
Focus on the edges of the clouds. They should look fluffy and soft. Add small wisps around the edges to give a floating effect. This adds depth and dimension to your clouds.
Setting The Scene
Setting the scene involves adding elements around the clouds. Think about the sky. Is it clear or stormy? Adding a few birds or the sun can set the mood.
Consider the horizon line. It helps the viewer understand the space. You can add distant mountains or treetops. These elements make your drawing more engaging.
Use light shading to create a sense of atmosphere. Darker areas can suggest an upcoming storm. Lighter areas can indicate a sunny day. This context will enhance your clouds.
Frequently Asked Questions
How Do You Start Drawing Clouds?
Start with light, fluffy shapes. Use soft pencil strokes. Draw outlines first.
What Tools Do I Need To Draw Clouds?
Use pencils, erasers, and blending tools. Soft brushes for painting. You can also use digital tools.
How Can I Add Depth To My Cloud Drawings?
Shade with different pencil pressures. Blend edges softly. Use darker shades for depth.
Are There Different Types Of Clouds To Draw?
Yes, draw cumulus, stratus, and cirrus clouds. Each has unique shapes and textures. Experiment with all.
Conclusion
Drawing clouds can be easy and fun with practice. Focus on shapes and shading. Start with light strokes to outline your clouds. Add depth by blending different shades. Make your clouds unique by experimenting with various techniques. Remember, practice makes perfect.
Soon, you will create stunning cloud drawings. Enjoy the process. Keep drawing and improving.

