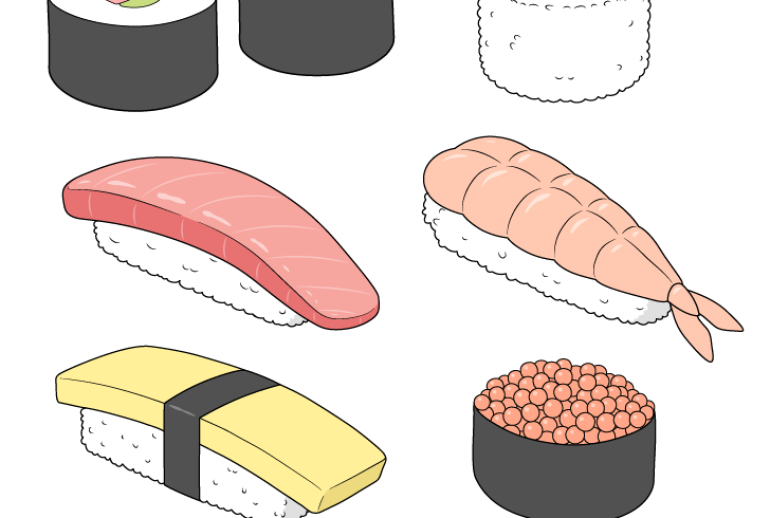
Drawing a sushi roll can be fun and easy. Start with basic shapes, and add details step by step.
Sushi rolls are not only delicious but also visually appealing. Learning to draw them can be a delightful experience. Whether you are an art enthusiast or a beginner, you can create a beautiful sushi roll drawing. In this guide, we will break down the process into simple steps.
With a few basic tools and a bit of patience, you’ll be able to sketch a sushi roll that looks good enough to eat. So, grab your pencils and paper, and let’s get started on this artistic journey!
Materials Needed
Drawing a sushi roll can be a fun and engaging activity. It helps to know what materials you need before you start. This guide will walk you through the essential and optional supplies to make your sushi roll drawing come to life.
Essential Tools
First, gather your essential tools. These are the must-haves for any drawing.
- Pencils: A set of pencils with different hardness levels. Use an HB pencil for sketching and a 2B or 4B pencil for shading.
- Eraser: A good quality eraser to correct mistakes and refine your drawing.
- Paper: High-quality drawing paper that can handle multiple layers of pencil strokes.
- Sharpener: A reliable sharpener to keep your pencils in perfect condition.
- Ruler: Useful for drawing straight lines and keeping proportions accurate.
Optional Supplies
These optional supplies can add more depth and detail to your drawing.
- Colored Pencils: To add color and vibrancy to your sushi roll.
- Markers: For bold outlines and details.
- Blending Stump: Helps in creating smooth shading and transitions.
- White Gel Pen: Useful for adding highlights and fine details.
- Fine Liners: To outline your drawing with precision.
With these materials, you’re ready to start drawing your sushi roll. Whether you stick to the essentials or experiment with optional supplies, the key is to have fun and let your creativity flow.

Choosing Your Sushi Roll
Drawing a sushi roll is a fun and creative activity. Before you start, you need to decide on the type of sushi roll you want to draw. This choice will guide the ingredients and the look of your sushi roll. Below, we will explore different types of sushi rolls and how to select the right ingredients for your drawing.
Different Types
There are many types of sushi rolls, each with its unique features. Common types include maki, uramaki, and temaki. Maki rolls have the seaweed on the outside, while uramaki rolls have rice on the outside. Temaki rolls are cone-shaped and handheld. Each type has its own style and ingredients.
Selecting Ingredients
Choosing ingredients is key to making your sushi roll look realistic. Common ingredients include fish, vegetables, and rice. Popular fish choices are salmon and tuna. Vegetables like cucumber and avocado add color and texture. Remember to add rice as the main component. It holds everything together and is essential for any sushi roll. Use simple shapes to represent each ingredient.
Basic Shapes And Outlines
Learning to draw a sushi roll can be a fun and rewarding experience. The process involves breaking down the sushi roll into basic shapes and outlines. This method simplifies the drawing and makes it more manageable. Let’s dive into the initial steps, focusing on the base and guidelines.
Drawing The Base
Start by sketching a simple rectangle. This will be the base of your sushi roll. Ensure the rectangle is not too long or too short. The length should represent the roll’s size.
Next, draw a circle at one end of the rectangle. This circle will be the cross-section of the sushi roll. Ensure the circle is slightly larger than the width of the rectangle.
Adding Guidelines
Now, add a horizontal line through the middle of the rectangle. This line helps align the roll’s components. Draw vertical lines to divide the rectangle into equal parts. These lines will guide you in placing the ingredients inside the sushi roll.
Inside the circle, draw smaller circles and shapes. These represent the various ingredients like rice, fish, and vegetables. Ensure the shapes are evenly spaced and proportional.
Refer to the table below for a quick summary of the steps:
| Step | Description |
|---|---|
| 1 | Draw a rectangle as the base. |
| 2 | Sketch a circle at one end. |
| 3 | Add a horizontal guideline through the rectangle. |
| 4 | Draw vertical guidelines to divide the rectangle. |
| 5 | Inside the circle, draw smaller shapes for ingredients. |
Following these steps will give you a solid foundation. You can now proceed to add details and bring your sushi roll to life.
Sketching Ingredients
Sketching the ingredients of a sushi roll brings your drawing to life. Understanding how each ingredient looks helps create a realistic and delicious-looking sushi roll. Begin with the basics: rice and seaweed. Then move to the fillings and toppings.
Rice And Seaweed
Start by drawing the seaweed. It is a dark, rough rectangle. This forms the outer layer of your sushi roll. Next, sketch the rice. Draw small, oval shapes. Fill the inside of the seaweed rectangle with these ovals. Make sure to leave some space for the fillings.
Fillings And Toppings
Now, add the fillings. Popular fillings include cucumber, avocado, and fish. Draw thin, elongated shapes to represent these ingredients. Place them inside the rice. For fish, use slightly irregular shapes to mimic real cuts.
Finally, add the toppings. Common toppings are sesame seeds or fish roe. Draw tiny dots or small circles on top of the sushi roll. This adds texture and detail.
Adding Details
Adding details to your sushi roll drawing can make a big difference. It brings your illustration to life. Let’s focus on two main aspects: Texturing and Enhancing Depth.
Texturing
Start by adding small lines to the rice part. These lines represent individual grains of rice. Make them short and uneven. This gives a natural look. Do not draw too many lines. Just enough to suggest texture.
Next, add details to the seaweed. Draw gentle, wavy lines. These should follow the curve of the roll. This shows the rough surface of seaweed. Again, keep it simple. Too many lines can clutter the drawing.
Enhancing Depth
Shading adds depth to your drawing. Begin by shading the edges of the sushi roll. Use a light hand. Gradually darken the areas near the seaweed. This creates a three-dimensional effect.
Focus on the filling as well. Add shadows where the ingredients overlap. Lightly shade around the edges of the fillings. This makes each element stand out.
Remember, less is more. Subtle shading enhances realism without overwhelming the drawing. Practice different shading techniques. See what works best for your style.
Inking Your Drawing
Inking your sushi roll drawing brings it to life. It adds depth and definition. Follow these steps for a clean and polished look.
Outlining
First, start with the basic outline of your sushi roll. Use a fine-tipped pen for precision. Trace over the main shapes and forms.
- Begin with the outer circle of the roll.
- Move to the inner details like the rice and filling.
- Keep your lines steady and smooth.
Make sure to erase any pencil marks after inking. This keeps your drawing clean.
Final Touches
Now, add the final touches to your drawing. These small details make a big difference.
- Draw small dots to represent the rice grains.
- Ink the texture of the seaweed wrap.
- Add shading to give depth and dimension.
Use a slightly thicker pen for shadows. This creates contrast and interest.
Inking can be a fun and relaxing process. Take your time and enjoy it!
Coloring Techniques
Coloring a sushi roll drawing can bring your artwork to life. The right colors and techniques will make it look realistic and appetizing. This section explores some effective coloring techniques.
Choosing Colors
Start by selecting the right colors. Sushi rolls have vibrant and natural hues. Use greens for seaweed, whites for rice, and a mix of reds, pinks, and oranges for the fish. Choose colors that are bright and true to real sushi ingredients.
Shading And Highlights
Shading adds depth to your drawing. Identify the light source in your drawing. Add darker shades on the opposite side. This will give a three-dimensional effect. Use lighter colors to highlight areas where the light hits directly.
Blend the colors smoothly. This will create a more natural look. Use soft strokes to blend. You can use blending tools or even your fingers. This will soften the transitions between colors.

Frequently Asked Questions
What Materials Do I Need To Draw A Sushi Roll?
You need paper, pencil, eraser, and colored pencils or markers.
How Do I Start Drawing A Sushi Roll?
Begin by drawing a simple oval shape for the sushi roll.
How Can I Make The Sushi Roll Look Realistic?
Add details like rice texture, seaweed wrap, and filling colors.
Can Beginners Draw A Sushi Roll Easily?
Yes, it’s simple. Follow step-by-step guides and practice regularly.
Conclusion
Drawing a sushi roll is fun and creative. Follow the steps shared. Practice makes perfect. Don’t worry about mistakes. They help you learn. Use simple shapes first. Add details gradually. Enjoy the process. Share your art with friends. Keep drawing and improving.
Soon you’ll see progress. Thanks for reading. Happy drawing!


