Drawing a forest can seem daunting at first. But with the right steps, it becomes easy.
Forests are full of life and detail. Capturing their beauty on paper can be a rewarding experience. You don’t need to be a professional artist to draw a forest. All you need is some guidance and practice. In this blog post, we will walk you through the steps to draw a forest.
Whether you want to draw a simple sketch or a detailed scene, this guide will help you get started. With basic materials and a few techniques, you’ll be able to create a beautiful forest drawing. Let’s dive in and explore the art of drawing a forest.
Materials Needed
Drawing a forest can be a fun and rewarding experience. To get started, you need the right materials. This section will guide you through the essential tools and optional supplies needed for creating a beautiful forest drawing.
Essential Tools
Start with a good quality sketchbook. The paper should be thick enough to handle different mediums. Next, use pencils of various hardness. An HB pencil is great for sketching, while 2B and 4B pencils work well for shading. Also, an eraser is crucial. Choose a kneaded eraser for lightening areas and a regular eraser for clean lines. A pencil sharpener is important too. Keep your pencils sharp for detailed work.
Optional Supplies
If you want to add color, consider colored pencils or markers. Watercolor pencils are another great option. They allow you to blend colors easily. Brushes and water can help create a soft, natural look. A ruler can be useful for drawing straight lines and measuring. Don’t forget about blending tools. Cotton swabs or blending stumps can help smooth out your shading.
Basic Shapes And Structure
Drawing a forest can seem daunting, but it starts with basic shapes and structure. This method breaks down the complex task into simple steps. You will learn to sketch the outline and add basic shapes.
Sketching The Outline
Begin with a light pencil. Sketch the horizon line first. This gives your forest a base. Draw simple lines for the tree trunks. Position them at different angles and heights. This adds variety and depth. Next, mark the major areas for bushes and shrubs. Use ovals and circles. These shapes will guide you in the next steps.
Adding Basic Shapes
Now, add basic shapes to your outline. Draw triangles for pine trees. Use circles and ovals for deciduous trees. These shapes represent the tree crowns. For bushes, draw smaller circles and ovals. Ensure they overlap the tree trunks. This makes your forest look dense. Add more lines to the trunks. This gives them texture and detail.
Drawing Trees
Drawing trees brings your forest artwork to life. Each tree has its own unique shape and texture. Focusing on the details of trunks, branches, leaves, and foliage will make your drawings more realistic and engaging.
Trunk And Branches
The trunk is the foundation of the tree. Start with a simple vertical line. This line will guide the shape of your trunk.
Next, draw the outline of the trunk. Use slightly curved lines to give a natural look. The trunk should be wider at the base and narrower as it goes up.
Add the branches. Draw them extending from the trunk. Branches should vary in length and thickness. Smaller branches can split off from larger ones.
Remember, branches are not perfectly straight. They should have slight bends and curves.
Leaves And Foliage
Leaves and foliage add volume to your tree. Start by drawing clusters of leaves at the end of branches. Use small, quick strokes for a realistic effect.
Vary the size and shape of the leaves. This creates a more natural appearance. Some leaves can overlap to show depth.
For dense foliage, draw larger clusters of leaves. Use shading to add dimension. Darker areas suggest shadow, while lighter areas indicate sunlight.
Tip: Observe real trees. Notice how leaves cluster together and how light affects them.
Creating Depth
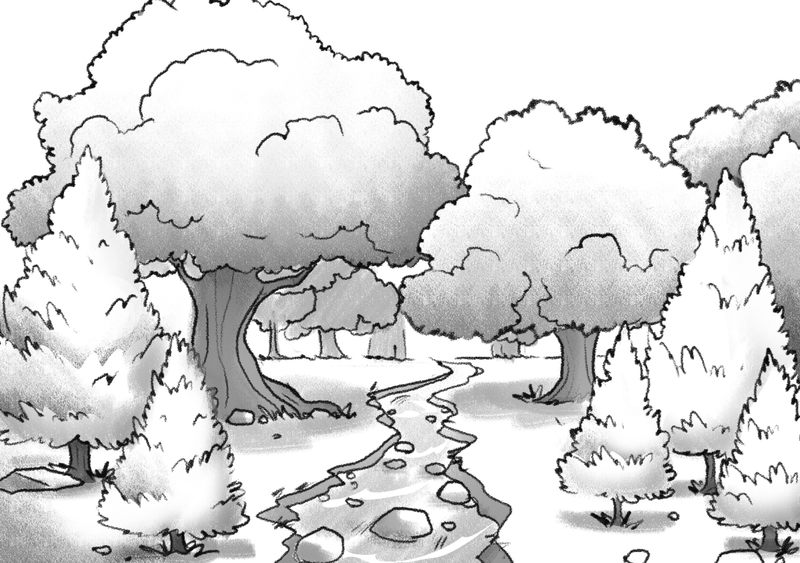
Creating depth in your forest drawing makes it more realistic. This technique gives your artwork a three-dimensional feel. It involves understanding how to use elements like the foreground, background, and overlapping objects. Let’s explore these concepts to add depth to your forest scene.
Foreground And Background
The foreground is the part of the scene closest to the viewer. Trees, bushes, or rocks in the foreground should be detailed. Use larger and darker lines to depict these elements. This creates a sense of closeness.
The background is the area farthest from the viewer. Elements in the background should have less detail. Use lighter and thinner lines for distant trees or hills. This helps create a sense of distance.
| Element | Foreground | Background |
|---|---|---|
| Details | High | Low |
| Line Thickness | Thick | Thin |
| Contrast | High | Low |
Overlapping Elements
Using overlapping elements adds depth to your drawing. Place one object in front of another. This makes the scene look more layered.
- Draw larger trees in front of smaller ones.
- Sketch bushes or rocks partially covering tree trunks.
- Layer different types of foliage.
Overlapping creates a sense of space and distance. It also guides the viewer’s eye through the artwork.
To practice, start with simple shapes. Draw circles and ovals to represent trees. Place some ovals in front of others. Add details and shading to enhance depth.
Remember, practice makes perfect. Keep experimenting with these techniques. Soon, your forest drawings will come to life with depth and realism.
Adding Details
Adding details to your forest drawing makes it come to life. Small elements like bark texture and leaf patterns create depth. These details transform a simple sketch into a realistic scene.
Bark Texture
Drawing bark texture adds realism to your trees. Use short, vertical strokes to mimic the rough surface. Vary the length and direction of these strokes. This variation creates a natural look. Focus on the base of the tree. This area often has more detailed bark. Add knotholes or cracks. These imperfections add character to your trees.
Leaf Patterns
Leaf patterns are crucial for a realistic forest. Start with the shape of each leaf. Different trees have different leaf shapes. Study real leaves for reference. Draw veins in each leaf. These lines give structure to the leaf. Group leaves together. Leaves often cluster in natural groups. Vary the size and direction of the leaves. This diversity adds to the realism.

Incorporating Wildlife
Adding wildlife can make your forest drawing come alive. Animals, birds, insects, and critters bring motion and authenticity to your art. They help tell a story. They add depth and interest. Let’s explore how to incorporate these elements.
Animals And Birds
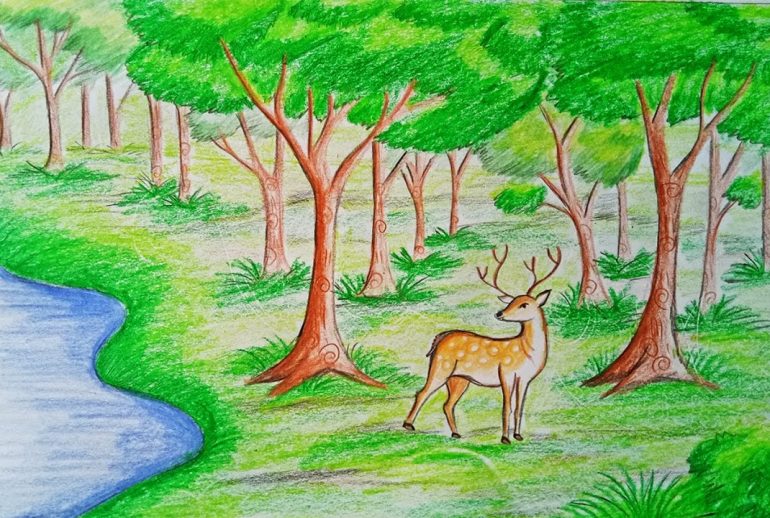
Animals are essential to a forest scene. Draw deer grazing among the trees. Include rabbits hopping along the forest floor. Add a fox peeking out from behind a bush. These animals create a sense of life.
Birds add a different layer. Sketch an owl perched on a branch. Draw small birds like sparrows or robins flitting about. Include a woodpecker tapping on a tree. These details make your forest vibrant and dynamic.
Insects And Critters
Insects and critters play a smaller, yet vital role. Draw butterflies fluttering over flowers. Sketch bees buzzing around. Include ants marching in a line. These small details make your forest feel real.
Add some forest critters too. Draw squirrels gathering nuts. Include a hedgehog scurrying through the leaves. Sketch frogs near a pond. These elements make the forest more engaging.
Incorporating wildlife in your forest drawing adds layers of interest. It makes your artwork more immersive and lively.
Final Touches
Once you have the basic structure of your forest, it’s time for the final touches. These steps will bring your drawing to life. Adding detail, depth, and texture will make your forest look more realistic.
Shading Techniques
Shading adds depth and dimension to your forest. It helps you create a sense of light and shadow. Use a variety of shading techniques:
- Cross-hatching: Draw intersecting lines to create texture and depth.
- Stippling: Use small dots to add shading. This is great for leaves and bark.
- Blending: Smooth out your shading with a blending tool or your finger. This works well for sky and smooth surfaces.
Highlighting And Refining
Highlights give your drawing a realistic touch. They mimic the way light interacts with surfaces. Use an eraser or a white pencil to add highlights. Focus on the following areas:
- Tree trunks: Add highlights where light hits the bark.
- Leaves: Highlight the edges of leaves to show sunlight.
- Ground: Add light spots to show patches of sunlight on the forest floor.
After highlighting, refine your drawing. Check for any rough lines or unfinished areas. Add small details like:
- Individual leaves
- Grass blades
- Small branches
These small details can make a big difference. They add realism and complexity to your forest drawing. Take your time with this step.

Frequently Asked Questions
What Materials Do I Need To Draw A Forest?
You need paper, pencils, erasers, and colored pencils or markers.
How Do I Start Drawing A Forest?
Begin by sketching the horizon line and main trees. Add details gradually.
What Techniques Help Add Depth To Forest Drawings?
Use shading and perspective. Draw trees of different sizes and overlap them.
How Can I Make My Forest Drawing Look Realistic?
Focus on details like leaves, shadows, and textures. Use reference images for accuracy.
Conclusion
Drawing a forest can be a relaxing and rewarding experience. Start with basic shapes and gradually add details. Remember, practice makes perfect. Use different pencils for varied textures and depth. Pay attention to light and shadows. Don’t stress about mistakes; they’re part of learning.
Enjoy the process and let your creativity flow. Soon, you’ll find your unique style. Keep your sketches, see your progress. Happy drawing!

