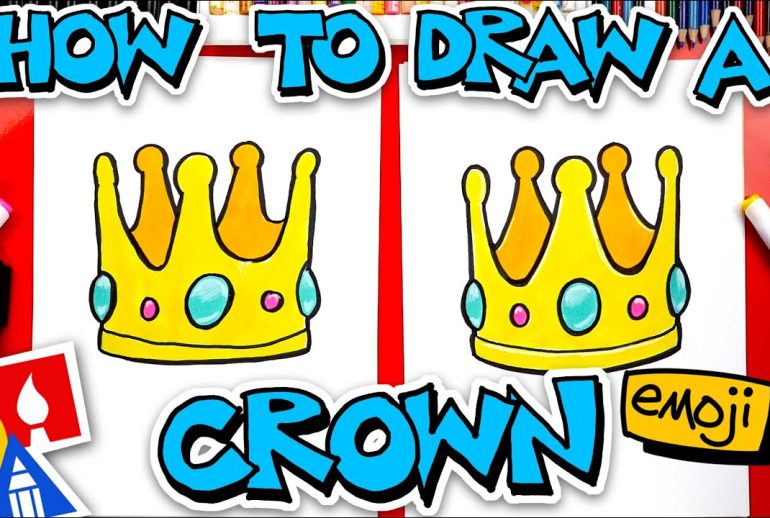
Want to learn how to draw a crown? You are in the right place.
Drawing a crown can be a fun and easy project. Whether you are a beginner or an artist, this guide will help you. Crowns are symbols of royalty and power. They are often seen in fairy tales, cartoons, and history books.
Drawing one can add a touch of elegance to your art. This step-by-step guide will break down the process. You will find it simple and enjoyable. Grab your pencil and paper. Let’s start drawing a crown together!
Materials Needed
Drawing a crown can be a fun and rewarding activity. To get started, you’ll need some basic materials. Let’s explore what you’ll need to create a beautiful crown drawing.
Drawing Tools
First, gather your drawing tools. You will need a pencil, an eraser, and a sharpener. A pencil helps you sketch the outline. Choose a soft pencil for easy erasing. An eraser is useful for correcting mistakes. A sharpener keeps your pencil point fine and precise.
You can also use colored pencils or markers. These add color and details to your crown. Choose colors that make your crown look royal and elegant.
Paper Types
Next, consider the type of paper you will use. Standard printer paper works well for sketches. It is easy to find and affordable. Use a smooth surface for clean lines.
If you want a more professional look, choose drawing paper. Drawing paper is thicker and more durable. It can handle more layers of color and detail. You might also try watercolor paper if you use paints.
Finally, keep your paper clean and flat. This helps your drawing look neat and professional. Happy drawing!
Basic Crown Shape
The crown has always been a symbol of royalty and power. Drawing one can seem difficult, but it’s quite simple when you break it down. Let’s start with the basic crown shape, which forms the foundation of your drawing. Understanding this basic shape is key to creating a stunning crown design.
Drawing The Outline
Begin by drawing a horizontal line. This will serve as the base of the crown. Next, draw a series of triangles along this line. These triangles should be evenly spaced. They will form the points of the crown. Make sure each triangle is the same size for balance.
Once the triangles are in place, connect their tips with a curved line. This line will give the crown a more natural and rounded look. Your outline should now resemble a row of connected peaks.
Refining The Shape
Now, it’s time to add some details. Start by thickening the base line of the crown. This makes it look more solid. You can also add small circles or gems at the tips of the triangles. This adds a touch of elegance to your crown.
To enhance the shape, draw a second line below the base. This line should follow the curve of the first line. It will give the impression of a band. Adding some vertical lines between the two base lines can create the look of embedded jewels.
Finally, you can add intricate details or patterns within the triangles. This step allows for creativity. Your crown will look unique and more detailed.
Adding Details
Drawing a crown is an exciting journey, but adding details can make your crown truly majestic. Paying attention to the finer points and enhancing the crown with gems will elevate your drawing.
Creating Points
The points of a crown define its elegance and grandeur. Start by drawing small triangles along the top edge of the crown. Vary the height of the points to add interest. Ensure the points are evenly spaced. This will give your crown a balanced look. You can also add small circles at the tip of each point for a royal touch.
Enhancing With Gems
Gems add sparkle and richness to a crown. Draw small circles, ovals, or diamonds on the body of the crown. Place them symmetrically for a pleasing appearance. Add a few larger gems at the center for emphasis. Use shading to give the gems a 3D effect. This will make them look realistic. Your crown will now shine with elegance.

Shading Techniques
Shading techniques are essential for bringing your crown drawing to life. Proper shading adds depth, making the crown appear more realistic. This section will cover two critical aspects of shading: light and shadow, and blending methods.
Light And Shadow
Understanding light and shadow is crucial in shading. Light sources affect how shadows fall on the crown. Identify where your light source is. This will help you determine where to shade.
Let’s break it down:
- Highlight: The brightest part where light hits directly.
- Midtone: The middle value between light and dark.
- Shadow: The darkest areas where light is blocked.
Use a light pencil for highlights. For midtones, use a medium pressure. Shadows need a darker, heavier pressure. Gradually build up the layers.
Blending Methods
Blending smooths out pencil strokes, giving a realistic look. Several tools can help you blend shades effectively.
Here are some common methods:
- Finger Blending: Use your finger to smudge the pencil marks. This technique is quick but can be messy.
- Blending Stumps: These are paper tools that offer more control. Gently rub the stump over shaded areas.
- Tortillons: Similar to stumps but smaller. Ideal for fine details.
Blend in small circles for a smooth effect. Avoid over-blending, which can make the drawing look flat.
Here is a table of tools and their uses:
| Tool | Use |
|---|---|
| Finger | Quick blending |
| Blending Stump | Controlled blending |
| Tortillon | Fine detail blending |
Mastering these shading techniques will enhance your crown drawing. Practice regularly to improve your skills.
Coloring The Crown
Coloring the crown brings your drawing to life. It adds depth and personality. You can choose colors that reflect a royal and majestic look. Follow these steps to make your crown stand out.
Choosing Colors
Select colors that fit the theme of royalty. Gold is a popular choice for a regal look. Other colors like silver, red, and blue can also add elegance. Think about the gems on the crown. Emerald, ruby, and sapphire are great options. Choose colors that complement each other for a balanced appearance.
Applying Color
Start by coloring the base of the crown. Use smooth and even strokes for a clean look. Gold or silver works well for the base. Next, focus on the details. Color the gems with vibrant shades. Use red for rubies, green for emeralds, and blue for sapphires. Blend the colors gently for a realistic effect.
Don’t forget the shadows and highlights. Add darker shades on one side of the crown. This creates a three-dimensional effect. Use lighter shades on the opposite side for highlights. This technique makes the crown look more realistic. Your crown now looks royal and stunning!
Final Touches
The final touches can make or break your crown drawing. You have drawn the basic shape and added some details. Now, it’s time to bring your crown to life with a few finishing touches.
Adding Highlights
Highlights add a sense of depth to your drawing. Use a white colored pencil or a white gel pen. Add small lines and dots where the light would naturally hit the crown. Focus on the edges and raised areas of the design. Do not overdo it. Less is more when adding highlights. A few well-placed highlights can make your crown shine.
Reviewing The Drawing
Take a step back and review your drawing. Look at it from a distance. Does it look balanced? Are the details clear? Correct any mistakes you see. Darken any lines that need more definition. Erase any unnecessary marks. Make sure the crown looks clean and polished. This final review will ensure your crown looks its best.
Frequently Asked Questions
How Do You Start Drawing A Crown?
Begin with a simple curved line for the base. This is the bottom of the crown.
What Tools Do I Need To Draw A Crown?
You need paper, a pencil, and an eraser. Optional: markers or colored pencils.
How Can I Make My Crown Look Realistic?
Add details like jewels and texture. Use shading for depth and sparkle.
Are There Different Styles Of Crowns To Draw?
Yes, many styles exist. You can draw royal, cartoon, or fantasy crowns.
Conclusion
Creating a crown drawing can be fun and easy. Follow each step carefully. Use simple shapes to start. Add details to make it unique. Practice will improve your skills. Soon, you’ll draw crowns confidently. Share your artwork with friends. They will love your creativity.
Keep drawing and enjoy the process. Happy drawing!


