Drawing a circle might seem simple. But there are different ways to do it.
With the right steps, anyone can learn to draw a perfect circle. Circles are basic shapes seen everywhere, from art to math. Learning to draw them can improve your skills. Whether you are an artist or just doodling, knowing how to draw a circle is useful.
This guide will help you understand the process. You will get clear instructions and tips. Soon, you will be drawing circles with ease. Let’s start with the basics and make it fun!

Materials Needed
Drawing a perfect circle can be a fun and relaxing activity. Before you start, you need to gather some materials. Having the right tools will make the process easier and more enjoyable.
Essential Tools
First, you will need a pencil. A pencil is important for sketching and erasing mistakes. A good eraser is also necessary. Mistakes happen, and a clean eraser will keep your paper neat. A ruler can help measure and mark points. This ensures your circle is the right size. Finally, a compass is essential. A compass helps draw a perfect circle with ease.
Optional Supplies
Some additional supplies can enhance your drawing experience. Colored pencils can add life to your circle. Markers can provide bold and vibrant colors. A stencil can offer various circle sizes without using a compass. A protractor can help with measuring angles, making your circle more precise. Lastly, a drawing board can give you a solid surface to work on.
Choosing Your Paper
Drawing essentials
These are the everyday tools we recommend for any drawing tutorial on this site, picked for reliability and beginner-friendly pricing.


As an Amazon Associate, drawingseasy.com earns from qualifying purchases. Prices and availability are subject to change.
Before starting to draw a circle, choosing the right paper is crucial. The type and size of the paper can impact your drawing experience. Selecting the ideal paper can help you achieve a perfect circle.
Types Of Paper
Different types of paper are available for drawing. Each has its own benefits. Here are some common types:
- Printer Paper: Cheap and widely available. Good for practice.
- Drawing Paper: Thicker and more durable. Better for detailed work.
- Sketch Paper: Lightweight and easy to erase. Ideal for quick sketches.
- Watercolor Paper: Suitable for ink or watercolor circles. Absorbs paint well.
Choose the paper based on your needs. Practice or final work.
Paper Size
The size of the paper matters. Larger paper gives more space for your circle. Smaller paper can be more manageable. Here is a table to help you decide:
| Paper Size | Benefits |
|---|---|
| A4 | Common size. Easy to handle. Suitable for most drawings. |
| A3 | Twice the size of A4. Provides more space for bigger circles. |
| A5 | Half the size of A4. Good for small, detailed circles. |
Consider the final use of your drawing. Choose the size that fits your project best.
Drawing The Initial Guidelines
Creating a perfect circle starts with good guidelines. These guidelines help keep your drawing symmetrical and balanced. Let’s explore the steps to draw the initial guidelines.
Finding The Center
The center of your circle is crucial. It acts as the anchor for your drawing. Follow these steps to find the center:
- Take a blank piece of paper.
- Use a ruler to measure the length and width.
- Mark the midpoint of each side with a small dot.
- Draw two diagonal lines from corner to corner.
The point where the lines intersect is the center of your circle.
Drawing A Cross
Next, draw a cross through the center. This helps in maintaining symmetry. Here’s how you can do it:
- Place your ruler horizontally through the center point.
- Draw a straight line from edge to edge.
- Now, place the ruler vertically through the center point.
- Draw another straight line from top to bottom.
Your paper should now have a cross, dividing it into four equal parts. This cross will guide you in drawing a balanced circle.
Using A Compass
Using a compass is one of the simplest ways to draw a perfect circle. This tool allows for precise measurements and can be adjusted to create circles of different sizes. Below, we will guide you through the steps for using a compass to draw a circle.
Setting The Compass
First, choose the size of the circle you want to draw. Adjust the compass by spreading its legs until the distance between the point and the pencil matches your desired radius. Ensure the pencil is sharp. A sharp pencil ensures a clean and accurate line.
Next, find a flat surface to work on. Place the point of the compass at the center of where you want the circle to be. Hold the compass firmly at the center point. Stability at the center is crucial for a perfect circle.
Drawing The Circle
Begin drawing the circle by rotating the compass. Keep the point steady as you move the pencil around. Use a steady hand. This helps to prevent any wobbles or uneven lines.
Complete the circle by returning to the starting point. Lift the compass carefully to avoid smudging the circle. Finally, inspect the circle. Ensure it is smooth and even.
Freehand Drawing
Drawing a circle freehand may seem challenging, but it is fun and easy with practice. This guide will help you understand the basic steps of drawing a circle without any tools. Freehand drawing improves your skills and boosts your confidence in your artistic abilities.
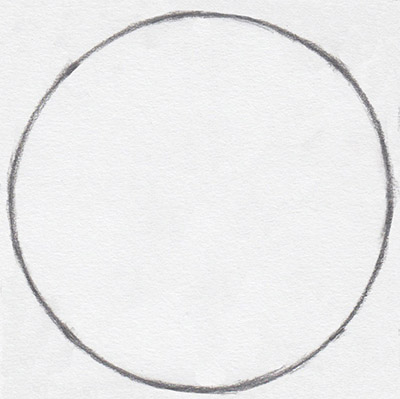
Sketching Lightly
Start by holding your pencil lightly. Use gentle strokes to draw a rough circle. Do not press hard; the lines should be barely visible. This step helps you plan the shape of your circle. If the circle is not perfect, do not worry. You will refine it later.
Here are some tips for sketching lightly:
- Hold the pencil at an angle.
- Keep your wrist relaxed.
- Move your whole arm, not just your wrist.
Refining The Shape
Once you have a rough circle, it’s time to refine it. Go over the light lines and make them smoother. Adjust any uneven parts. Use small, controlled strokes. This step helps you create a more accurate circle.
Follow these steps to refine your circle:
- Look at your rough circle and identify uneven areas.
- Use short strokes to correct these areas.
- Gradually darken the outline of your circle.
Refining takes practice. Do not rush. Practice makes perfect.
By following these steps, you will improve your freehand drawing skills. Drawing a circle freehand will become easier with time. Happy drawing!

Adding Details
After drawing a basic circle, you can make it more interesting by adding details. These details can bring your circle to life. They can add depth and creativity. You can experiment with different techniques to enhance your drawing.
Inner Designs
Start by adding patterns inside the circle. You can use lines, dots, or shapes. Simple lines can form interesting patterns. Try drawing parallel lines or a grid. Dots can create textures. Arrange them in a pattern. Shapes like stars or triangles can add a unique touch.
Shading Techniques
Shading adds depth and dimension to your circle. Use light and dark areas to show light sources. Start with light shading. Gradually make it darker. You can use a pencil or charcoal. Blend with your finger or a blending tool. This will smooth out harsh lines. Practice different shading styles. Cross-hatching or stippling can create interesting effects. These techniques can make your circle look more realistic.
Final Touches
After drawing your circle, it’s time to add the final touches. This step ensures your circle looks neat and clean. It involves erasing guidelines and fixing any imperfections. Below, we’ll walk you through each task.
Erasing Guidelines
Start by identifying the guidelines you used to draw the circle. These might be faint pencil marks or construction lines. Use a soft eraser to gently remove them.
- Be careful not to smudge the circle.
- Erase small sections at a time.
- Ensure the circle’s outline remains intact.
Erasing guidelines makes your circle appear smooth and professional. It’s an important step to achieve a polished look.
Fixing Imperfections
Next, check for any imperfections in your circle. These could be uneven lines, gaps, or rough edges. Use a sharp pencil to correct these areas.
- Trace over any uneven lines.
- Fill in gaps to complete the circle.
- Smooth out rough edges with light strokes.
Pay attention to small details. Even minor adjustments can make a big difference. Your goal is to have a clean, smooth circle.
Frequently Asked Questions
What Tools Do I Need To Draw A Circle?
You need a compass, pencil, and paper. These are the basic tools.
How Can I Draw A Perfect Circle By Hand?
Use a compass. Adjust its width, place the needle, and draw with the pencil.
Can I Draw A Circle Without A Compass?
Yes, use a string and pencil. Tie one end of the string to the pencil, hold the other end, and draw.
What Are The Steps To Draw A Circle?
Place the compass needle on paper. Adjust the width. Draw with the pencil. Simple and easy!
Drawing a circle can be simple and fun. With practice, you’ll improve. Start with a pencil and paper. Use a compass for perfect circles. Or, try freehand drawing for a personal touch. Circles are everywhere in art and design. Keep practicing to enhance your skills.
Enjoy the process and see your progress. Happy drawing!