

Drawing a beach can be fun and relaxing. With a few simple steps, you can create a beautiful scene.
Beaches are often associated with peace and tranquility. Drawing one can help capture this serene feeling. Whether you are an experienced artist or a beginner, learning how to draw a beach is a rewarding activity. This guide will help you through the process.
You will learn how to sketch the waves, sand, and other beach elements. By the end, you’ll have a picturesque beach drawing. So, grab your pencils and let’s get started on your beach masterpiece!

Materials Needed
Creating a beautiful beach drawing starts with having the right materials. The right tools and supplies can make the process easier and more enjoyable. Below, we will explore the essential tools and optional supplies you may need.
Essential Tools
To draw a beach, you need basic drawing tools. Here is a list of essential materials:
- Pencils: Use different grades for varied line thickness.
- Eraser: A good eraser helps correct mistakes easily.
- Paper: Choose smooth paper for clean lines.
- Ruler: Useful for drawing straight lines and measuring.
- Pencil Sharpener: Keep your pencils sharp for detailed work.
Optional Supplies
While the essential tools are enough, optional supplies can enhance your artwork. Consider these additional materials:
- Colored Pencils: Add color and life to your beach scene.
- Markers: Use for bold outlines and vibrant colors.
- Blending Stumps: Smooth out pencil shading for a realistic look.
- Watercolor Paints: Perfect for creating soft, fluid backgrounds.
- Brushes: Use different sizes for varied stroke effects.
Having these materials ready will set you up for a fun and successful drawing session. Happy drawing!

Sketching The Horizon
Recommended supplies for landscape sketches
Landscapes lean on graphite for atmosphere and colored pencils for accents, all on a sketchbook that holds up to layered work.


As an Amazon Associate, drawingseasy.com earns from qualifying purchases. Prices and availability are subject to change.
Creating the perfect beach drawing begins with sketching the horizon. The horizon line separates the sky from the sea. It’s the foundation of your beach scene. This step sets the perspective and guides the rest of your drawing. Let’s break it down into simple steps.
Placing The Horizon Line
The horizon line is essential. It determines where the sky meets the sea. Start by deciding the height of your horizon line. If you want more sky, place it lower. If you want more sea, place it higher. Use a ruler for a straight line. This line should be horizontal and even.
Drawing Basic Shapes
With the horizon line in place, start drawing basic shapes. These shapes represent elements like the beach, sea, and sky. Begin with the beach. Draw a curved line below the horizon line. This represents the shoreline.
- For waves, draw small, curved lines near the shore.
- For the sun, draw a circle above the horizon line.
- Add clouds by drawing fluffy shapes in the sky.
These basic shapes will serve as guides for detailed drawing later. Take your time to ensure they are correctly placed.
Remember, sketching the horizon sets the stage for your entire beach scene. A well-placed horizon line and basic shapes make the drawing process easier. Enjoy the process and let your creativity flow.
Creating The Beach
Creating the beach in your drawing can be an enjoyable process. It involves focusing on the details that bring the scene to life. You start by drawing the sand, then add textures to make it realistic. Follow these steps to create a stunning beach scene.
Drawing The Sand
Begin by drawing a horizontal line for the horizon. This separates the sky from the beach. Next, sketch the beach’s outline below the horizon line. Use gentle, curved lines to represent the shore. Make sure the beach looks natural and inviting.
Now, fill in the beach area with smooth, even strokes. This forms the base layer of sand. Use a light hand to keep it soft and sandy. Aim for a consistent texture, avoiding harsh lines or dark spots.
Adding Textures
To make the sand more realistic, add some texture. Lightly shade small areas to create shadows. Use short, quick strokes to mimic the grainy surface of sand. Vary the pressure to add depth and detail.
Consider adding footprints or small objects like shells. These small details can bring your beach to life. Draw them lightly and blend them into the sand. This helps maintain a natural look.
Finally, add some variation in the sand’s color. Use slightly darker and lighter tones. This creates a more dynamic and engaging scene. With these textures, your beach will look vibrant and inviting.
Drawing The Ocean
Drawing the ocean can be a fun and rewarding part of creating a beach scene. The ocean adds depth, movement, and life to your drawing. By focusing on the details like the outline and waves, you can make your beach scene more realistic. Let’s dive into the steps for drawing the ocean.
Outlining The Water
Begin by outlining the water. Use light, wavy lines to mark the edge of the ocean. This line should not be perfectly straight. A natural curve will look more realistic.
Next, make sure the horizon line is level. The horizon separates the ocean from the sky. Place it higher if you want more ocean in your drawing. Place it lower if you want more sky.
Creating Waves
Now, let’s focus on creating waves. Start with small, curved lines near the shore. These lines represent the gentle waves hitting the beach. As you move further from the shore, make the waves larger and more spaced out.
For added realism, add a few foam lines on the top of the waves. Use short, quick strokes to create a frothy look. You can also add some reflection lines in the water to show the light hitting the waves.
Remember, the waves should not all be the same size. Vary their height and width for a natural look. This small detail makes a big difference in the overall effect.
Adding Beach Elements
Once you’ve sketched the basic outline of your beach scene, it’s time to add some exciting beach elements. These details make your drawing vibrant and lively. From palm trees to beach accessories, each element brings more life to your artwork. Let’s dive into how to draw these elements effectively.
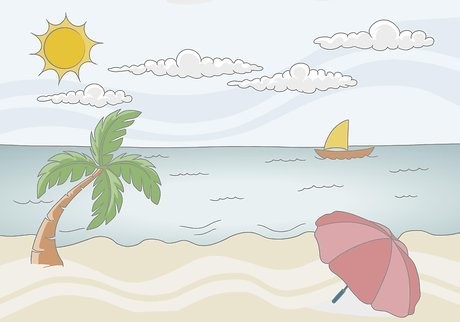
Drawing Palm Trees
Palm trees are iconic in any beach scene. Start by drawing two parallel lines for the trunk. Make them slightly curved to represent the natural bend. Add texture by sketching small, horizontal lines across the trunk. For the leaves, draw long, curved lines extending from the top of the trunk. Connect these lines with smaller, curved lines to form the leaf structure. Repeat this process to create multiple leaves.
Including Beach Accessories
To make your beach scene more interesting, add beach accessories. Common items include beach towels, umbrellas, and sandcastles. Draw a beach towel by sketching a rectangle on the sand. Add small lines for texture. For an umbrella, draw a half-circle and add a stick extending downwards. Decorate the umbrella with lines to show its segments.
A sandcastle can be drawn with simple shapes. Use rectangles and triangles to form the castle’s towers and walls. Adding small details like windows and flags will make it look more realistic.
Beach balls and seashells also add charm. Draw a beach ball by sketching a circle and adding curved lines to show its panels. For seashells, draw small, curved shapes on the sand. Add lines to give them texture.
Adding these elements makes your beach drawing more engaging. Each detail brings a unique touch, transforming a simple sketch into a lively beach scene.
Adding Depth And Details
Adding depth and details to your beach drawing makes it come alive. These techniques help create a realistic and engaging scene. Focus on the elements that bring your beach to life. Let’s explore some techniques to add that perfect touch.
Shading Techniques
Shading adds dimension to your drawing. Use light and dark tones to create shadows. Shadows show where the light source is. This makes the drawing more realistic. Softly shade areas like the sand and water. Use a blending tool or your finger. This will make the shading smooth. Don’t forget the shadows of objects like umbrellas or beach chairs.
Highlighting Key Areas
Highlights make your drawing pop. They show where the light hits the most. Use a white pencil or eraser for this. Focus on the tops of waves, shells, and the crest of dunes. These areas catch the most light. Highlights add contrast and make details stand out. They give your beach drawing a sunny, bright feel.
Final Touches
The final touches are crucial in making your beach drawing come to life. This stage involves reviewing your work, making necessary adjustments, and adding small details that can make a big difference. Let’s break it down into a few simple steps.
Reviewing Your Drawing
Take a moment to step back and look at your drawing. Observe the overall composition and see if everything looks balanced. Check the details like the waves, sand, and sky. Are they well-defined? Do they need more work?
Making Necessary Adjustments
If you notice any areas that need improvement, now is the time to fix them. Maybe the waves need more texture. Or the sky could use more shading. Use your eraser and pencils to make these adjustments. Small changes can have a big impact.
After making adjustments, add final details. Draw small shells on the sand. Add shadows to give depth. Enhance the sun or clouds. These little details can make your beach drawing look more realistic and complete.
Frequently Asked Questions
What Materials Do I Need To Draw A Beach?
You need paper, pencils, erasers, colored pencils, or paints.
How Do I Start Drawing A Beach Scene?
Begin by sketching the horizon line. Add elements like sand, water, and sky.
How Can I Add Details To My Beach Drawing?
Include items like palm trees, shells, umbrellas, and waves for more detail.
What Techniques Can I Use For Shading?
Use light strokes for sand, and darker lines for shadows. Blend colors gently.
Creating a beach drawing can be relaxing and fun. Practice helps improve your skills. Use light strokes to sketch the basic shapes. Add details like waves, shells, and palm trees. Blending colors can make your drawing lively. Remember, every artist has a unique style.
Don’t worry about perfection. Enjoy the process and let your creativity flow. Share your artwork with friends and family. Keep drawing and exploring new techniques. Happy drawing!


