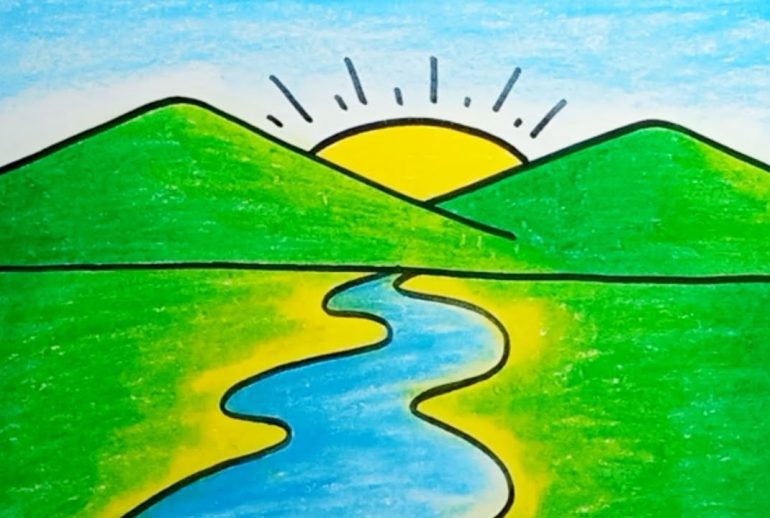
Drawing a river can be a fun and rewarding experience. With the right approach, anyone can create a beautiful river scene.
Rivers are not just bodies of water; they are dynamic, flowing elements of nature. They twist and turn, reflect light, and carve through landscapes. Whether you are a beginner or an experienced artist, understanding how to capture the essence of a river can enhance your drawing skills.
In this guide, we will explore the basic steps to draw a river. You will learn how to sketch its curves, add depth, and bring it to life with shading and textures. Let’s dive in and discover the joy of drawing a river.
Choosing Your Tools
Drawing a river can be a fun and rewarding experience. The first step is choosing the right tools. The tools you pick will impact your drawing’s quality and ease. Whether you prefer traditional methods or digital options, the right equipment is essential. Let’s explore the two main categories: pencils and paper, and digital options.
Pencils And Paper
Using pencils and paper is the classic way to draw a river. It’s simple and accessible. Here are some tips to help you choose the best materials:
- Pencils: Use a range of pencils. H pencils are light and good for sketching. B pencils are darker and better for shading. A good set would include HB, 2B, 4B, and 6B.
- Paper: Choose the right paper. Thick paper, like 200gsm, is ideal. It can handle erasing and multiple layers. Smooth paper is good for fine details, while rough paper adds texture.
- Erasers: Use a kneaded eraser. It can be shaped for precise erasing. A regular eraser is good for large areas.
- Ruler: A ruler can help draw straight lines, like the riverbanks.
Digital Options
Digital drawing tools have become very popular. They offer flexibility and endless possibilities. Here are some digital tools to consider:
- Drawing Tablet: A drawing tablet is essential. It mimics the feel of drawing on paper. Brands like Wacom and Huion are popular.
- Stylus: A good stylus is important. It should be pressure-sensitive. This allows for varied line thickness and shading.
- Software: Choose the right software. Adobe Photoshop and Corel Painter are great for detailed work. Procreate is a favorite for iPad users.
- Layers: Use layers in your software. This allows you to work on different parts of the drawing separately. It makes editing easier.
Both traditional and digital tools have their advantages. The choice depends on your preference and comfort. Happy drawing!

Basic Sketch
Creating a basic sketch is the first step in drawing a river. Start with a simple outline to capture the essence of the river. This step ensures a solid foundation for adding details later. By following these easy steps, you can draw a realistic river scene.
Drawing The River Shape
Begin by drawing the main shape of the river. Use smooth, curvy lines to represent the flow. Rivers are rarely straight, so include some bends. Vary the width to make it look natural. The river should taper as it flows into the distance.
Adding Banks
Next, add the banks of the river. These are the edges that contain the water. Sketch lines parallel to the river shape. Make them uneven to show the natural landscape. Add small details like rocks or plants. These elements make the scene more realistic.
Adding Depth
Drawing a river can seem simple at first. But adding depth can make it look more realistic. It brings life to your drawing. The river seems to flow, and the water looks dynamic. Depth in drawing gives your river a three-dimensional feel. This section will help you achieve that effect.
Shading Techniques
Shading is key to adding depth. Use light and dark shades to show where light hits the water. Darker shades can show deeper parts of the river. Use soft strokes to blend the shades smoothly. A gradient effect works best. Start light and go darker.
Think about the direction of the light. This affects where the shadows fall. Shadows give the river a realistic look. Don’t forget reflections. They add another layer of depth.
Creating Texture
Texture makes a river look lively. Use different strokes to create ripples. Short, wavy lines can show small waves. Long, flowing lines can show calm water. Mix both for a natural look. Vary the pressure of your pencil. This changes the thickness of the lines.
Add some details like rocks or plants. They break the monotony of the water. They also add more depth. Draw them at different angles and sizes. This makes your river scene more dynamic.
Incorporating Details
Incorporating details in your drawing can make your river scene look more realistic and engaging. Adding elements like rocks, pebbles, plants, and trees can enhance the depth and beauty of your artwork. Here’s how you can incorporate these details effectively.
Rocks And Pebbles
To make your river look natural, you can add rocks and pebbles. Start by sketching different shapes and sizes along the riverbank. Use shading to give them a three-dimensional look. You can also place some pebbles within the water to show the river’s clear flow.
- Draw small oval shapes for pebbles.
- Use irregular shapes for rocks.
- Add shading for depth.
Remember to vary the sizes. This makes your drawing more interesting.
Plants And Trees
Adding plants and trees around your river can create a lush environment. Start with the base of the plants and trees. Then, draw the leaves and branches. Use different shades of green to show depth and light.
- Draw the trunk and branches.
- Add leaves and smaller branches.
- Use shading to show light and shadow.
Plants like grass and bushes can be drawn along the riverbank. This adds detail and makes your scene look more alive. Make sure to add some plants in the water as well.
Here is a simple table to guide you through the detailing process:
| Element | Details |
|---|---|
| Rocks | Irregular shapes, shading for depth |
| Pebbles | Small ovals, within water and along riverbank |
| Trees | Base, branches, leaves, different shades of green |
| Plants | Base, leaves, add near water for lush effect |
By paying attention to these details, you can bring your river drawing to life. Your artwork will look more realistic and engaging.
Water Effects
Creating the illusion of water in a drawing can be challenging. But, adding water effects like ripples, waves, and reflections can bring your river to life. These elements make your drawing look more realistic and engaging.
Ripples And Waves
Ripples and waves add motion to your river. Start by sketching small, curved lines on the water surface. Vary the size and length of these lines. Smaller lines can represent gentle ripples. Larger lines can show stronger waves. Draw these lines parallel to each other, but not too evenly. This randomness makes the water look natural.
To add depth, make the lines closer together in some areas. Space them out in other areas. This technique creates the illusion of movement. Focus on the areas around objects in the water. Ripples often form around rocks, logs, or riverbanks. Observe real rivers for inspiration.
Reflections
Reflections are key to drawing realistic water. They mirror the environment around the river. Start by looking at the objects above the waterline. Trees, mountains, and the sky can all be reflected. Sketch these objects lightly on the water surface. Use softer lines and lighter shading. Reflections are often less detailed than the actual objects.
Next, add some distortion to the reflections. Water is rarely perfectly still. Add slight waves or ripples to the reflected shapes. This makes them look more natural. Remember to keep the reflections aligned with their sources. If a tree is on the left bank, its reflection should be in the same place in the water. Consistency is key for realism.
Final Touches
Drawing a river can be a rewarding experience. You’ve created the basic structure and added details. Now, it’s time to give your drawing a professional look. Final touches will make your river drawing stand out. Let’s enhance the depth and realism of your artwork.
Highlighting Key Areas
Highlighting is crucial. It draws attention to important parts of your river. Use a lighter shade of blue for the water’s surface. This creates the illusion of sunlight reflecting. Add white highlights to areas where the water flows faster.
Consider the banks of the river. Use a darker shade to show depth. Add some green for vegetation. This makes the scene more vibrant. You can also add rocks or pebbles near the shore. It adds texture to your drawing.
Adjusting Contrast
Contrast helps to differentiate various elements in your drawing. Increase the contrast between the river and its surroundings. Use dark shades to outline the river. This makes it more distinct.
Adjust the contrast within the river. Darker shades can show deeper areas. Lighter shades can depict shallow parts. This gives a sense of depth and movement to your river.
Use a blending tool or your fingers to smooth out harsh lines. This creates a natural look. Pay attention to the edges. They should blend seamlessly with the surrounding landscape.
To summarize, final touches include highlighting and adjusting contrast. These steps enhance your river drawing. They add depth, realism, and make your artwork more appealing.
Practice Tips
Drawing a river can be both fun and challenging. To improve your skills, practice is key. Here are some essential tips to guide you in your practice sessions.
Common Mistakes
Many beginners make some common mistakes. One mistake is drawing the river too straight. Real rivers have curves. Another mistake is not adding enough detail. Rivers have ripples, reflections, and varying shades. Lastly, some forget the surroundings. Trees, rocks, and banks add realism.
Improving Your Skills
To enhance your river drawing skills, observe real rivers. Notice how light interacts with water. Practice drawing different parts of a river. Focus on the flow and direction of water. Use references and tutorials to learn new techniques.
Experiment with different tools. Pencils, pens, and digital tools all offer unique effects. Practice regularly. The more you draw, the better you will become. Keep your sketches. Track your progress over time. Enjoy the process and have fun!

Frequently Asked Questions
What Materials Do I Need To Draw A River?
You need paper, pencil, eraser, and colored pencils. Simple tools work best.
How Do I Start Drawing A River?
First, draw a winding line to represent the river’s path. Keep it natural and flowing.
How Can I Add Details To The River?
Add rocks, plants, and reflections. Use light strokes for water ripples and shadows.
What Colors Should I Use For A River?
Use blue for water, green for plants, and brown for rocks. Blend colors gently.
Conclusion
Drawing a river can be fun and relaxing. Follow the steps mentioned to create a beautiful river scene. Practice often to improve your skills. Use your imagination to add unique details. Enjoy the process and let your creativity flow. With patience, your river drawings will look amazing.
Keep experimenting with different styles and techniques. Soon, you will be proud of your artwork. Happy drawing!


