

Drawing a square is simple. With a few steps, anyone can do it.
Squares are basic shapes, but they are important in art and design. Learning to draw a square helps you understand geometry better. It also improves your drawing skills. Whether you are a beginner or someone wanting to refresh your skills, drawing a square is a great place to start.
This guide will take you through easy steps to draw a perfect square. You only need a pencil, ruler, and paper. Ready to start drawing? Let’s get into it!
Materials Needed
Before you start drawing a square, it’s important to gather the right materials. Using the correct tools can make the process easier and more enjoyable. In this section, we will break down the essential tools and optional supplies you will need.
Essential Tools
To draw a square, you will need a few basic tools. These tools ensure you get clean, precise lines.
- Pencil: A sharp pencil is crucial for drawing clean lines.
- Eraser: Mistakes happen. An eraser will help you correct them.
- Ruler: A ruler ensures your lines are straight and accurate.
- Paper: Use a blank sheet of paper for the best results.
Optional Supplies
While the essential tools are enough to draw a square, some optional supplies can enhance your drawing experience.
- Colored Pencils: Use colored pencils to add some flair to your square.
- Compass: A compass can help you draw perfect corners.
- Graph Paper: Graph paper can help with precision and alignment.
- Sharpener: Keep your pencil sharp for the best results.
Having the right materials at hand makes the process smoother. Gather these tools and you are ready to start drawing a perfect square.
Choosing The Right Surface
Drawing essentials
These are the everyday tools we recommend for any drawing tutorial on this site, picked for reliability and beginner-friendly pricing.


As an Amazon Associate, drawingseasy.com earns from qualifying purchases. Prices and availability are subject to change.
Choosing the right surface is crucial when learning how to draw a square. The surface you draw on affects the outcome and your drawing experience. Some surfaces are better suited for beginners, while others are for advanced artists. Let’s explore different surfaces to find the best one for you.
Paper Types
Paper is the most common surface for drawing squares. It is easy to find and use. Different types of paper serve different purposes. Regular printer paper is smooth and cheap. It works well for practice. Sketch paper is thicker and can handle more erasing. It is great for beginners. Watercolor paper is textured and can hold wet media. It is good for more advanced projects.
Alternative Surfaces
Alternative surfaces offer unique drawing experiences. Using a whiteboard allows for easy corrections. This surface is ideal for quick sketches. Drawing on a chalkboard gives a different texture. It can be fun for temporary art. Some artists use fabric to draw squares. This can be turned into sewing patterns later. Digital tablets are another option. They provide endless possibilities and easy editing.
Drawing Basic Lines
Learning to draw a square starts with mastering basic lines. This skill is essential for creating precise and neat shapes. Whether you use a ruler or draw freehand, understanding the techniques for straight lines is crucial. Let’s dive into the methods for drawing basic lines.
Using A Ruler
A ruler helps achieve straight and even lines. Place the ruler on your paper where you want the line. Hold the ruler firmly with one hand. Use the other hand to draw along the edge of the ruler. This method ensures your line is straight and clean. Repeat this process for all sides of the square.
Freehand Techniques
Drawing lines freehand requires practice. Start by lightly sketching the line. Keep your hand steady and use small, controlled movements. Try to keep the pressure even on the pencil. This creates a smooth and consistent line. Practice will improve your freehand drawing skills.
Creating The First Side
Drawing a square begins with creating its first side. This step is crucial as it sets the foundation for the entire shape. Here’s how to ensure your first side is accurate and straight.
Measuring Length
Before you start drawing, you need to measure the length of the side.
- Use a ruler for precise measurement.
- Decide the length you want for each side of the square.
- Make sure the ruler is straight and aligned correctly.
Write down this measurement to keep it consistent for all sides.
Drawing The Line
With the length measured, it’s time to draw the line.
- Place your pencil at the starting point.
- Draw a straight line using the ruler as a guide.
- Ensure the line is straight and matches the measured length.
Take your time to avoid mistakes. Accuracy is key.
Here’s a quick summary:
| Step | Description |
|---|---|
| Measure Length | Use a ruler to measure the desired length. |
| Draw the Line | Draw a straight line using the ruler as a guide. |
With the first side complete, you are ready to move on to the next step in drawing your square.
Completing The Square
Drawing a square involves four equal straight lines. Each line connects at right angles. Ensure all sides measure the same length.
Drawing a perfect square can seem tricky. But with simple steps, anyone can do it. You start with one line. Then you draw parallel lines and ensure right angles. By the end, you will have a perfect square.
Drawing Parallel Lines
First, draw a straight horizontal line. This will be the base of your square. Next, use a ruler to draw a line parallel to the base. This parallel line should be the same length as the base. Make sure it is perfectly parallel. Now, connect the ends of the base to the parallel line. Use a ruler to draw two vertical lines. These lines should be the same length as the base. Now you have three sides of your square.
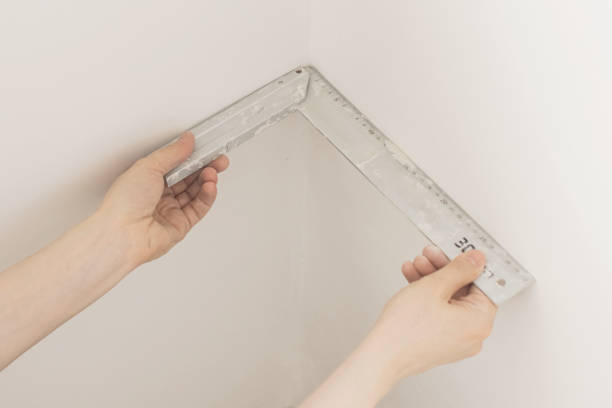
Ensuring Right Angles
To complete the square, you need to ensure right angles. Use a protractor to check the angles. Each corner should be 90 degrees. If the angles are not right, adjust the lines. Another way to ensure right angles is by using a set square. Place it on each corner to check. If the lines are correct, they will match the set square. By ensuring right angles, your square will be perfect. Now you have a completed square! “`
Adding Final Touches
Adding final touches to your square drawing can make a big difference. These steps will help polish your artwork and give it a clean, professional look. This section will guide you through darkening the lines and erasing guidelines.
Darkening Lines
First, take a sharpened pencil or a fine-tipped pen. Trace over the square’s edges. Make sure to apply even pressure. This will create consistent, bold lines. Clean lines give your square a finished appearance. They also make the shape stand out more.
Erasing Guidelines
Next, grab a good quality eraser. Carefully remove the light guidelines inside the square. Take your time to avoid smudging. Erasing guidelines makes the square look neater. It helps in achieving a more professional and clean look. Your square should now have clear, strong edges and a crisp appearance.
Practicing Techniques
Consistent practice helps improve the skill of drawing a square. Using different techniques can enhance your accuracy and creativity. Below are some effective methods to practice drawing squares.
Improving Accuracy
Accuracy is key when drawing a square. Here are some tips to improve:
- Use Grid Paper: Grid paper helps maintain straight lines and equal sides.
- Draw with a Ruler: A ruler ensures precise, straight edges and equal side lengths.
- Mark Points: Mark four points at equal distances to guide your lines.
- Practice Freehand: Drawing freehand improves muscle memory and control over time.
Trying Different Sizes
Experimenting with various square sizes can be fun and educational. Here are some ways to practice:
| Size | Technique |
|---|---|
| Small | Use a fine-tip pen or pencil for better control. |
| Medium | Use a standard pencil and try both freehand and ruler. |
| Large | Use a larger paper and a ruler for accuracy. |
Varying the size helps you understand proportion and improves versatility. You will become more comfortable with drawing squares in any context.

Frequently Asked Questions
What Tools Do I Need To Draw A Square?
You need a ruler, pencil, paper, and an eraser.
How Do I Start Drawing A Square?
Draw a straight line with a ruler. This is your first side.
How Do I Make Sure The Angles Are Right?
Use the ruler to draw all sides equal in length. Keep lines straight.
Can I Draw A Square Without A Ruler?
Yes, but it may not be perfect. Use a ruler for accuracy.
Drawing a square is simple with the right steps. Start with a straight line. Use a ruler for precision. Then, draw three more lines to complete the shape. Practice makes perfect. With time, you will draw squares easily. Enjoy the process and have fun.
Drawing can be very relaxing. Keep practicing and you will improve. Soon, you can draw squares in your sleep. Happy drawing!


